


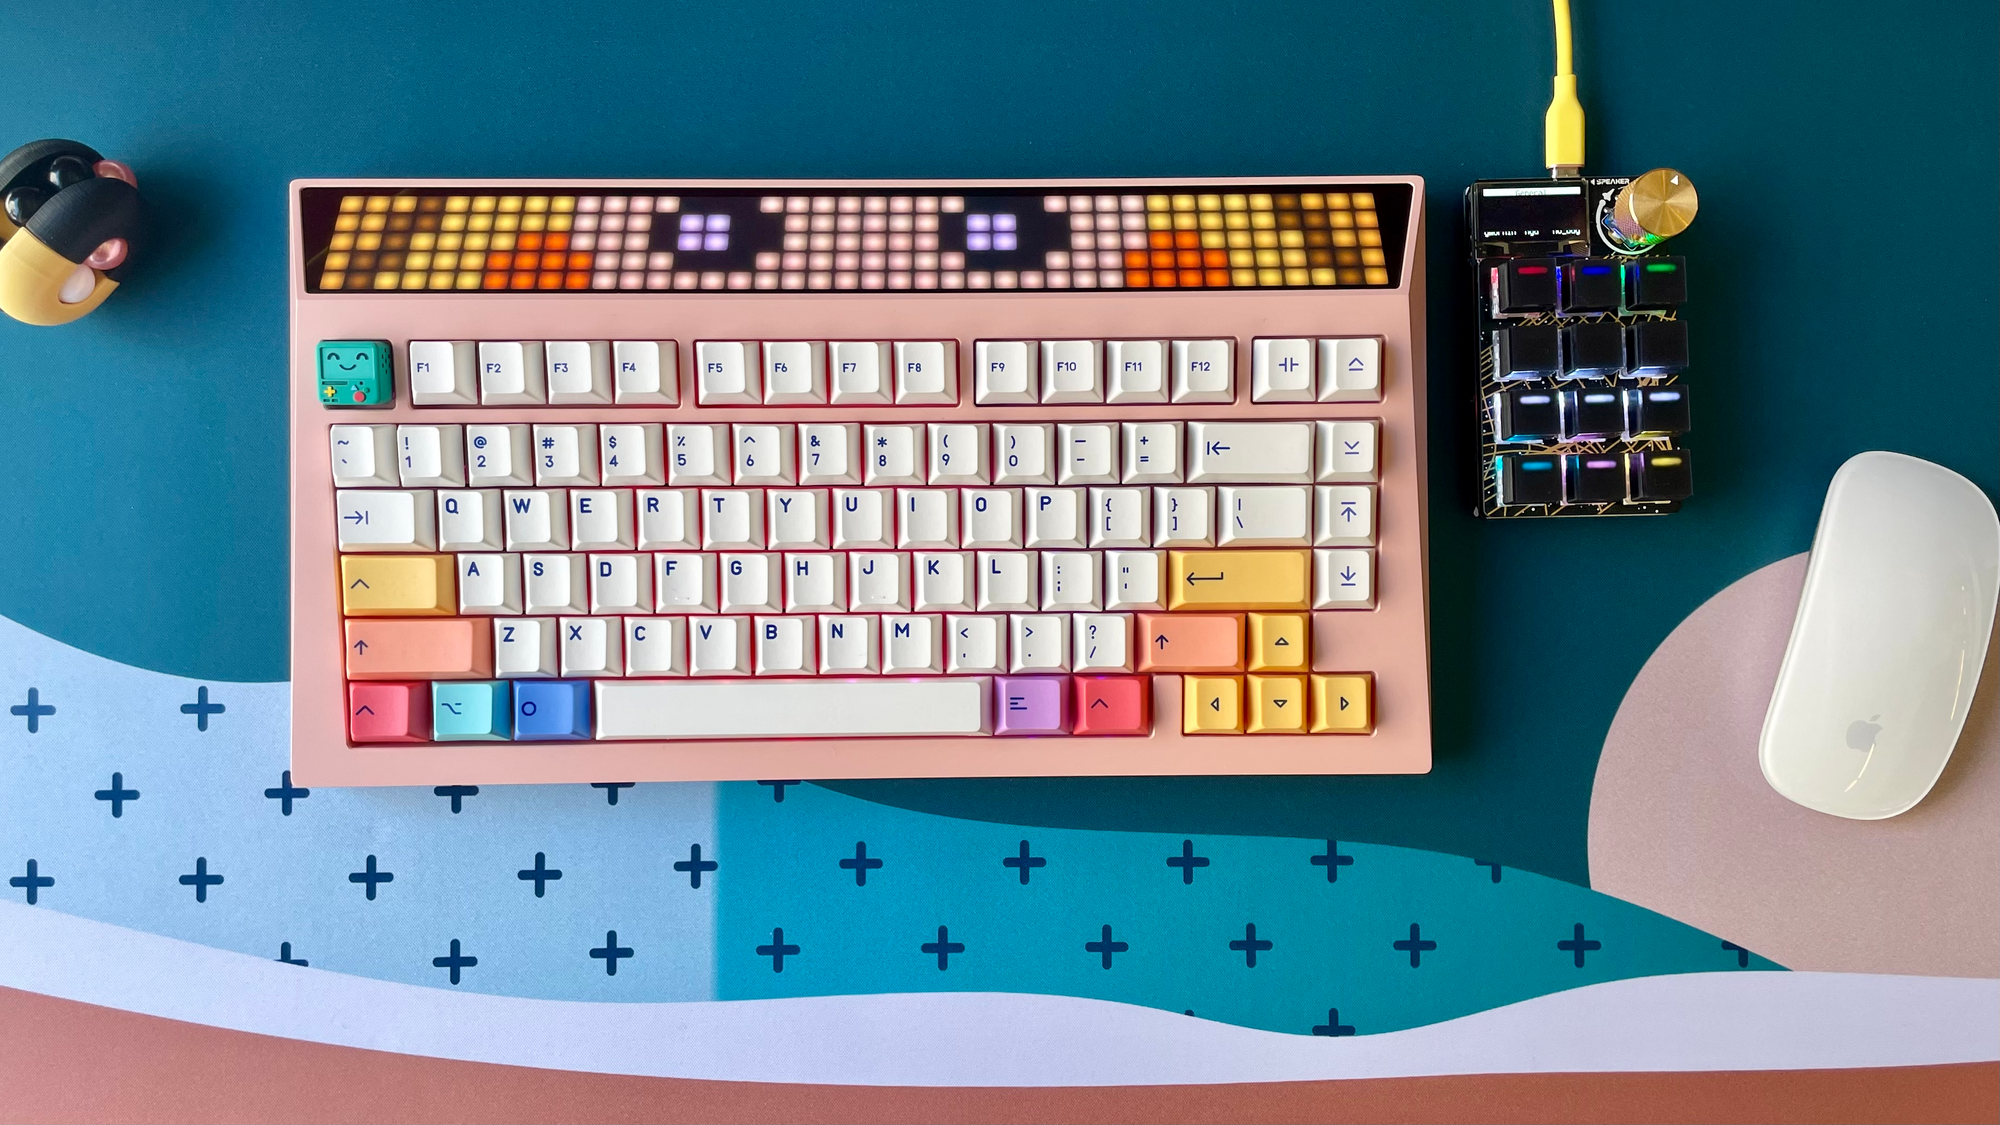
If you know even a little bit about me, you know that I love glowy LED things. So when it was time to customize my desk setup, I came across the Cyberboard R3 by AngryMiao and I knew that this was my destiny. I mean, it's pink and it has a huge LED matrix 🤷🏻♀️ . This is a little different from my usual posts, but I'm hoping that it will maybe inspire someone to liven up their daily desk life!
Keyboard setup
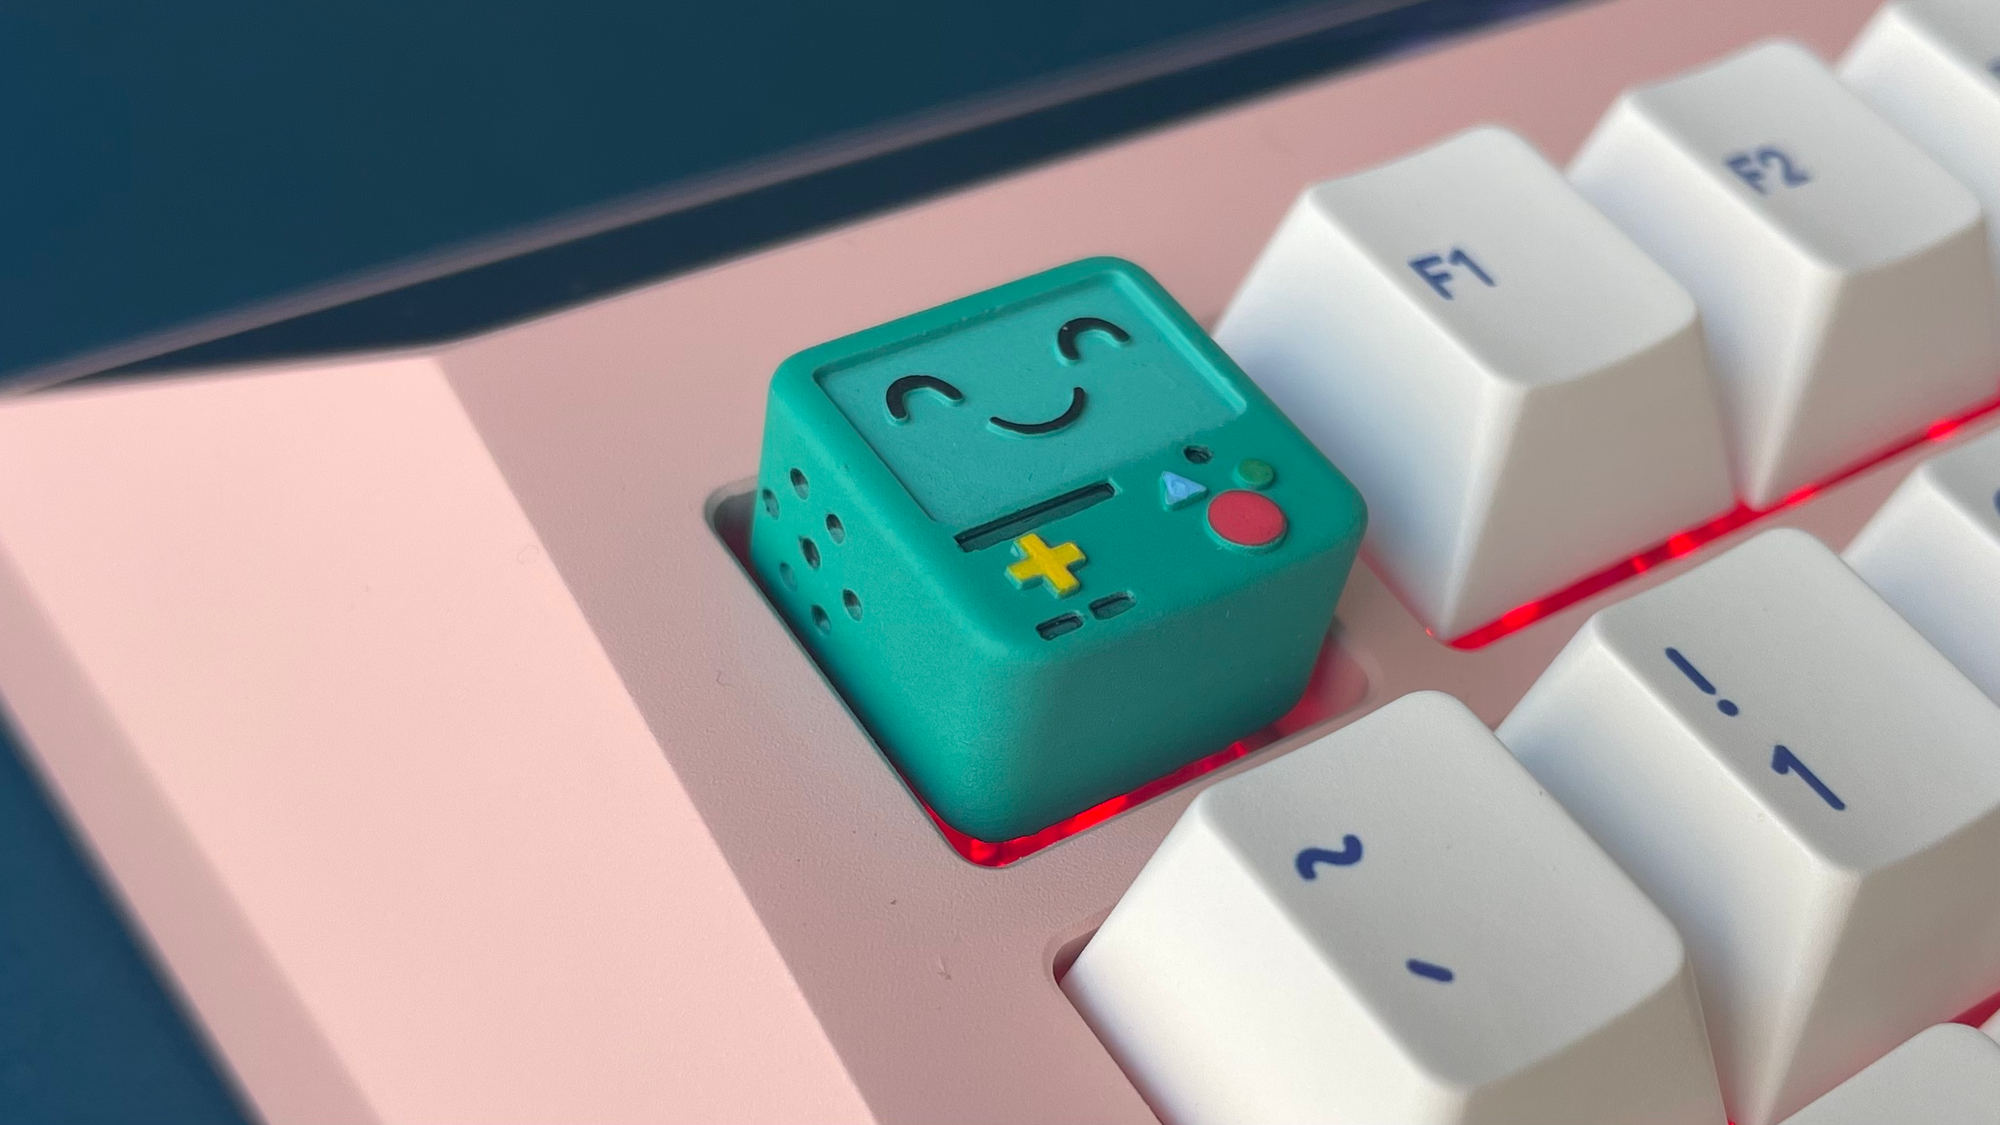
After a long search, I paired the Cyberboard R3 with these Notion keycaps designed by biip, whose keycap designs I've admired for a while. To top it off, I paired it with a BMO artisan keycap from AstroKeycaps – the perfect robot companion for such a futuristic board. They don't always have it in stock, so watch their Etsy shop for more releases. If I were to guess, I think it is 3D printed on an SLA printer with resin, and then primed and painted. Excellent paint job and production!
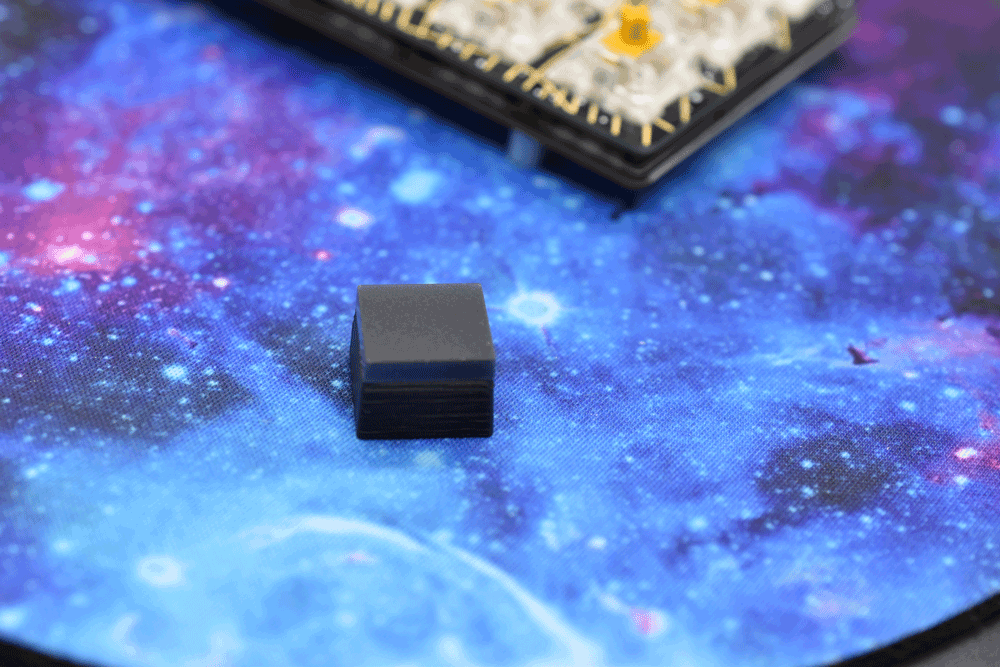
I also really wanted a deskmat that would pair with the keyboard and keycap colors, while being interesting but not toooo visually noisy. Etsy is filled with all kinds of over-the-top designs, but I finally settled on this unique modern one from ElysiumMats (pictured in the hero image of this post).
And in case you were curious, I actually tried two switches on this keyboard, both from The Key Company, ran by awesome humans Mintlodica and team! First I had the Star Marble Soda Switches (OG) mainly because the turquoise blue color fits in with the "Budapest Hotel" color palette that the Cyberboard R3 was inspired by. These switches were smooth and linear and I liked them, but after a couple weeks though I switched (heh) to these Dragonfruit switches instead because I really wanted a more tactile feel. Since the Cyberboard is "hotswap", switching switches was easy!

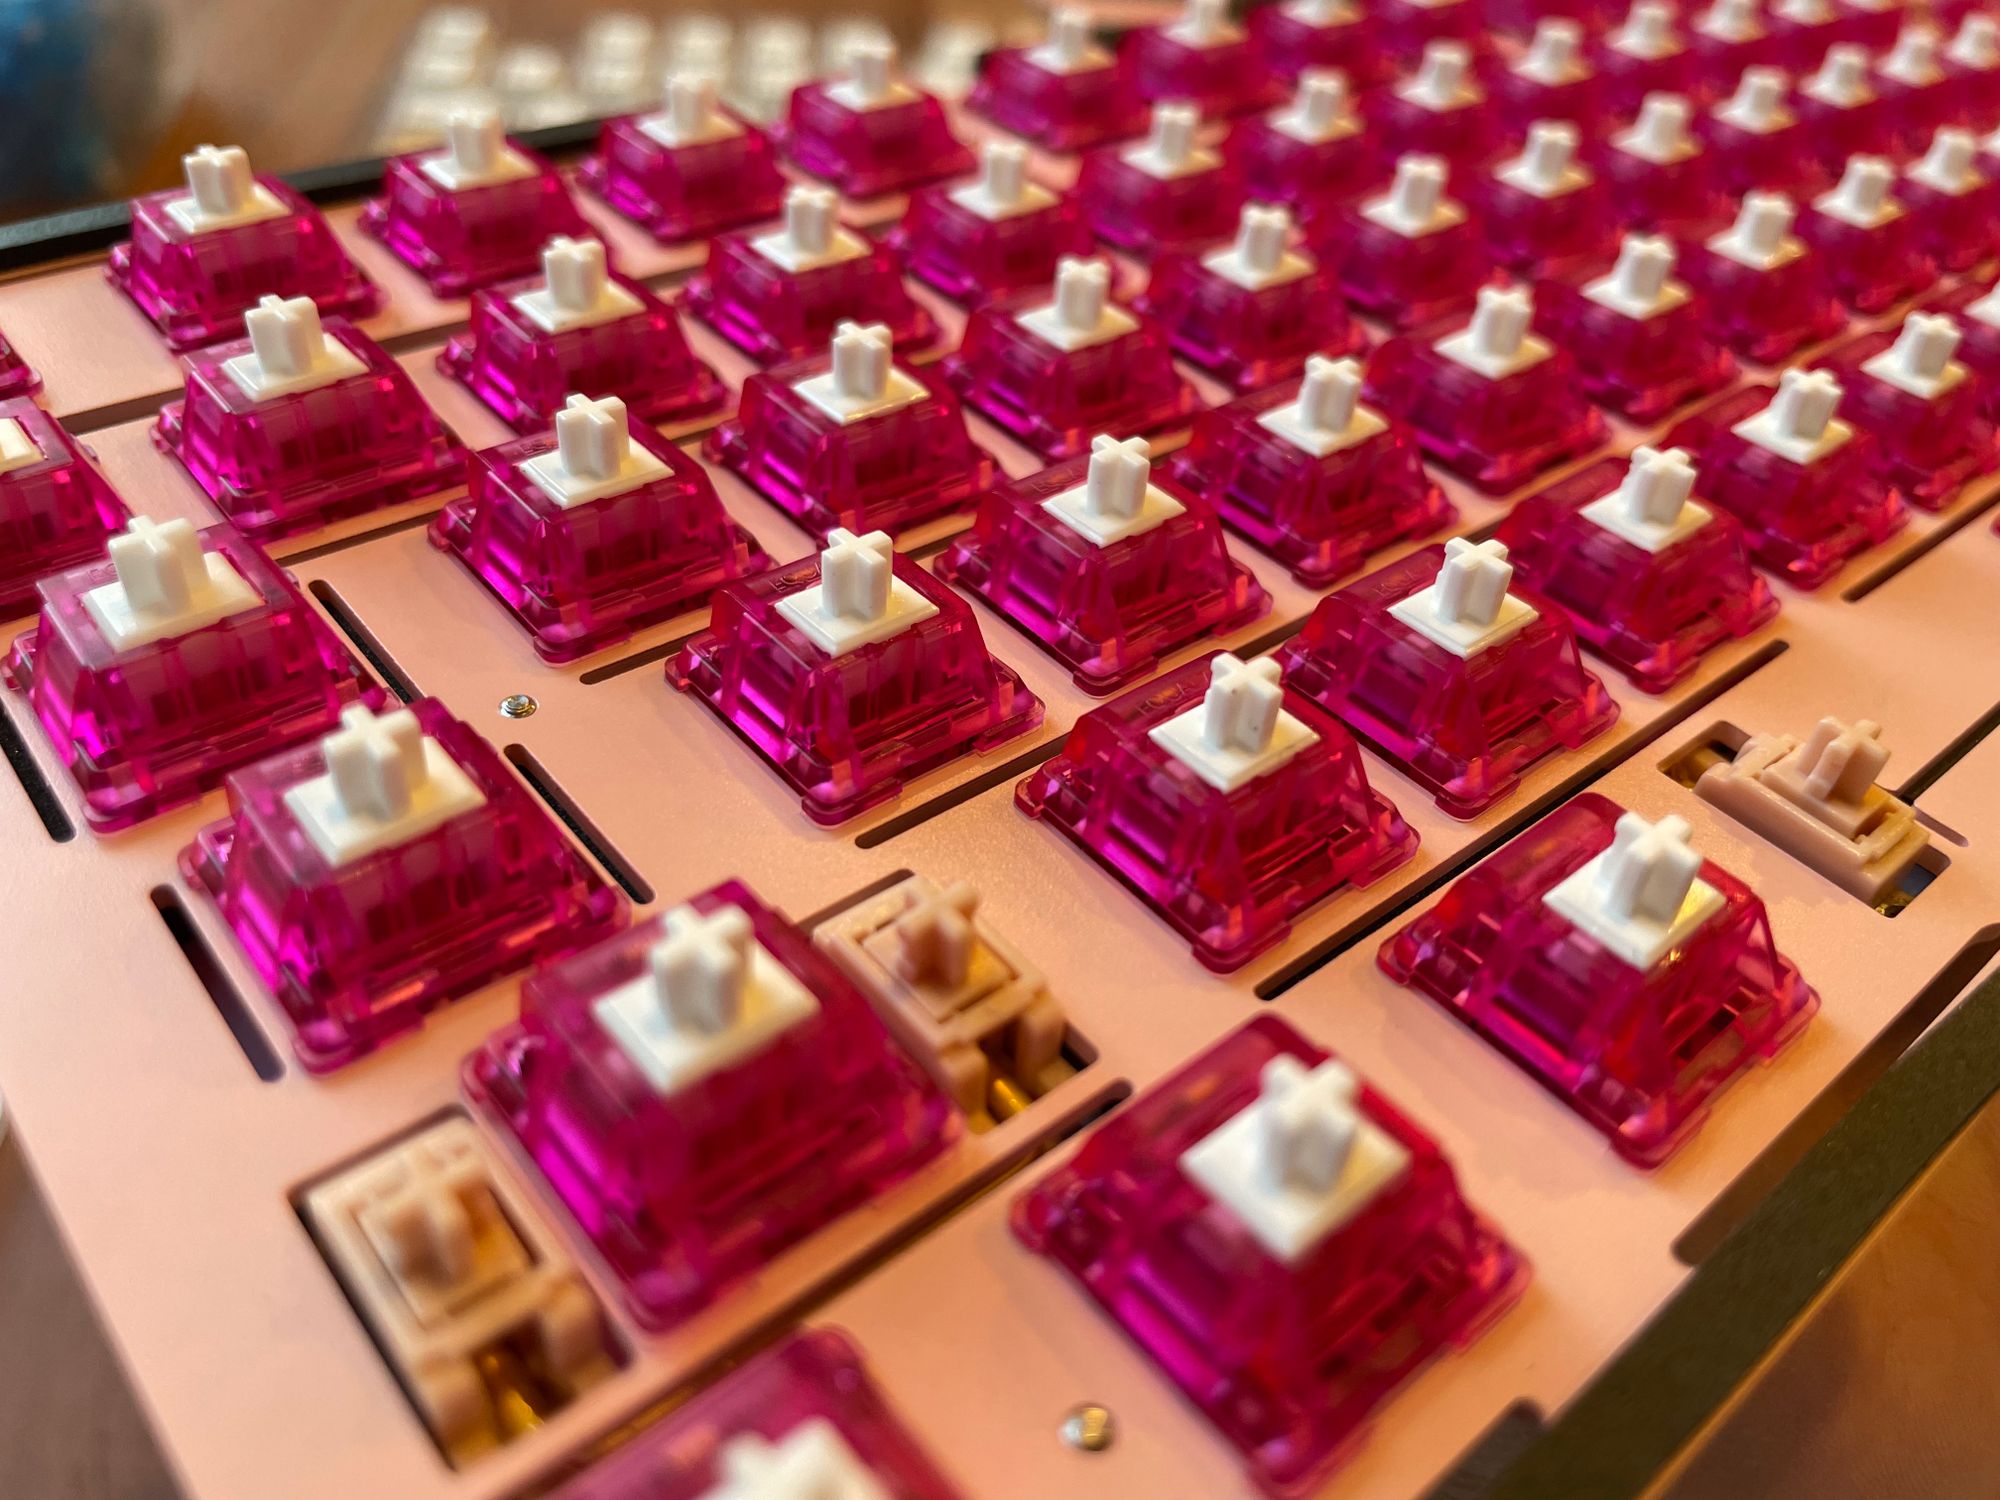
Last detail for the enthusiasts: I used C3 Equalz screw-in stabilizers, also from The Key Company. The stem and housing of the "Salmon" color variant for these stabs are preeettyyyy darn close to the case/plate color of this board, which made it really satisfying to see.
Macropad setup
Ok, I've actually never had a macropad before, so when Adafruit released their RP2040 Macropad I had to give it a shot. The "plate" for this macropad has gorgeous golden lines on it, and if I put regular keycaps on it, the design would have been hidden away underneath. So, I designed my own!
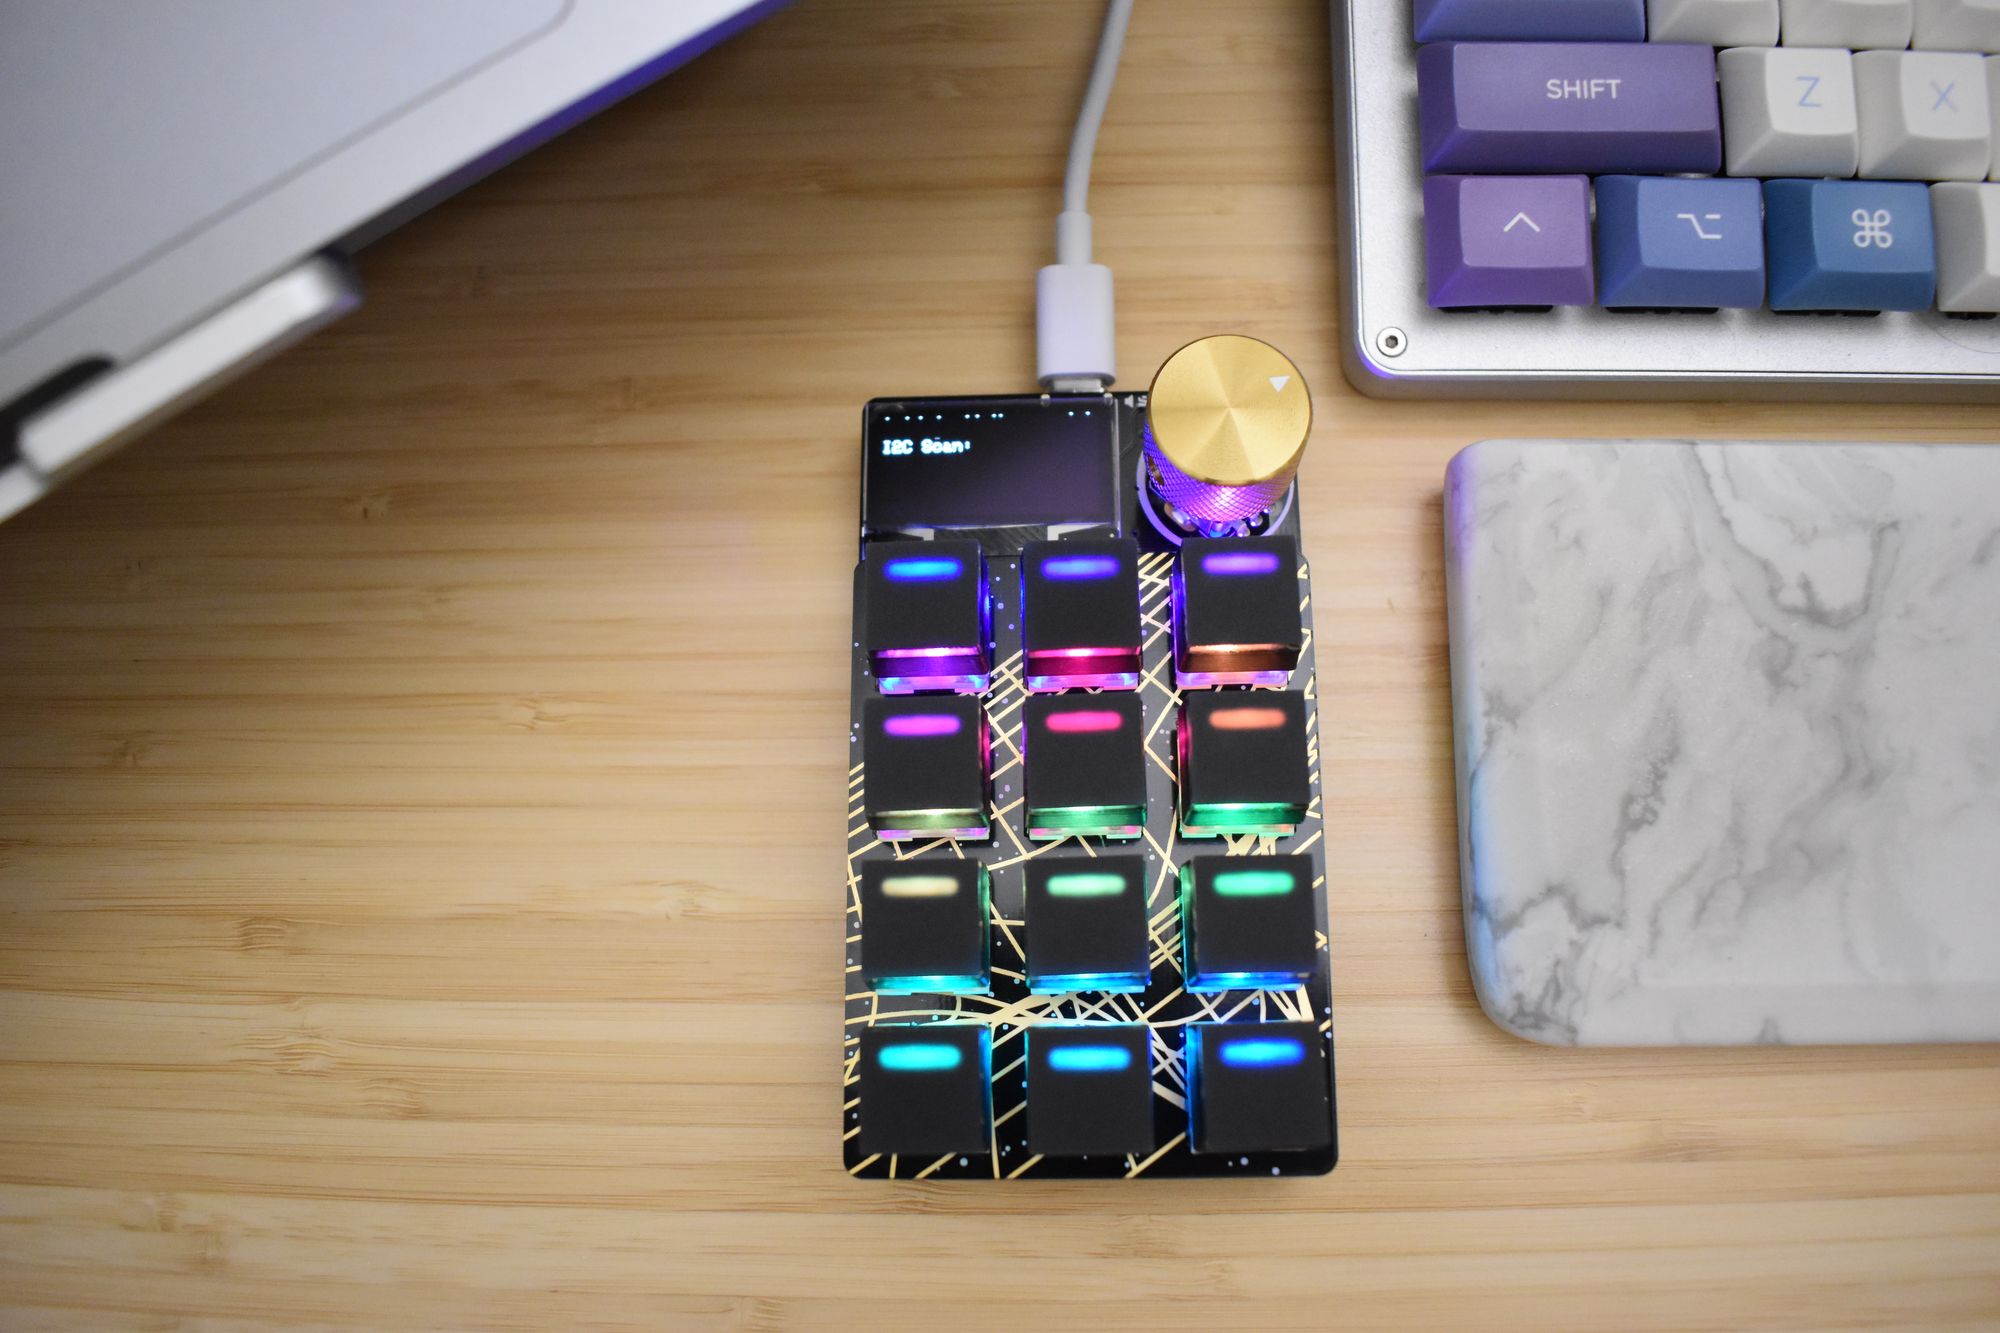
The keycaps you see above are made with a 3D printed body and a lasercut top. I call them "smol" keycaps. You can download all the files needed to make your own keycaps on the Printables page. I added this gold rotary encoder knob to really bring out the gold from the switch plate.
Macropad software
This macropad is CircuitPython compatible, which means it's a highly customizable keypad, probably more customizable than a lot of other ones out there. If you just want to use it as a macropad like I did though, there's a couple steps you'd need to take. Roll up your sleeves, I promise it won't take that long :D
- Update the CircuitPython version on the board to the latest.
- Download the project bundle in this guide
- Copy over the contents of the project bundle into your CIRCUITPY drive (lib folder, code.py file, and macros folder).
Now, the files inside the macros folder are different "layers" you can switch between using the rotary encoder. You can keep just the ones you like, or create new files with the same format to customize what each keypress should do. There's more details in the original guide so have at it!
As a last step, you'll probably want to be able to unplug your macropad from your computer without having to eject it everytime. So here's what you need to do:
- Create a new file called boot.py in your CIRCUITPY drive.
- Copy the following code into boot.py (directly copied from this guide):
import storage
import board, digitalio

# On the Macropad, pressing a key grounds it. You need to set a pull-up.
# If not pressed, the key will be at +V (due to the pull-up).
button = digitalio.DigitalInOut(board.KEY12)
button.pull = digitalio.Pull.UP

# Disable devices only if button is not pressed.
if button.value:
   storage.disable_usb_drive()
Now, whenever you want to edit the files inside macros folder or code.py, you'll have to press and hold the bottom-rightmost key while plugging in your macropad via USB. But if you're not pressing that key when you plug it in, you'll be able to just use the macropad like normal and won't be able to edit the code inside (which means no need to eject it when unplugging).
That's it! I hope this post gives you some inspo for your desk setup – it's nice when something that you see everyday gives you a bit of joy. Let me know if you found this useful, I'm @chardane on Twitter and Insta!