
Welcome to the workshop, aspiring spacefarers! Check that you have all materials needed, and choose whether you want to make a "badge" style or a "pendant" style wearable.
Materials
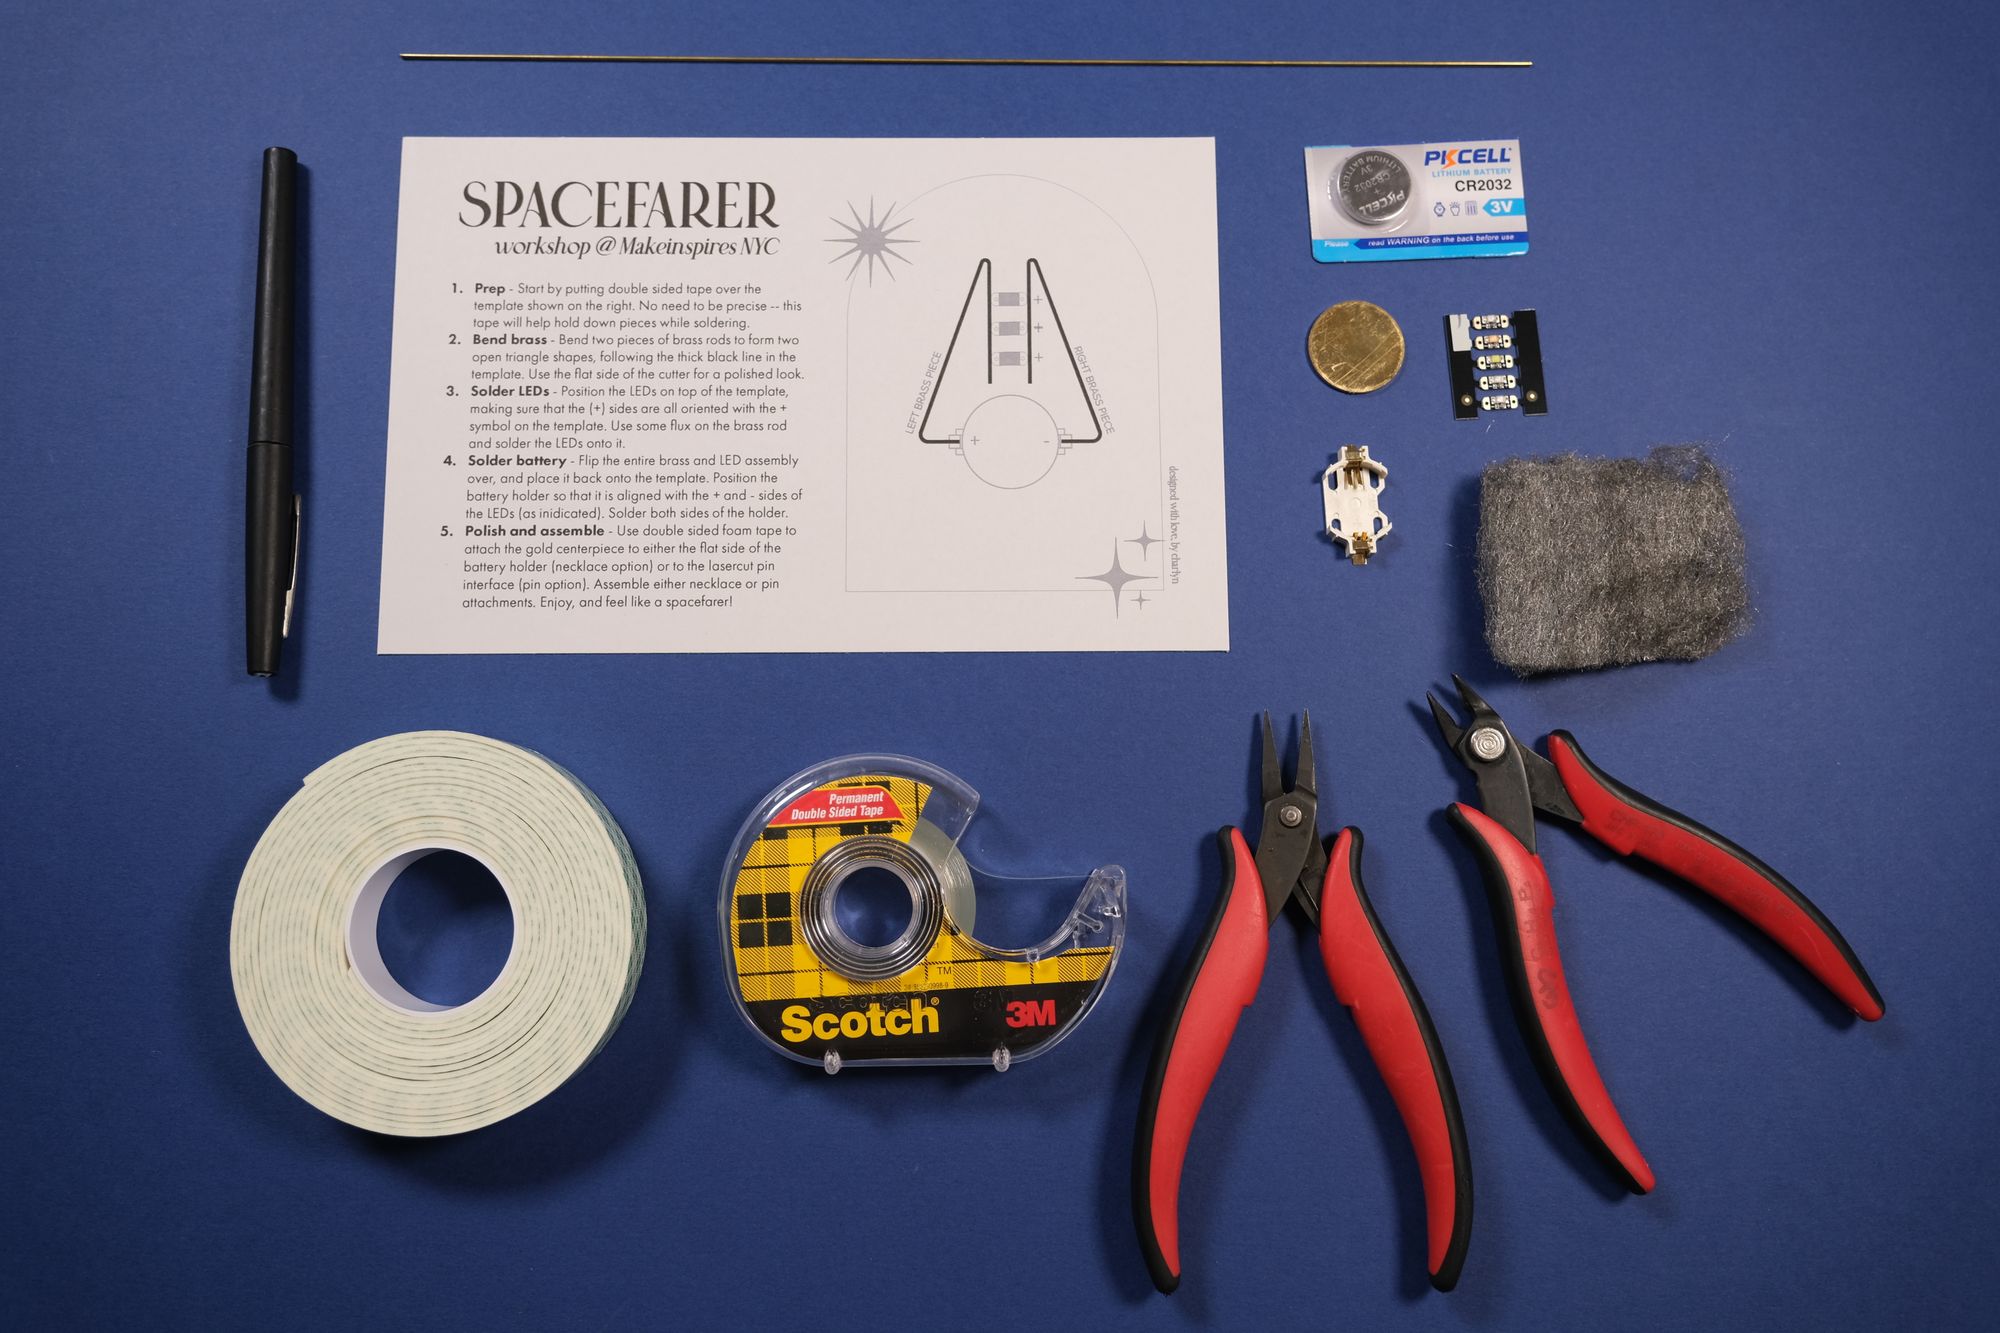
Note: You'll also need some Kapton tape!
Pin materials:
- laser cut interface
- pin set (backing and post)
Necklace materials:
- chain
- 2x jump rings
Full video
If you want to watch the full video with all the steps at once, you can do so here. Skip this if you want to go through each step-- continue to the next section instead.
Template prep
Place double sided tape over the brass bending template. It is recommended to do it in horizontal rows so that the sticky hold will be sufficient. Some gaps between tape strips are acceptable, but you should try to minimize them as much as possible
Brass bending
Align one end of the brass rod on top of the thick black template line. Mark the brass at the point where you want to bend. This pen mark is very temporary and will be easy to rub off – so be careful to not accidentally wipe the mark off as you lift the brass rod from the template.
Hold the brass with the flat nose pliers right next to the mark, not on top of it. This will allow you to bend the brass closest to where the mark is.
Bend as much as needed to match the template, and try to keep bends as flat as possible. When cutting, use the flat side of the flush cutters so that the ends are flat, not pointed.
Solder LEDs
Choose your own LED colors from the pack. Remove the brass pieces for now, and align the LEDs on top of the template so that all the "plus" indicators are on the right side
Align the brass pieces right up against the LEDs as much as possible. Use some kapton tape to secure the brass pieces before soldering. Generously apply flux onto the brass rod where it meets the LED. Heat up both the brass and the LED at the same time. If there is no smoke from the flux, stop and add some more flux before trying again.
Wait 2-3 seconds before applying solder. Use a generous amount of solder, and bridge the gap between the solder and the LED
This was the trickiest part! After this, it's smooth sailing.
Flip and solder battery holder
Gently remove the soldered assembly from the template. Flip the assembly over, and align to the template again. The surface should still be sticky enough. If you see that all of the "LED Sequin" labels are upside down as shown in the video, you're on the right track! Solder the battery holder to both ends of the brass rods.
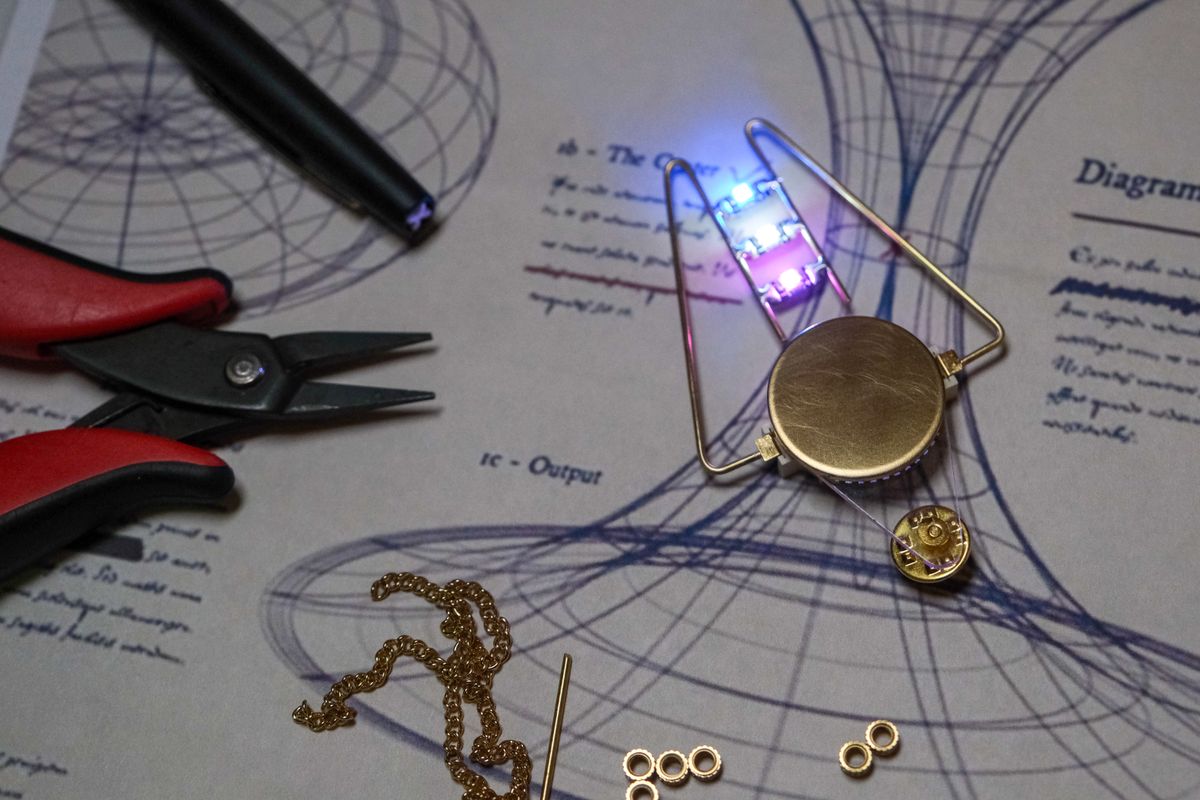
Polish and Final Assembly
To make this piece a bit cleaner, we can use some steel wool to polish the brass and the solder joints
You have two options for wearing your spacefarer jewelry: a badge or a pendant.
Option 1: Badge
Remove the protective paper from the laser cut piece. Push the pin through the top hole, and align the pin's tab onto the smaller hole. Use the soldering iron to heat up the pin, and gently push it down as the acrylic melts around it. Keep pushing until you feel that the tab is fully seated into the acrylic. This will "heat set" the pin into the acrylic and bonds it permanently.
Use some thin double sided tape to attach the gold disc onto the laser cut interface, and make sure that the pin is pointing to the back of the assembly as shown above
Use some foam double sided tape to attach the battery holder to the gold disc and pin assembly. Now you have a badge!
Option 2: Pendant
Twist one end of the jump ring out, so that you create a gap, and slip the chain through the gap in the jump ring. Slip one of the tips of the pendant into the jump ring. Repeat for both sides of the pendant. Attach the gold disc onto the battery holder using double sided foam tape. You now have a necklace!
Enjoy!
We hope you enjoy your new LED wearable!