
What time is it? What day is it? No one really knows anymore. This clock won't help you tell exact time, but it does try to capture this pervasive, ubiquitous mood in this global pandemic. Inspired by my favorite mental refuge: Animal Crossing New Horizons. Powered by Adafruit and CircuitPython.
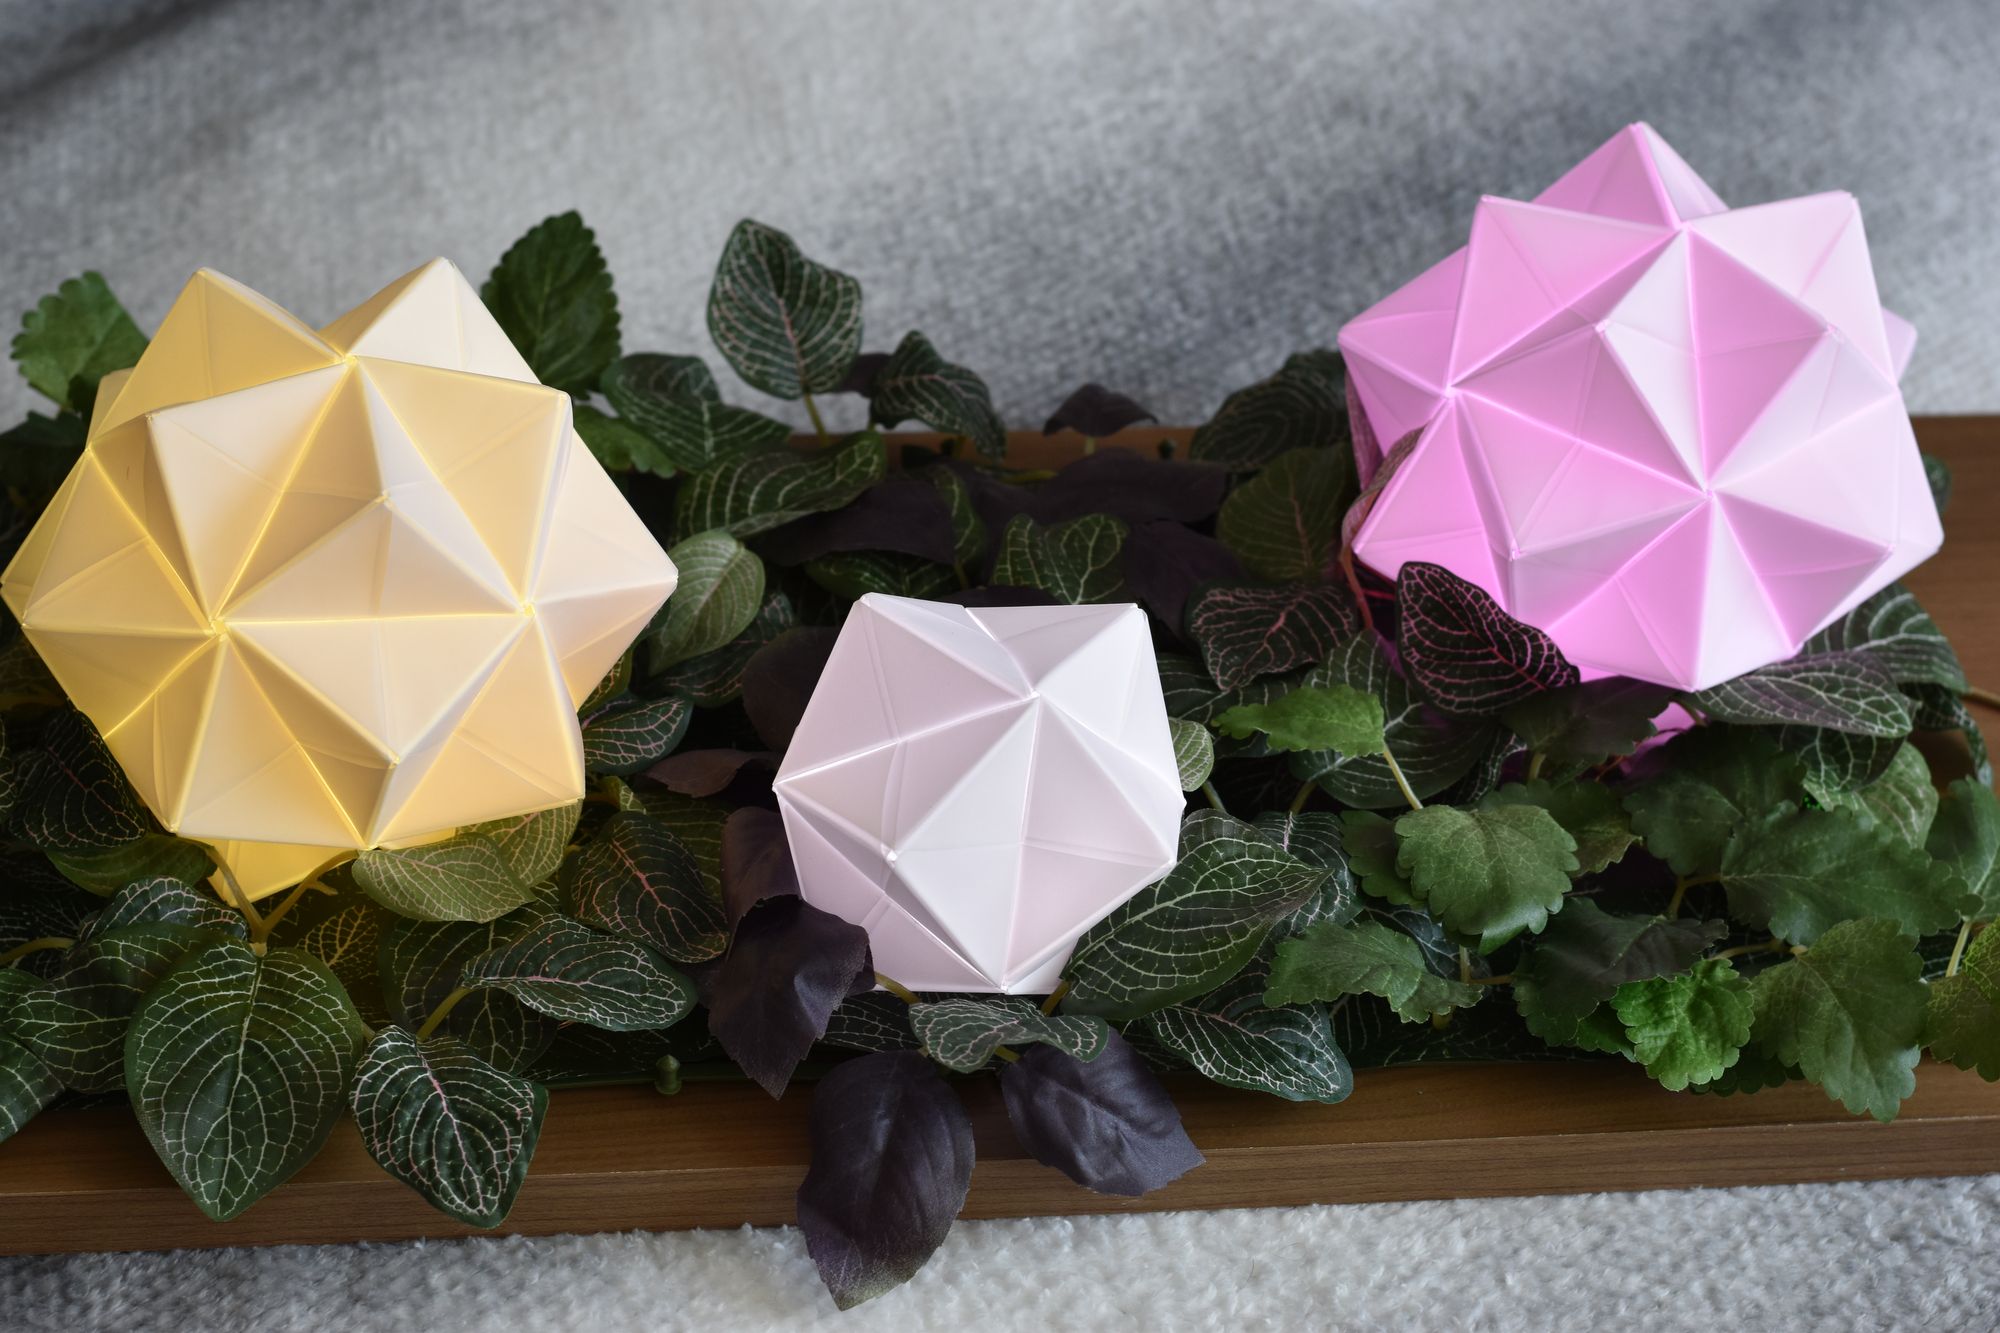
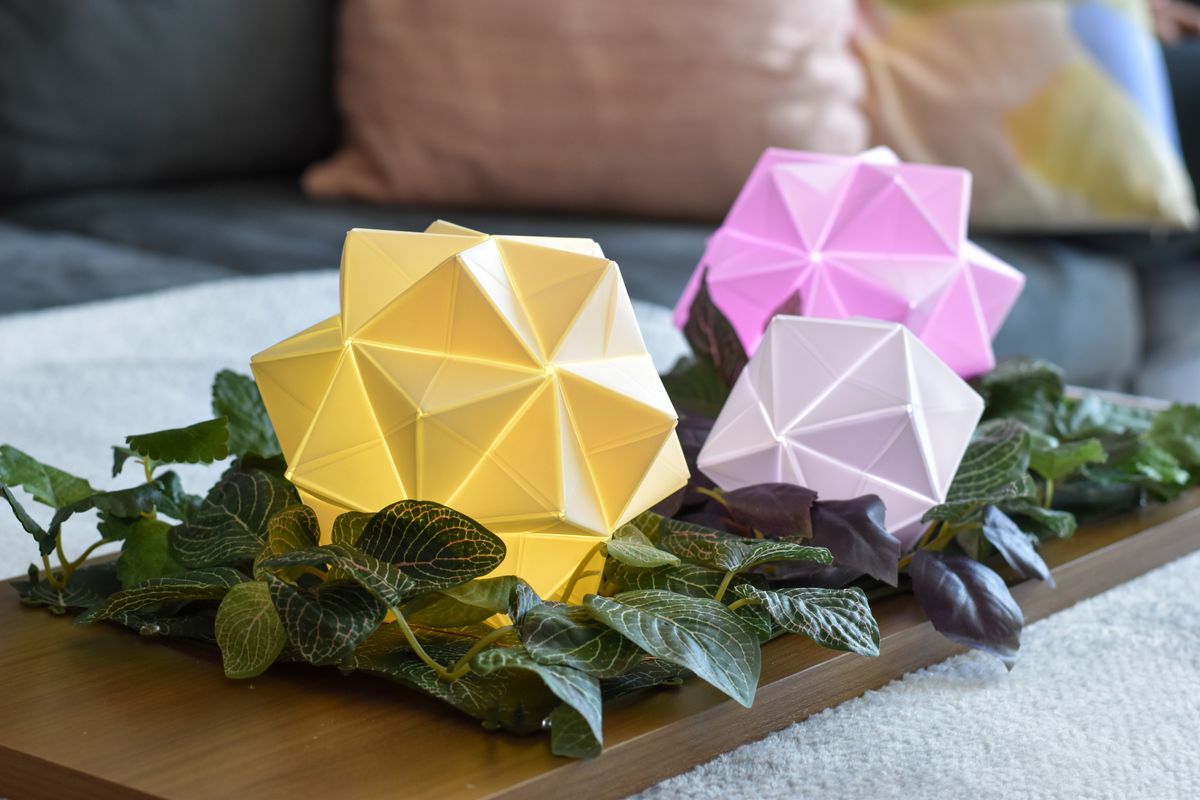
Seasoned players will (hopefully) recognize these as Nova Lights, one of the DIY items you can craft in-game. The recipe is from Celeste, who is my absolute FAVE.
Here's how it works: the top Nova Light unit will change depending on the time of day, roughly following the colors of a star going nova (from white, blue, yellow, orange then red) as the day goes on. It's like a little sun that explodes everyday! ☀️ Captures the doomsday feeling of the times, doesn't it?
The bottom Nova Light unit will change colors depending on what day it is, and the smallest "star fragment" will calmly breathe, just to let you know that time is indeed passing, even if it doesn't feel like it. ⏰
But when it's Friday, who even cares about time! 🤷🏻♀️ The nova lights will just breathe different colors, in celebration of this day. Maybe it will help remind you that Friday used to be a day you got excited about.
When it's 12am - 7am, all the lights turn off, reminding you that you should probably stop looking at the news and go to bed.
This clock attempts to illustrate how I feel about time – I can tell it's passing, I can appreciate its beauty, but I honestly just have a hard time knowing the difference from one timestamp to the next.
Animal Crossing has actually helped me keep track of time, and provided me with temporal landmarks so that my brain can process the days pass. I wanted to make this project as an homage to this wonderful world that was a supportive mental crutch for a lot of people in a time when we needed it most.

The beauty of personal projects is that my function names can be whatever i want – here's a snippet of code that runs when it's Friday:
def friday_feels():
    wait = 0.05
what_even_is_time(bottom_nova, top_nova, BOTTOM_NOVA_LEN, wait)The rest of the code is below, as well as details about how to craft your own Nova Light clock. ✨
How to craft your own!
You'll need quite a few things. Customize this list for what you already have and what you need.
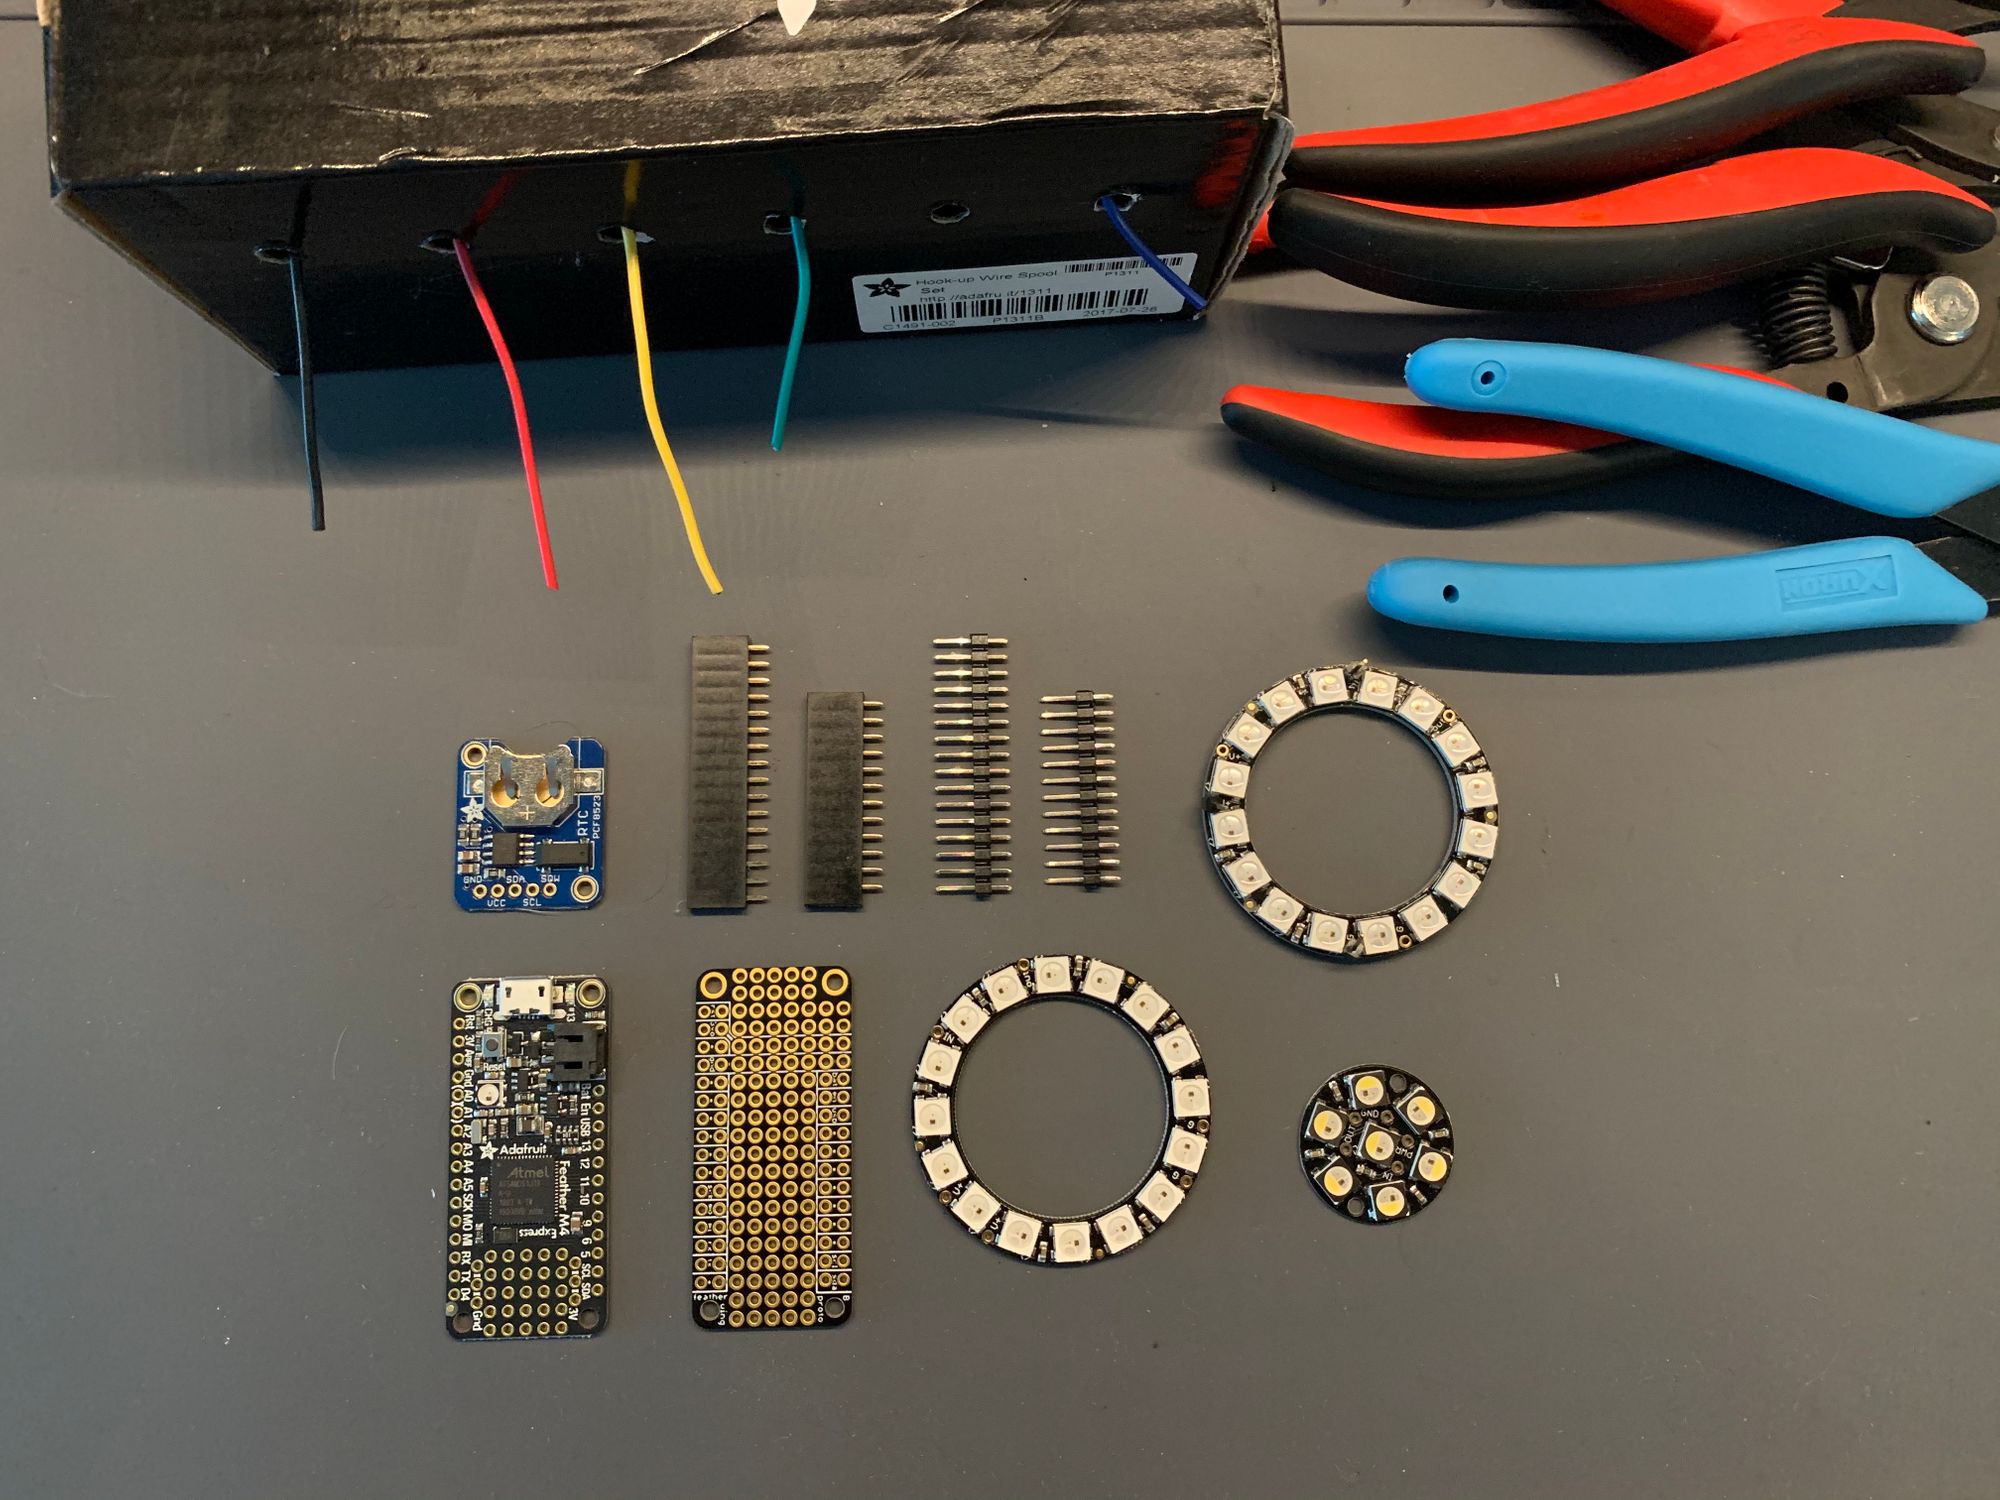
Project materials
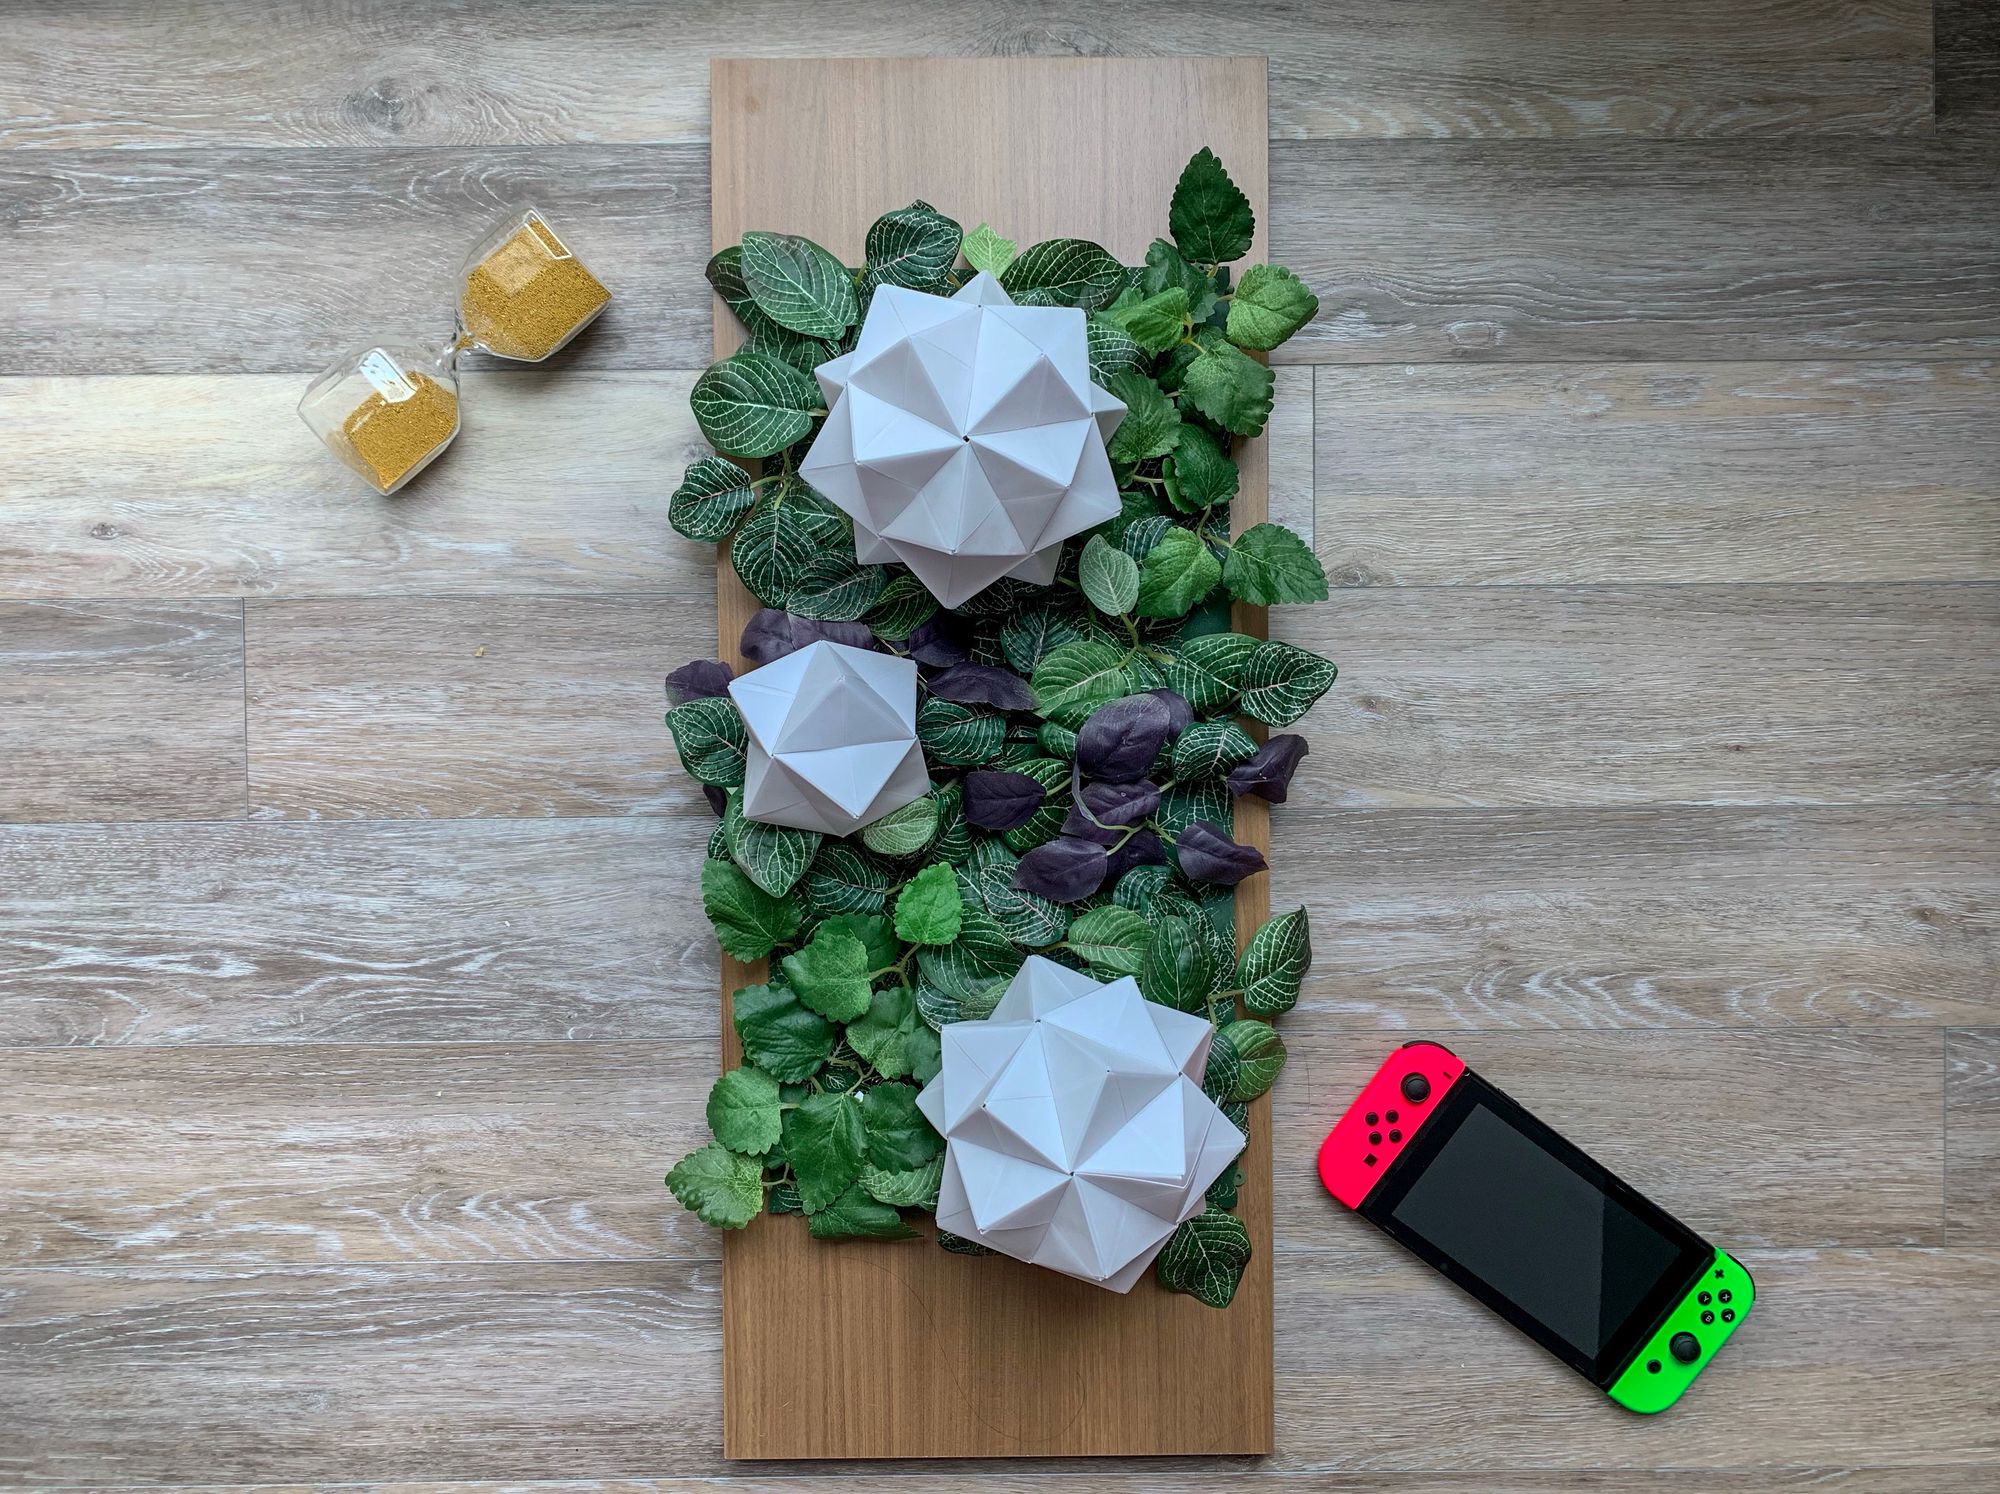
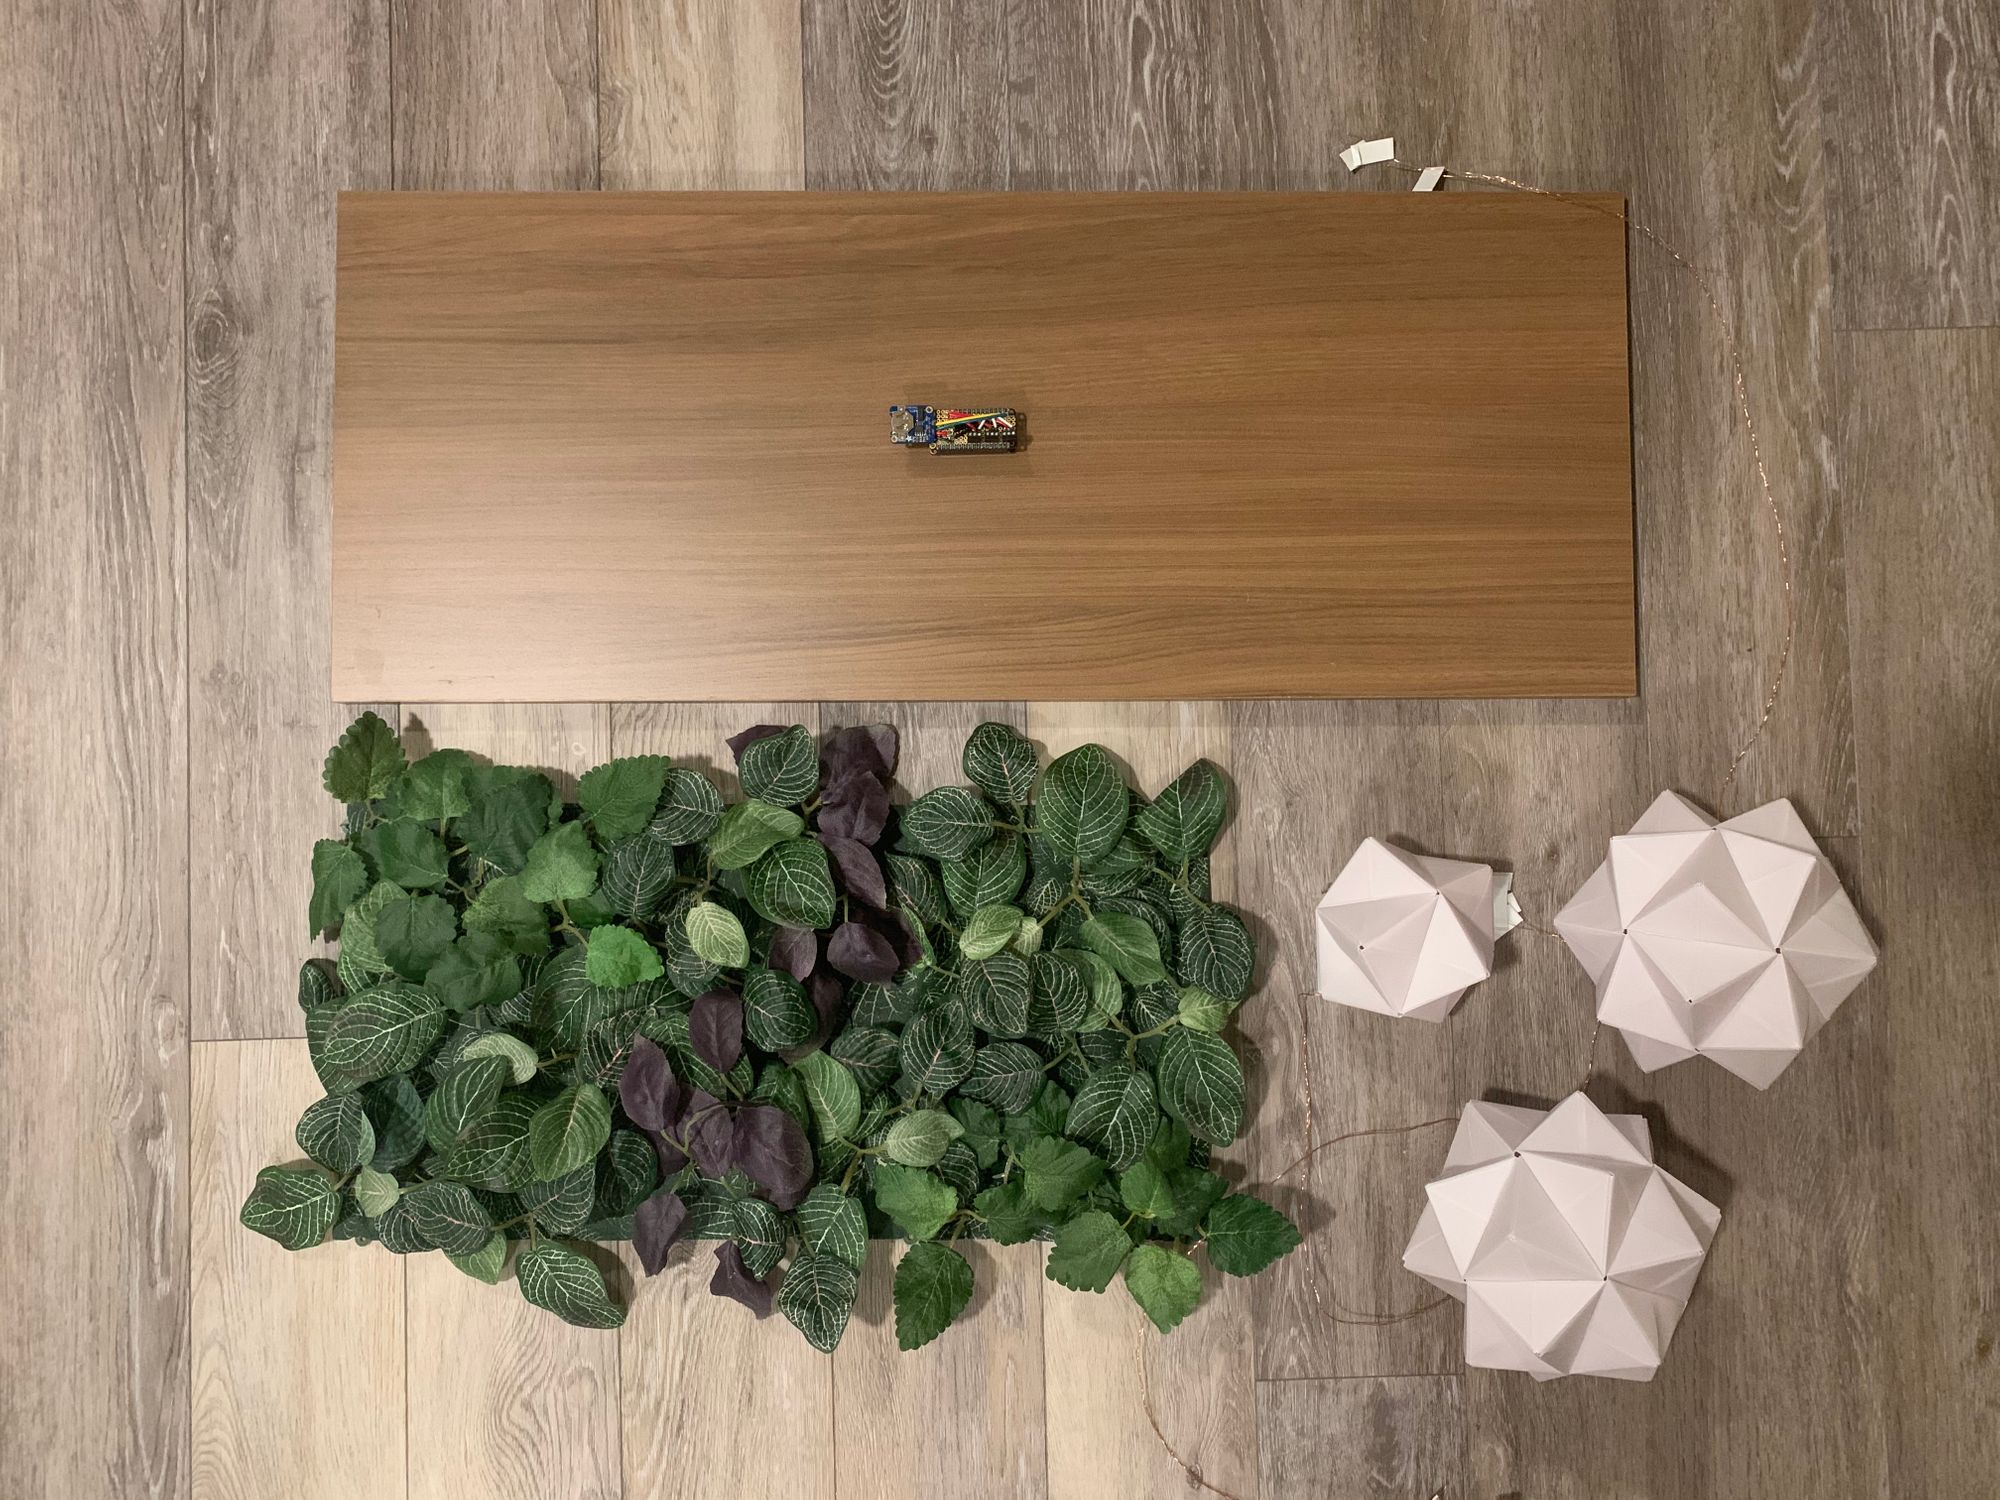
- A wooden panel
- Some fake leaves - mine was from IKEA
- 115 GSM Vellum paper - I used these from Amazon
- 1 x Feather M4 Express board from Adafruit - the brain 🧠 of this project
- 2 x Neopixel 16 pixel rings from Adafruit - for the two bigger lights
- 1 x Neopixel Jewel (RGBW) from Adafruit - for the smaller light
- 1 x PCF 8523 Realtime Clock module from Adafruit - to keep track of time
- 1 x Featherwing Proto board also from Adafruit duh - to make wiring clean
- 12-pin and 16-pin Feather pan headers (sometimes known as female headers but "pan" is cuter)
- Muffin headers (sometimes known as male headers but "muffin" is cuter) - great to have extras lying around but these should be included with the Featherwing Proto board linked in #8.
- A bunch of wires - I used these wires from Adafruit for the proto board, plus some enameled copper wires for hooking up the lights *
- 5V USB power supply - Something to power the board with when you're done coding. You can also just use any ol' wall phone charger with a USB-A to Micro USB cable.
- A good USB data cable - a common issue that people face is using a USB cable that only charges but doesn't have a data line. This one should do the trick, but any USB cable you use for data syncing will do. You could maybe even try a reversible one!
Prototyping/testing materials
- Breadboard (so you can test your circuit while prototyping)
- Jumper wires - depending on what you already have, you may need one or more of the following:
Tools
- Wire stripper tool
- Flush cutter
- Soldering iron
This project also requires quite a bit of soldering. You can avoid it in the beginning while using the breadboard, but if you want to be able to make these connections a bit more permanent and in a smaller form factor (when you put the wires on the Featherwing proto board) you'll need to solder.
*Note about using enameled copper wires: it's a bit of a pain since you have to remove the enamel coating from the wire by melting it off with solder or sanding it. You can watch this youtube video that explains how to do that, but alternatively you can use a thinner wire like this 30 AWG wire or any wire that's thinner than 22 AWG and would fit in the little holes would probably work just fine.
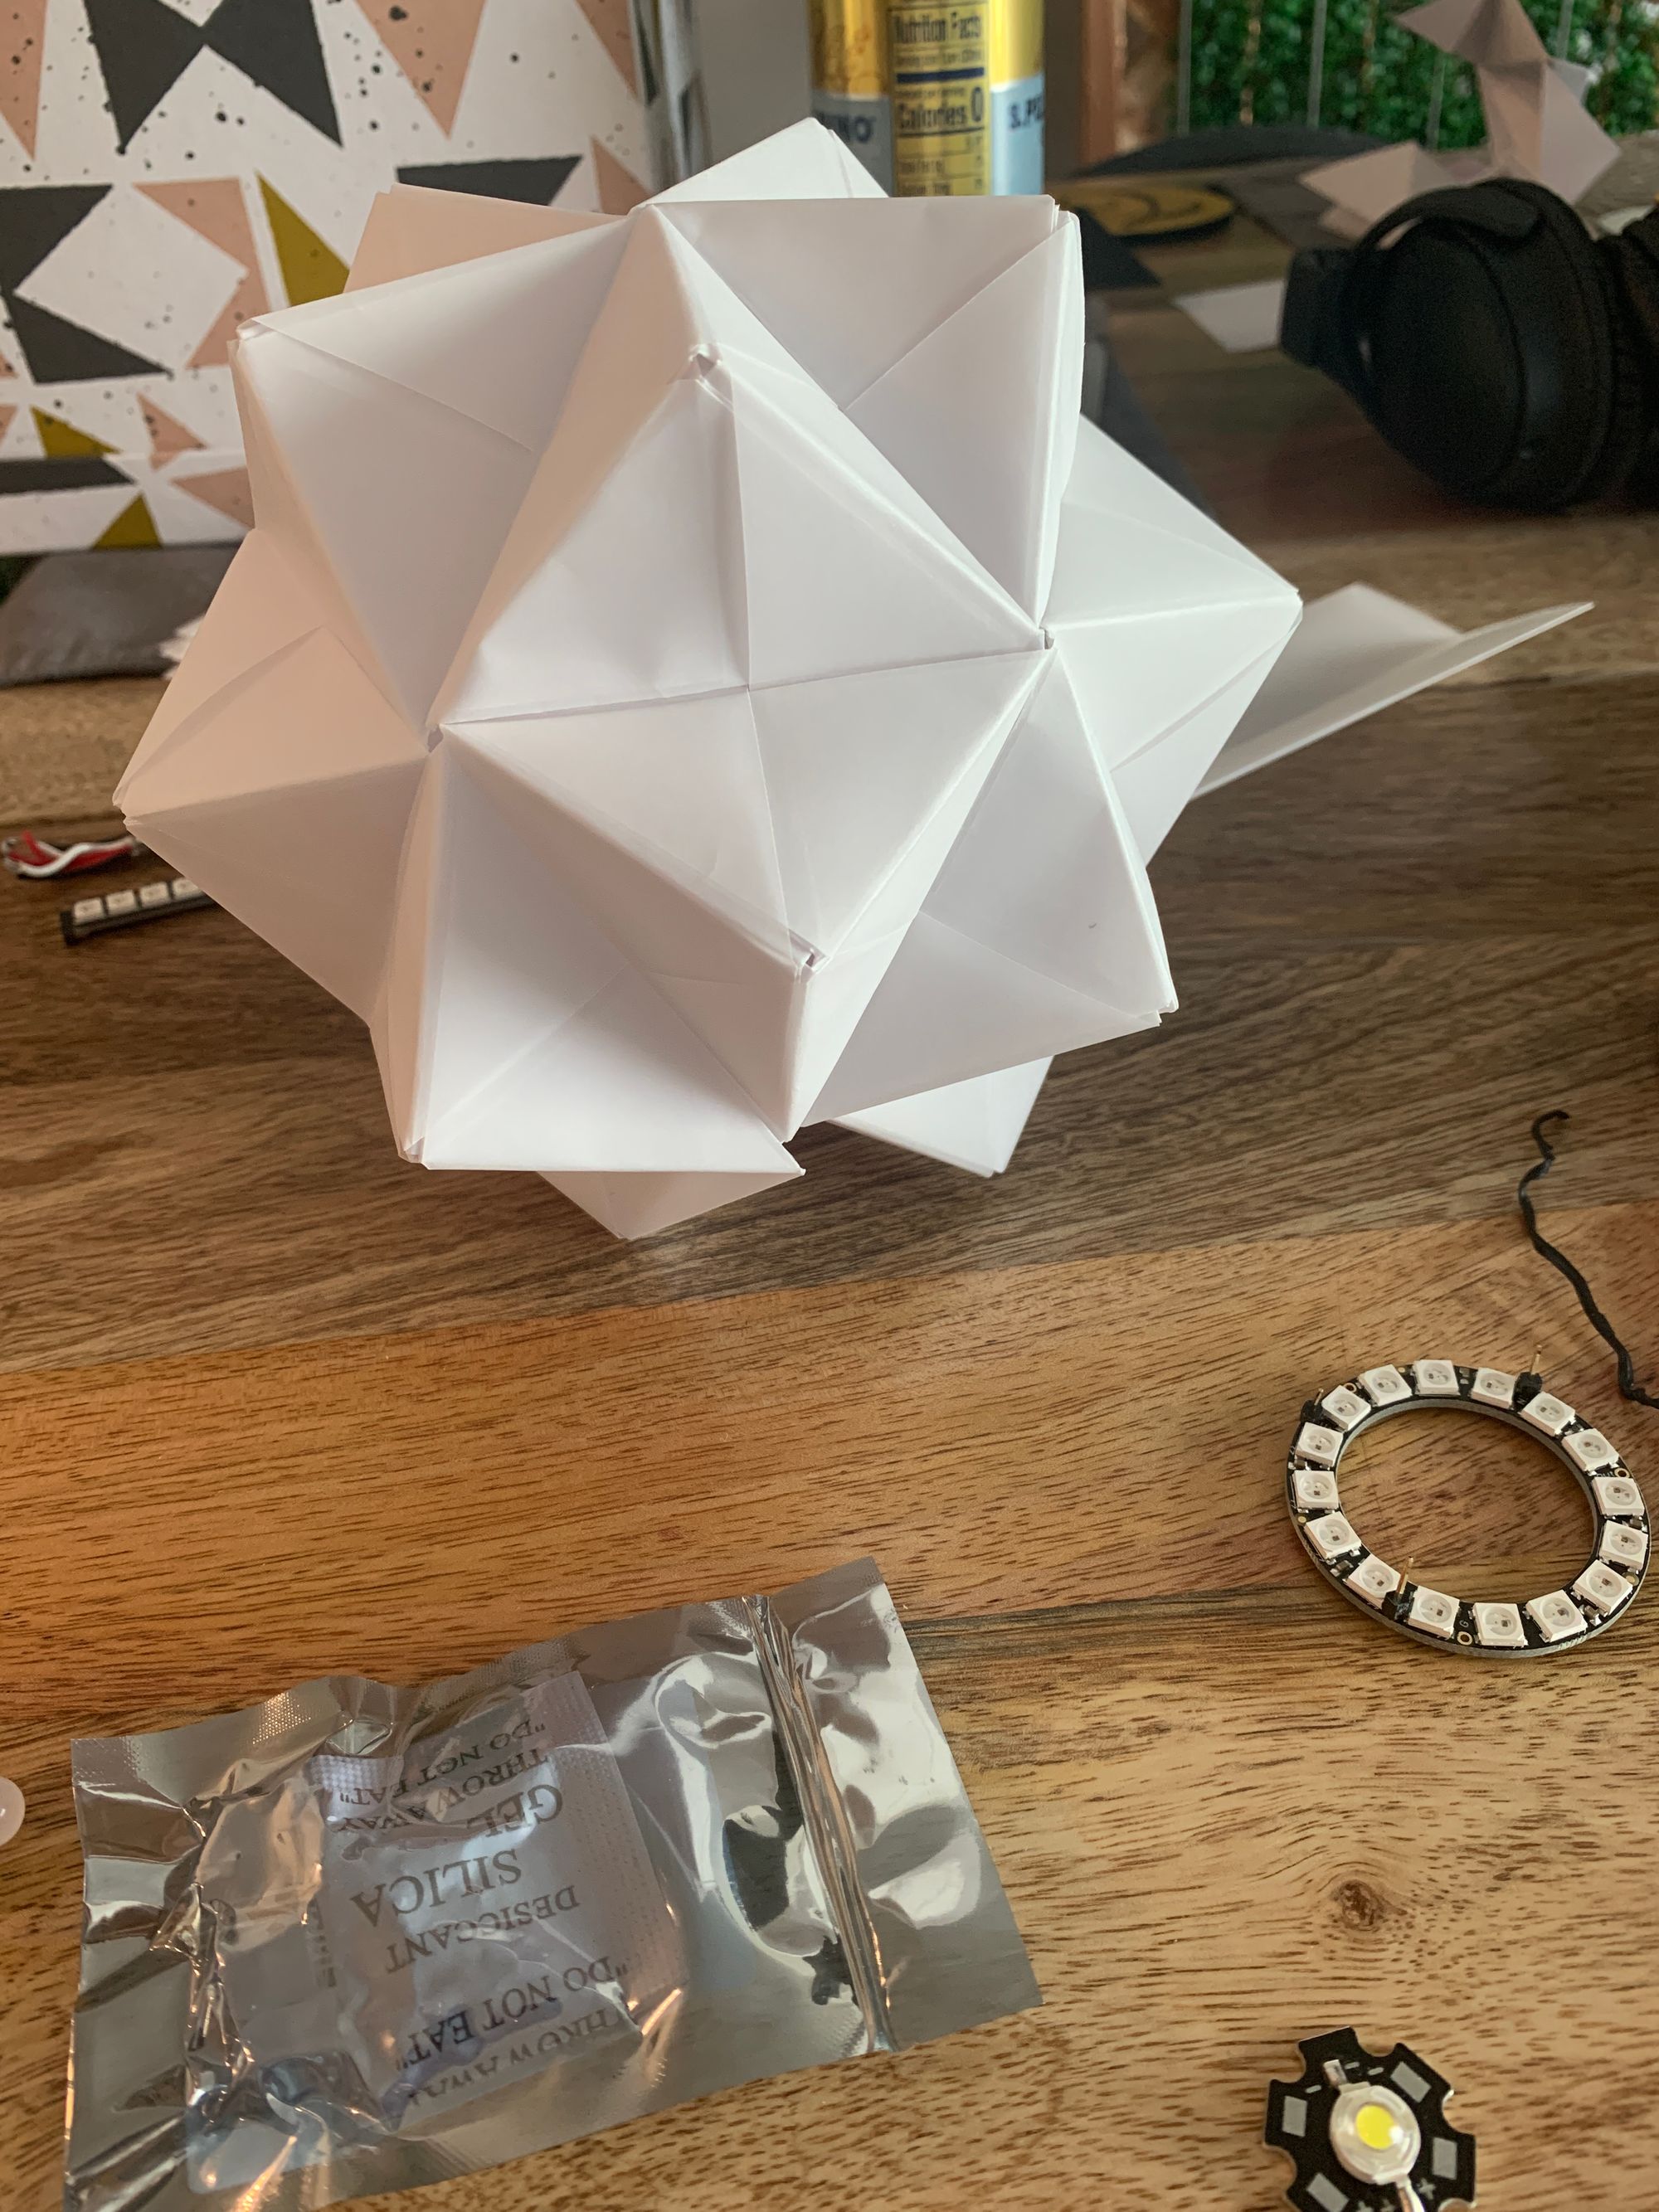
Sonobe Modules
First, I crafted an Ironwood DIY Workbench to keep it classy, then I got to folding. Each Nova Light is made from sonobe origami modules, and assembled two into an icosahedron, and a smaller one into an octahedron. Here are the two video tutorials I followed:
- Modular Origami Icosahedron 30 Sonobe Units - for the two bigger Nova Lights
- Modular Origami Stellated Octahedron 12 Sonobe Units - for the smaller Star Frag
Circuit assembly with Feather M4 Express
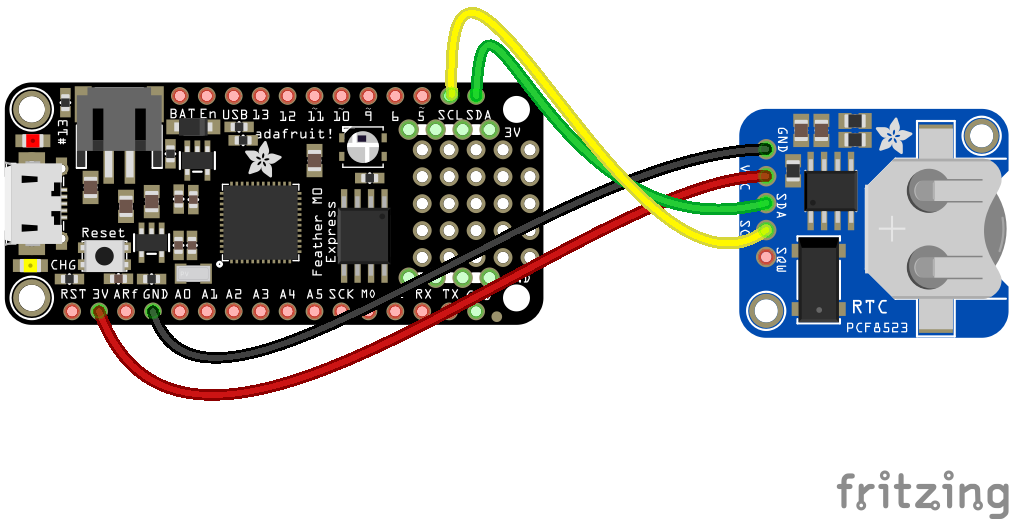
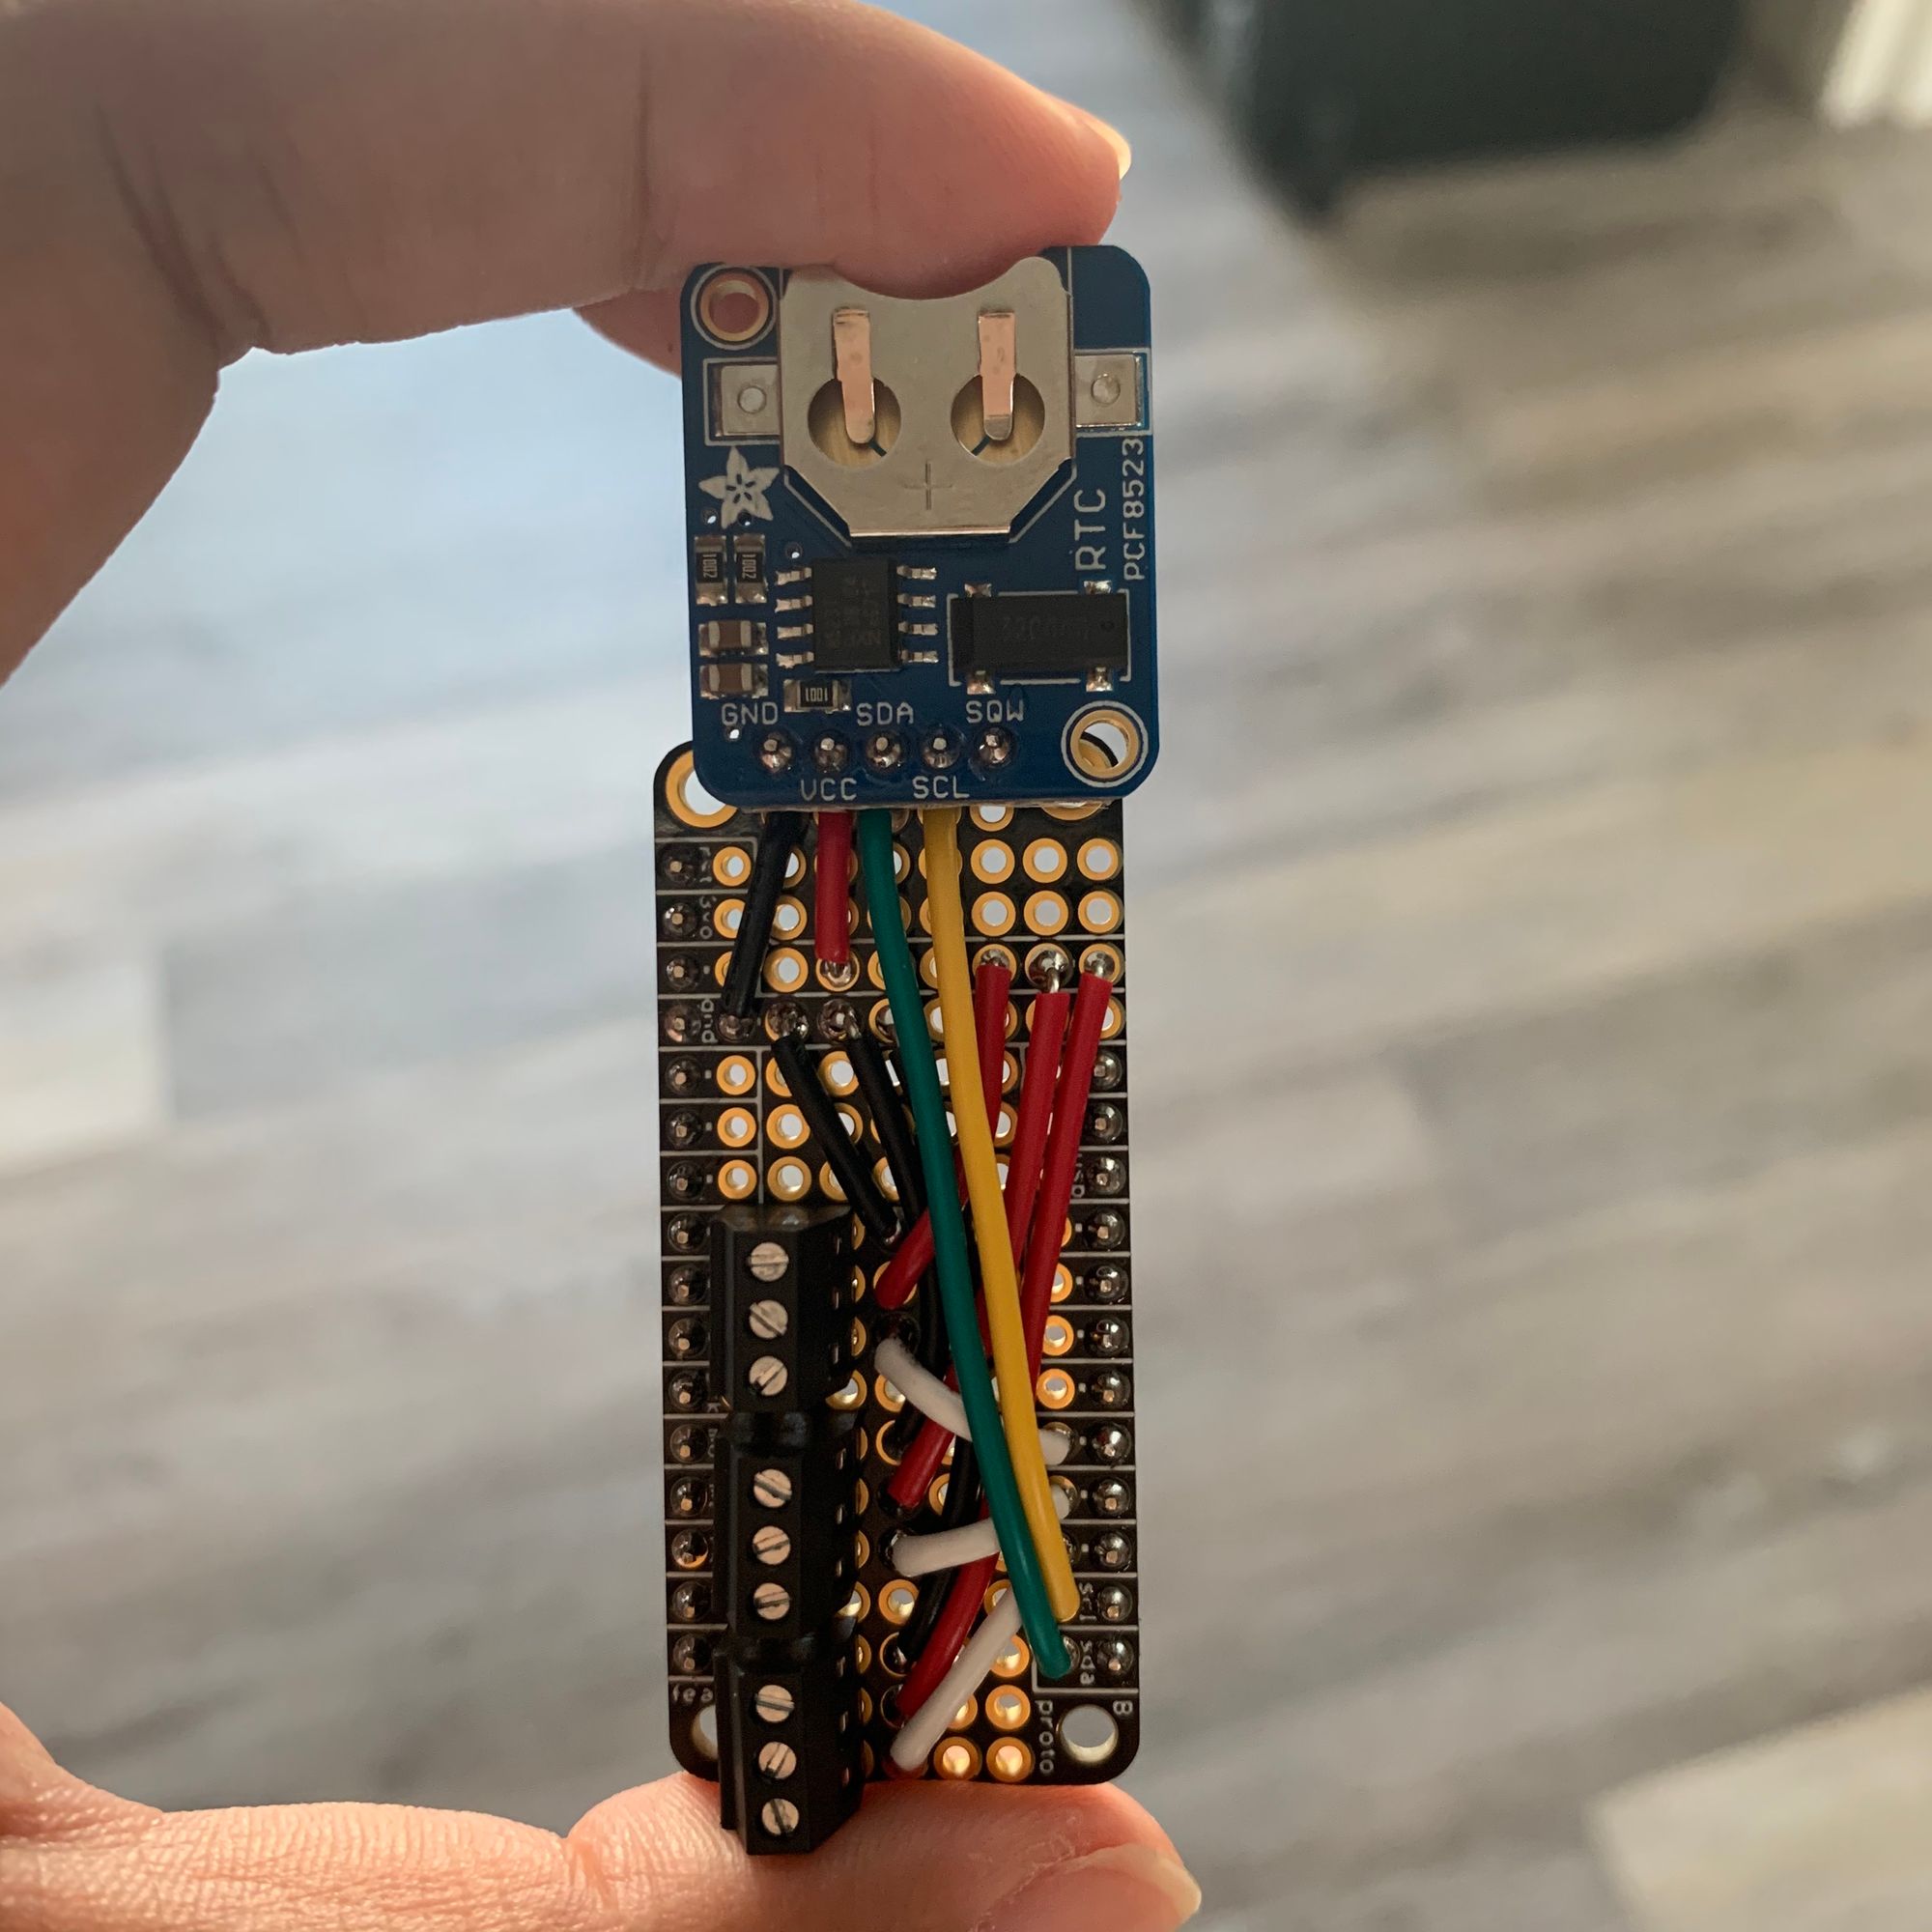
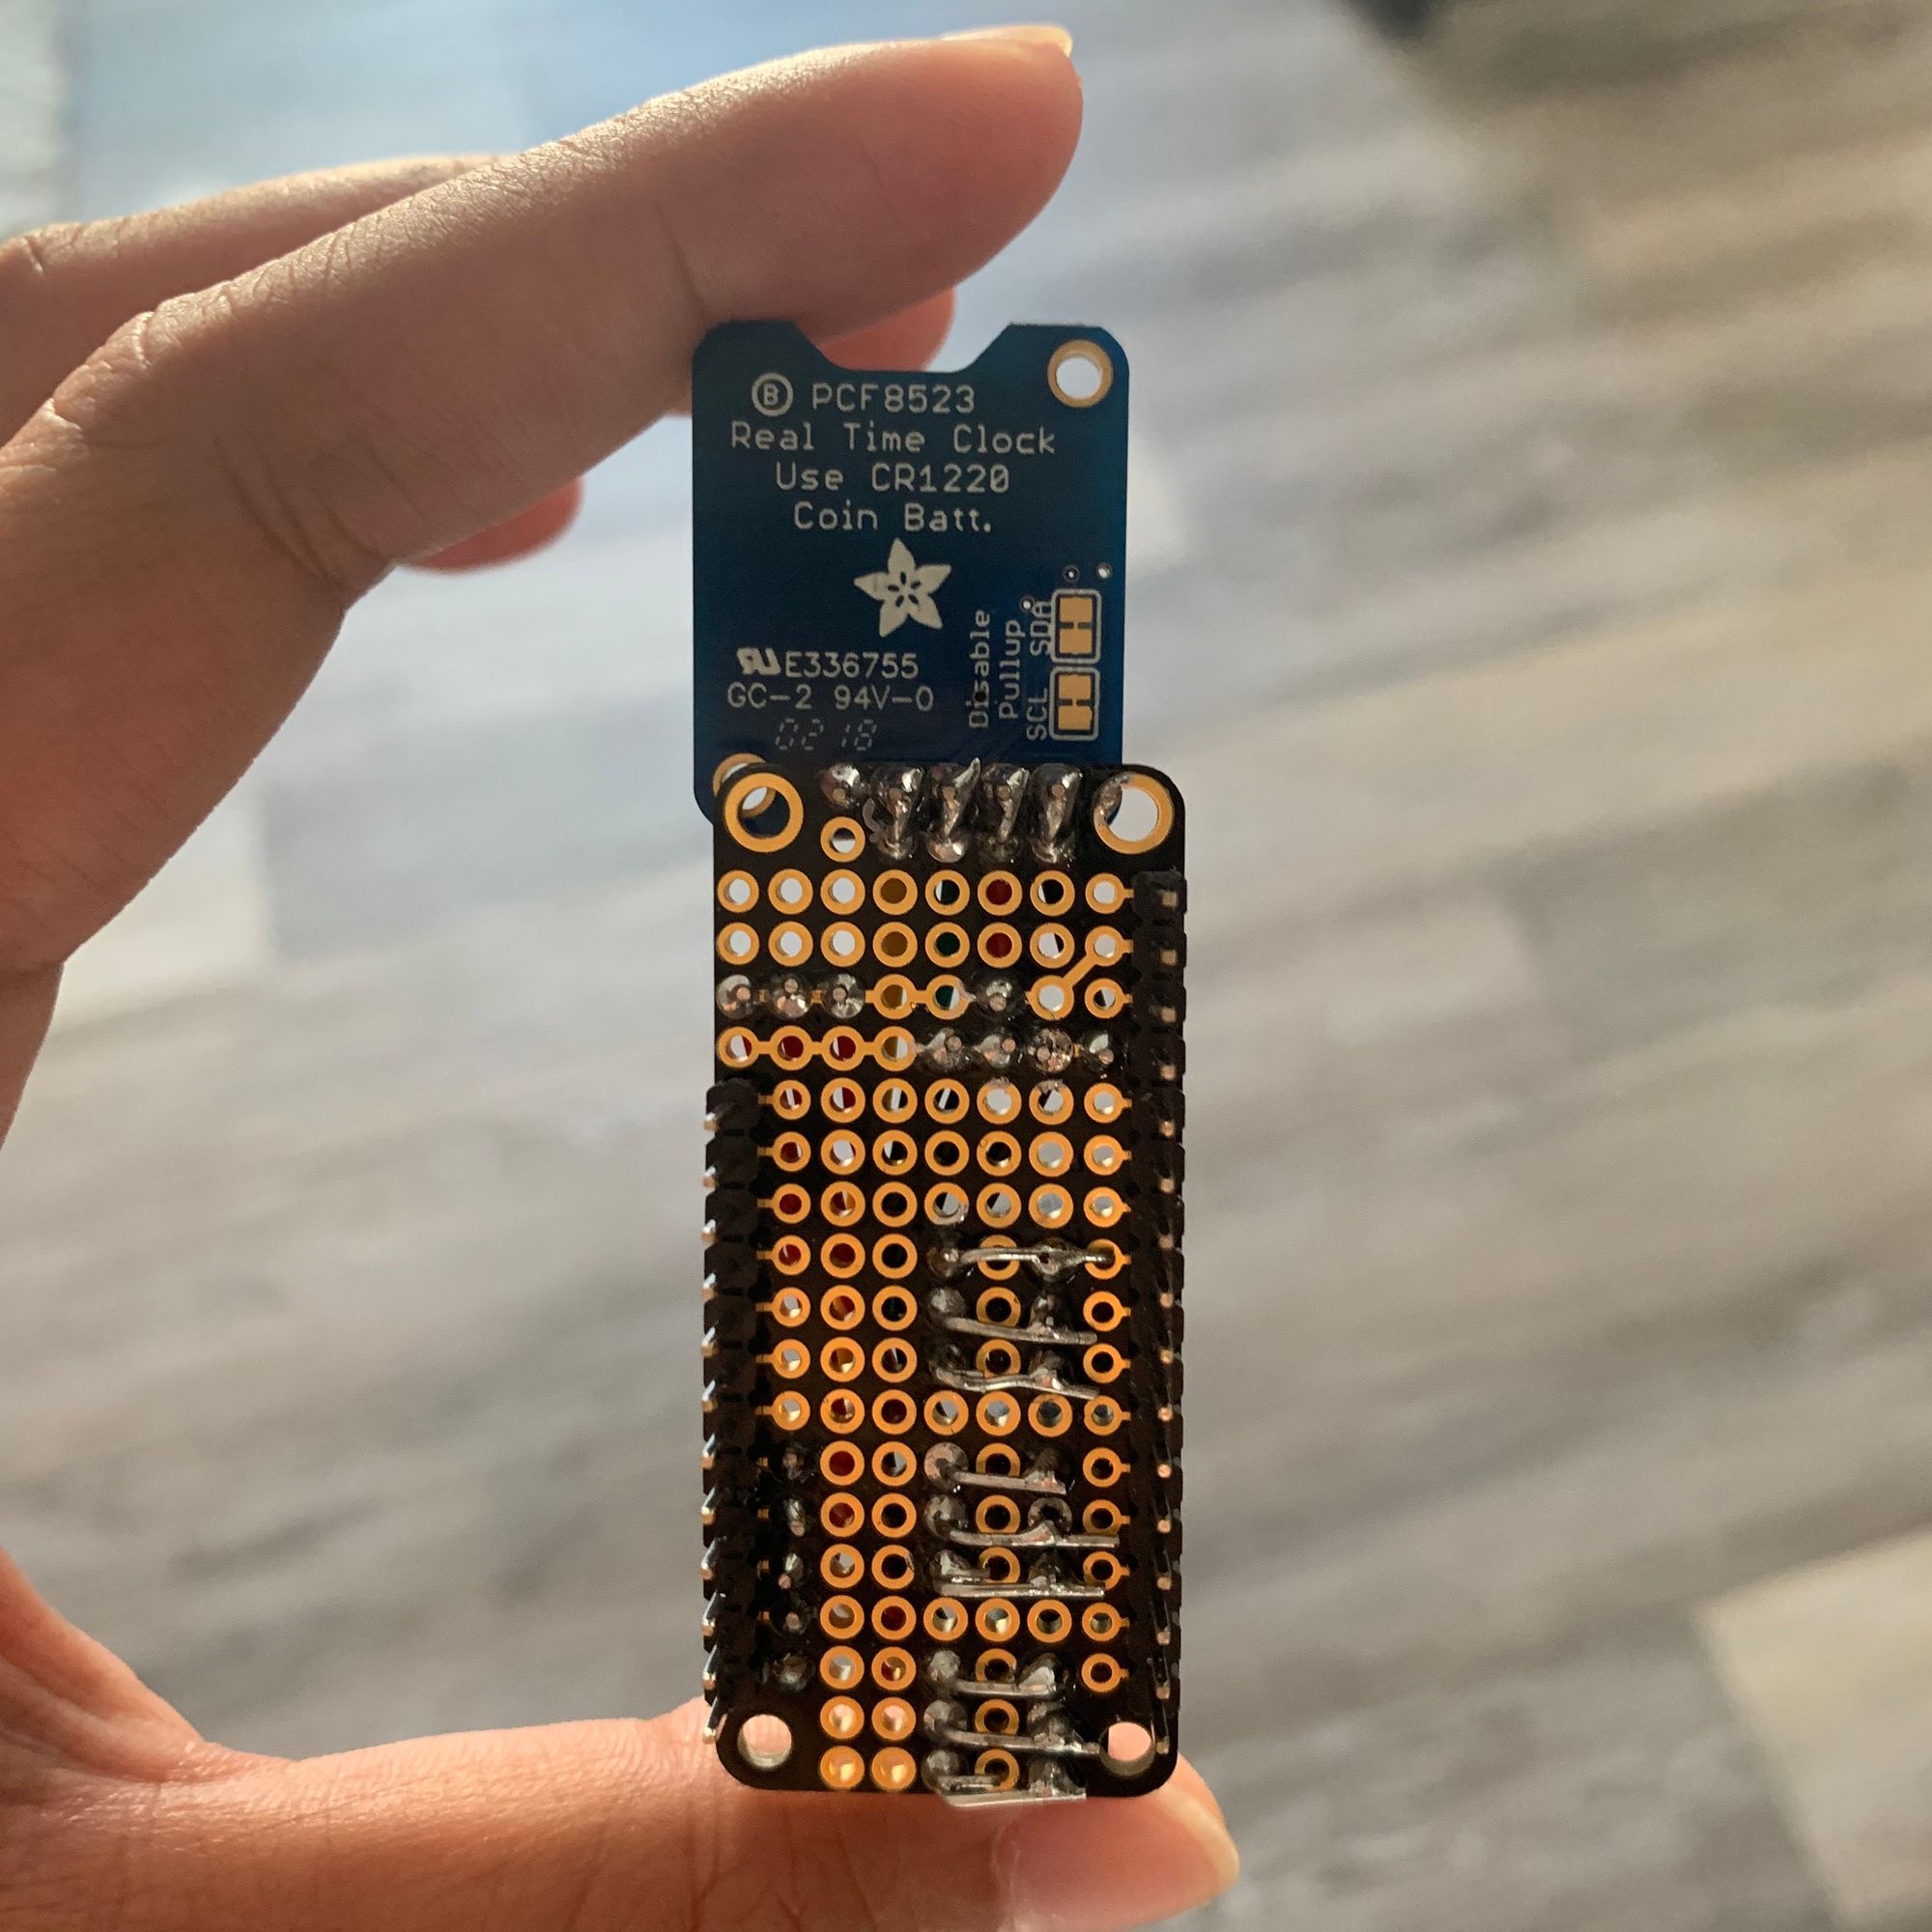
I followed this tutorial for wiring up the Realtime clock module – this is the piece of the board that can keep accurate time even if you end up unplugging the power from the board (you just have to make sure there's a coin cell battery in it). Here's a summary of what needs to connect together:
| PCF8523 | Feather M4 |
|---|---|
| GND | GND |
| VCC | 3.3v |
| SDA | SDA |
| SCL | SCL |
This image is taken from the tutorial linked above:
And then I wired up the Neopixels as follows:
| Neopixels | Feather M4 |
|---|---|
| GND | GND |
| 5V DC | 3.3V line * |
| Jewel DIN | D9 |
| Top Ring DIN | D6 |
| Bottom Ring DIN | D5 |
I first tried the circuit connections from the board to the Neopixels and the PCF8523 on a breadboard. I unfortunately didn't take photos while I was breadboarding, but the idea is that you can make temporary electrical connections using jumper wires and a breadboard. Breadboards are explained quite nicely in this Sparkfun explainer post!
Then, I soldered up the connections on an Adafruit Featherwing Proto Board to make these connections a bit more compact and permanent. The proto board pictured below goes directly on top of the Feather M4.
Note: I believe that ideally, the Neopixels should be supplied with 5v power and 5v signals. However, I really wanted to use the Featherwing Proto board to keep wiring simple, and it only had a connected power line from 3.3V. I tried it, it's working, YMMV 🥰
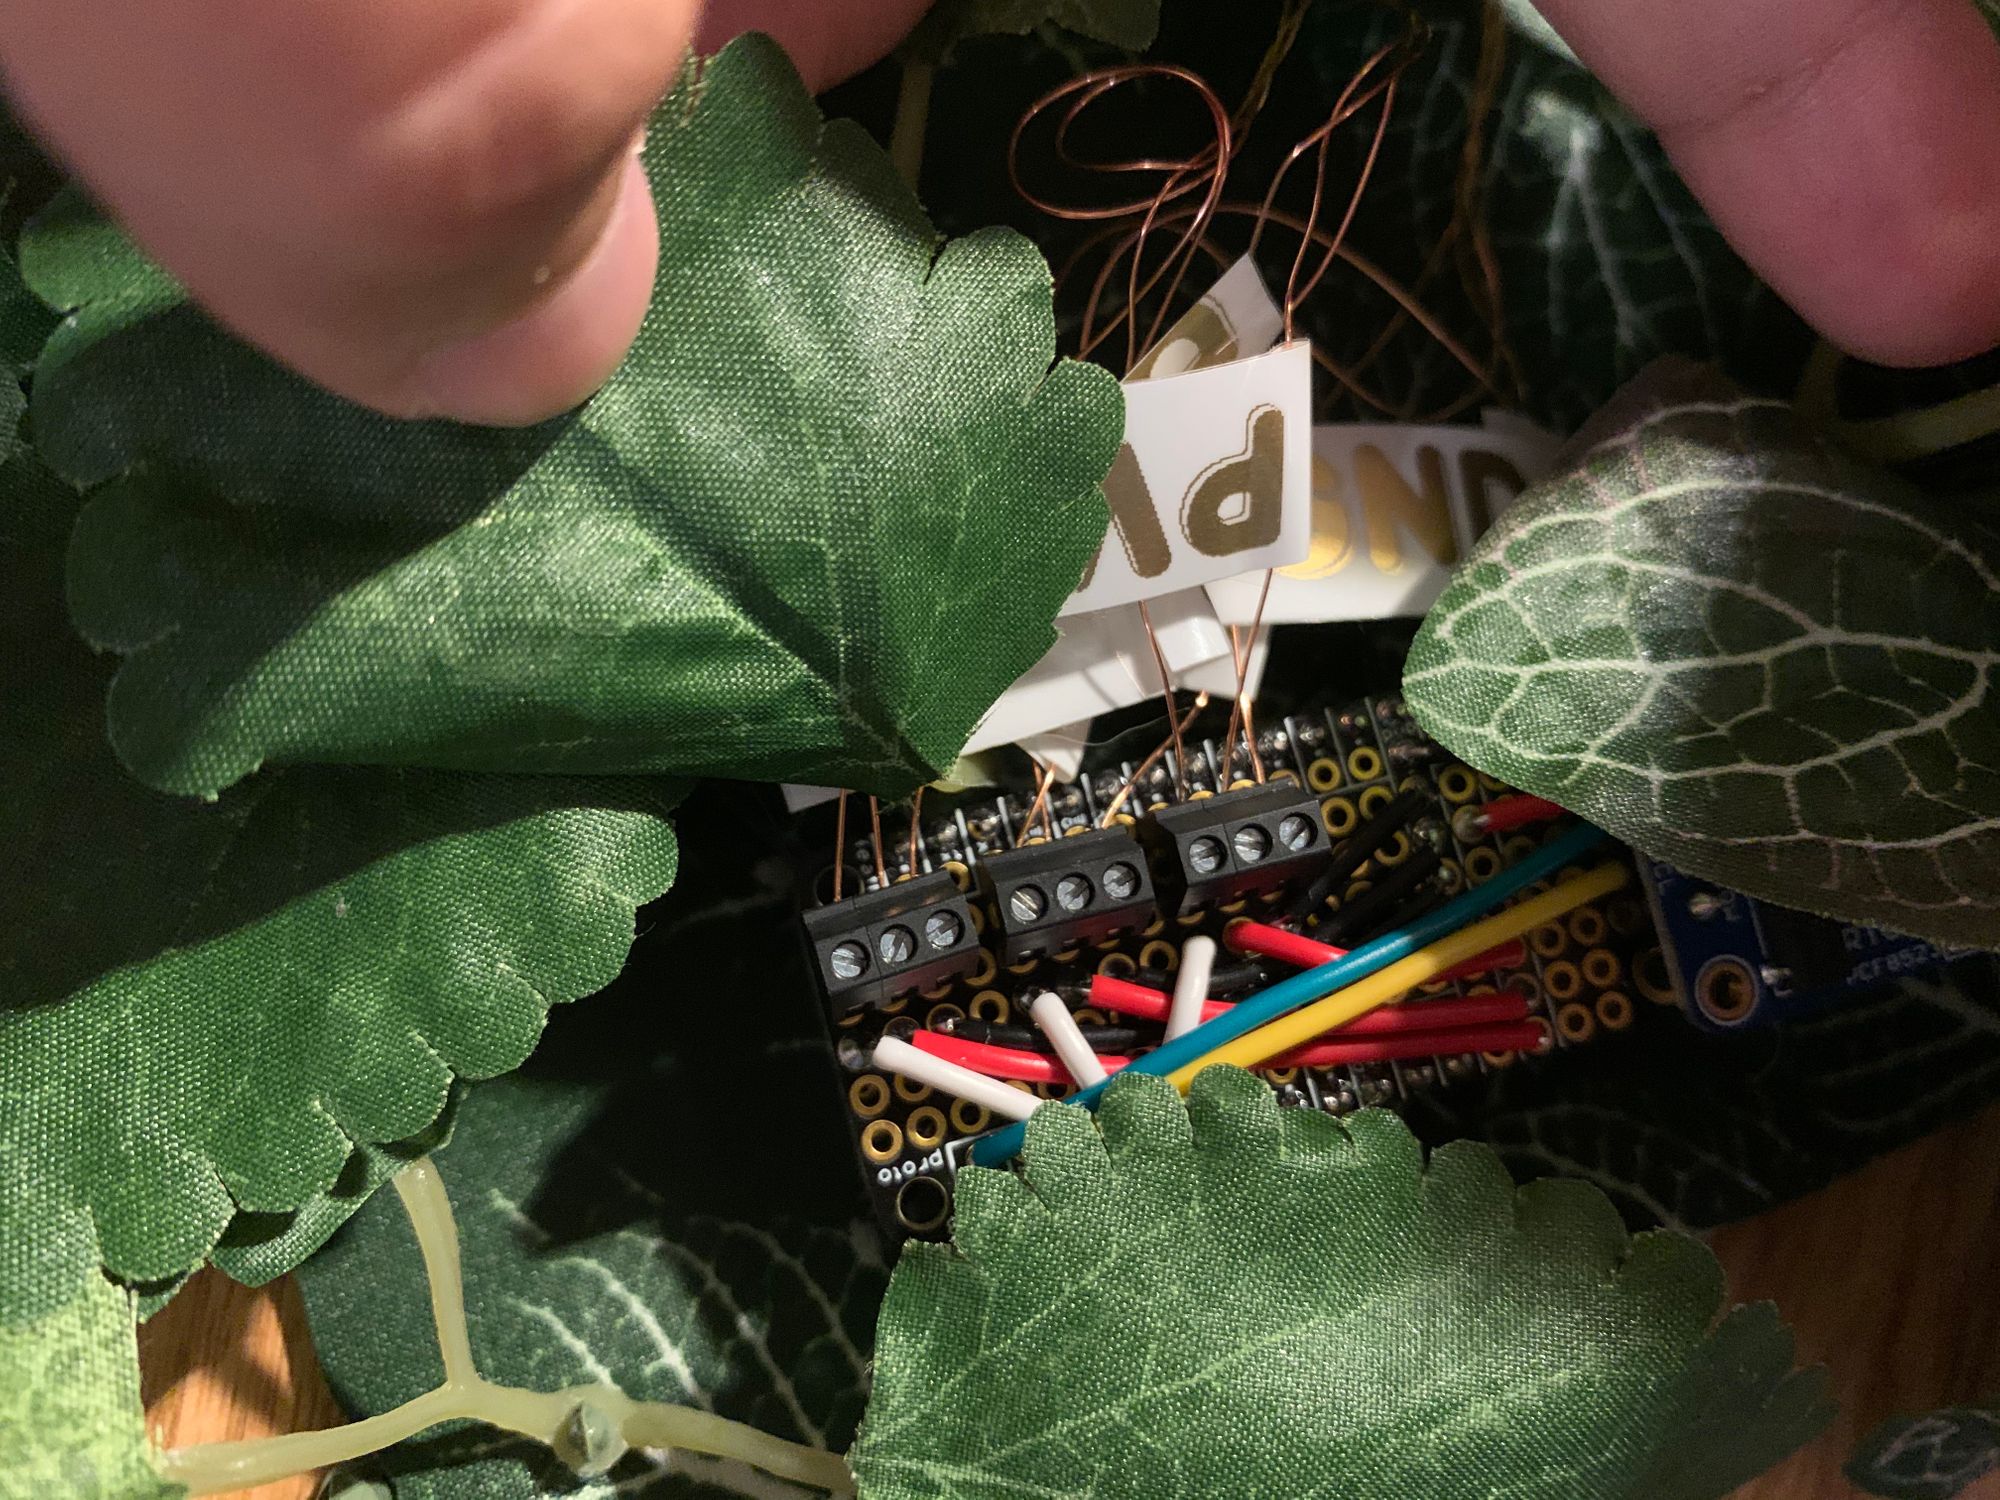
I used some 3-wire terminals to connect the wires from the circuit to the Neopixels since I knew I was gonna have to route some wires in weird places. These terminals allowed me to use screws to connect and re-connect as needed.
Putting it all together
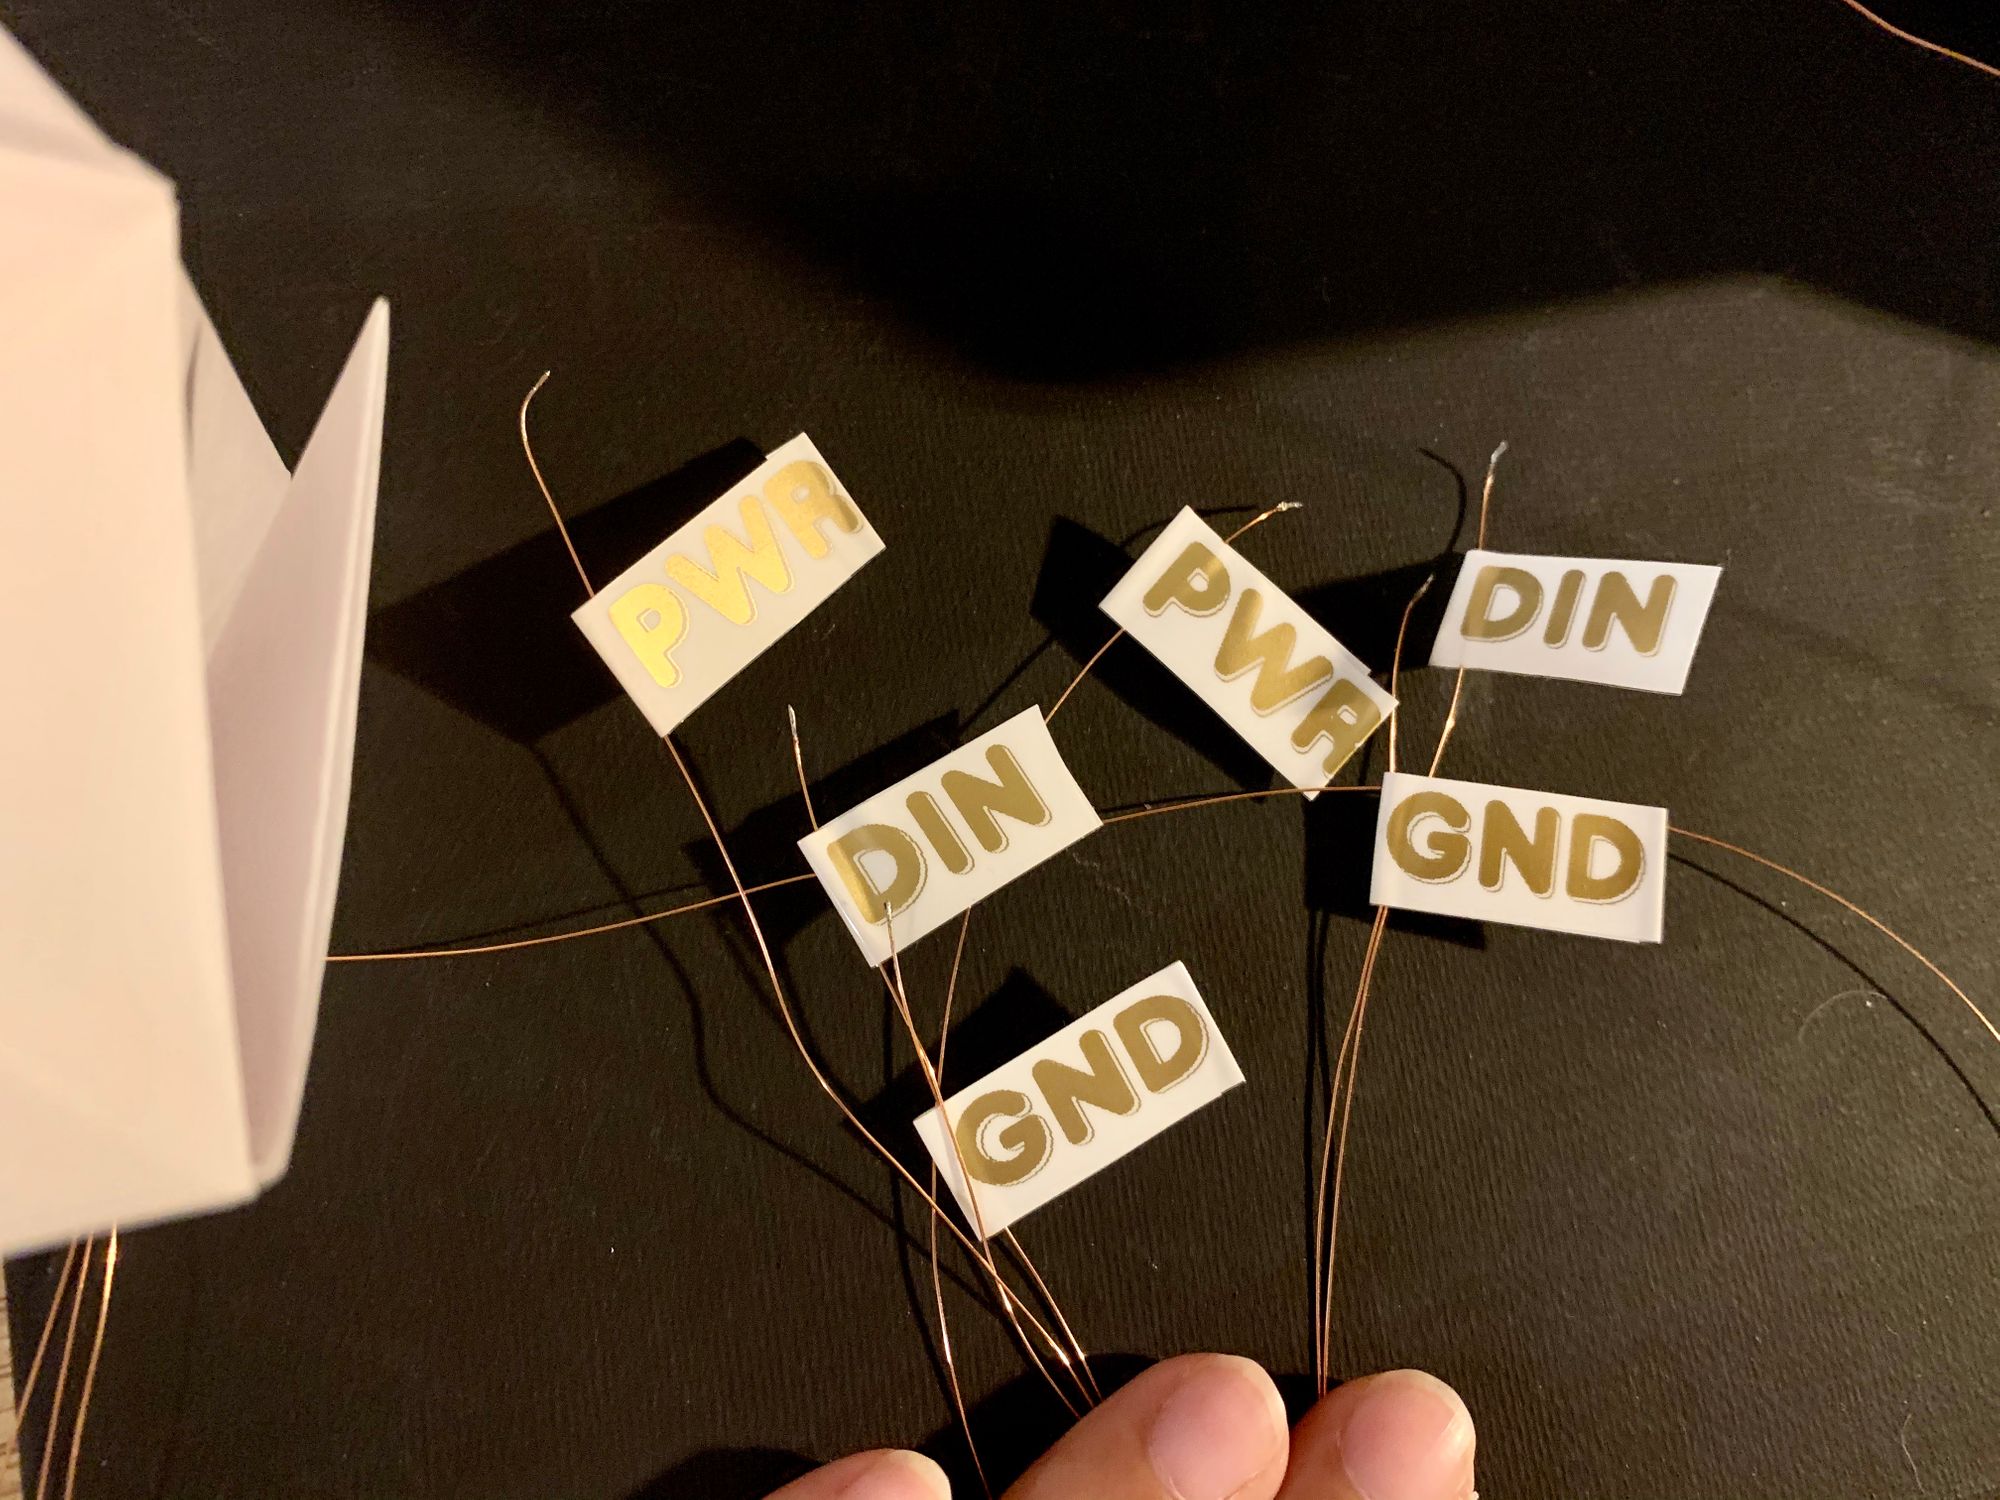
I ended up using these delicate enameled copper wires because they fit in the gaps of the sonobe modules. If you decide to go this route, you'll need to label your wires so you don't get them mixed up.
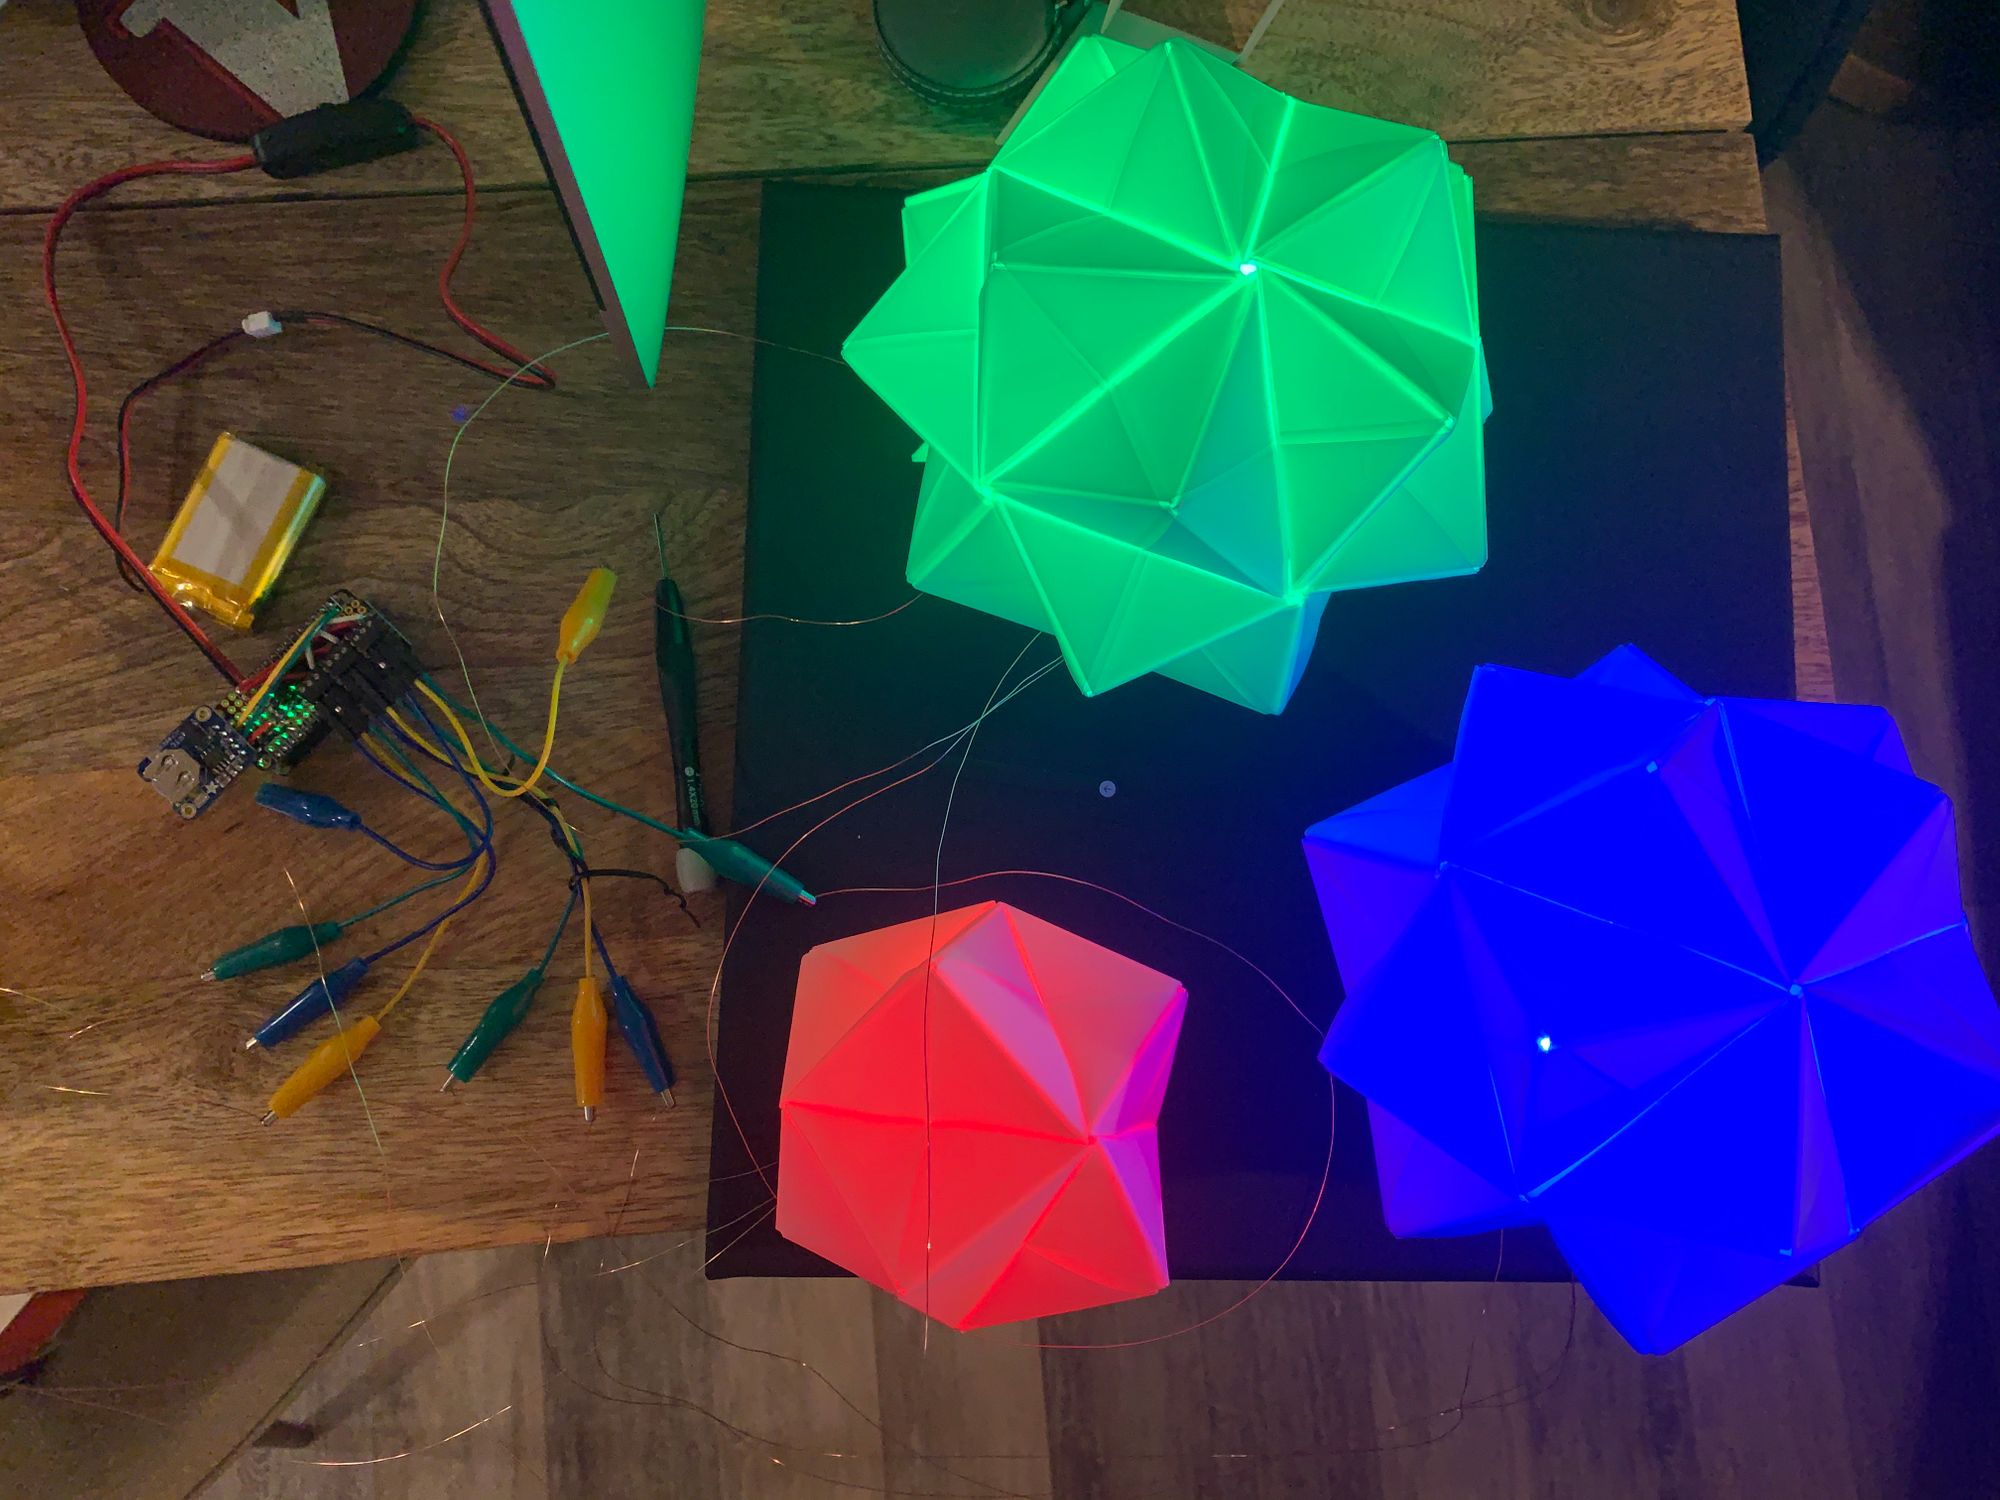
With the help of my trusty Third Hands, I opened up a bit of the Nova light to insert the Neopixel and secure it (kinda messily) with some hot glue.

Since I used wire terminals, I could connect alligator clips into them and test the circuit after assembly (super important to test!)
Now that I've assembled the lights, I had to secure the Feather M4 Express onto the leaves background. Some trusty thread and a needle did the job pretty well!
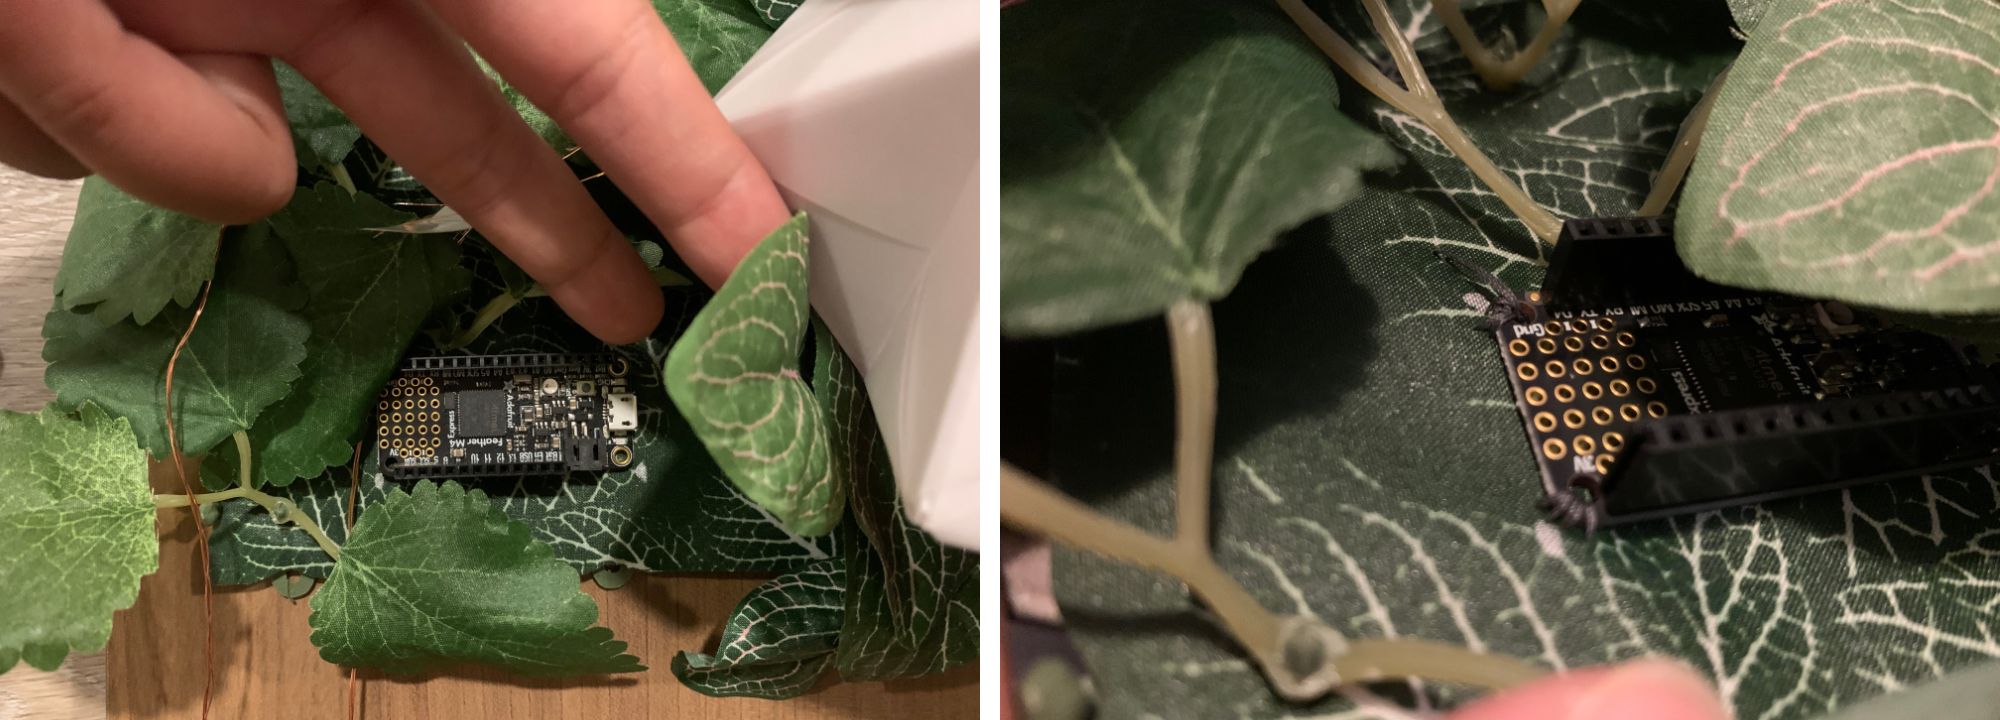
Now that I secured the Feather itself, putting on the Featherwing proto board was super easy. I could then plan out the placement of the lights then connect the wires to the terminals! The board hides under a canopy of leaves, in its own mini tropical paradise.
CircuitPython setup and code
After assembling and wiring up the parts, follow these quick and easy instructions to learn more about CircuitPython and setup the newest CircuitPython on the Feather M4:
- What is CircuitPython?
- Adafruit Feather M4 Express - CircuitPython install guide
Once you have that setup, feel free to use my code below and edit as you wish! This code takes parts from the guide from the Adafruit tutorial on PCF8523.
Note: If you are viewing this blog post on a mobile device, visit this link to see the code – I'll have to re-learn some CSS-fu to fix this issue, thanks for your patience!
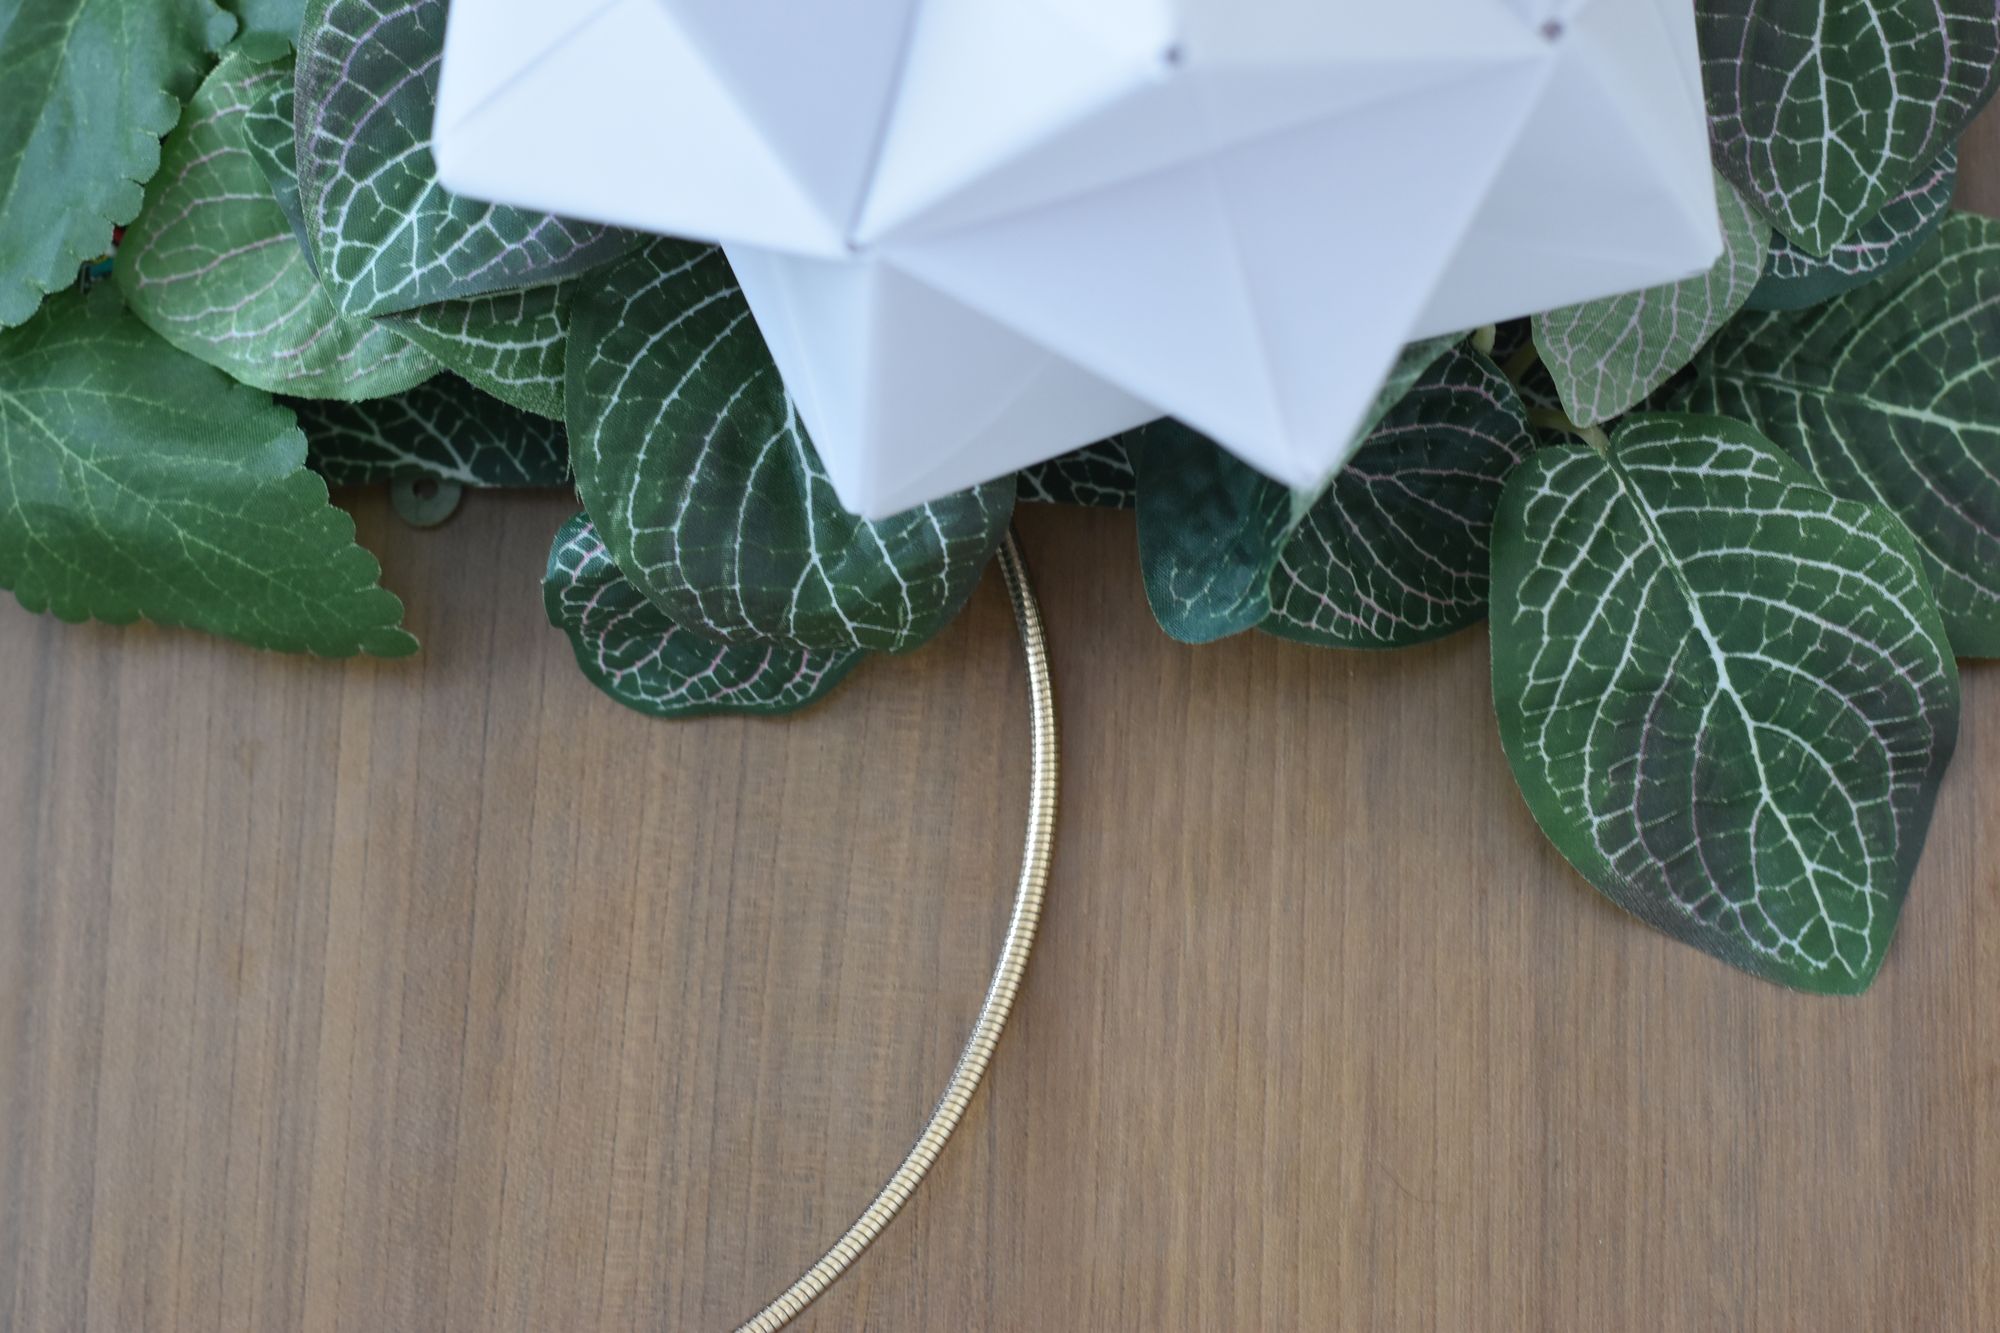
The cool thing about the Feather M4 Express is that you can program it via USB, and when you're done coding, you can use a regular USB wall charger or battery pack to power this project! I'll be using a phone wall charger just as soon as I figure out where exactly this beauty will be hanging :D
To keep it classy while powering the project, I'm using a golden USB cord, which ended up pairing well with the leaves and the wood ✨
That's it! I hope this project can help re-assure you that time is still passing, and that it's ok to play AC (at least that is what I keep telling myself) 😅