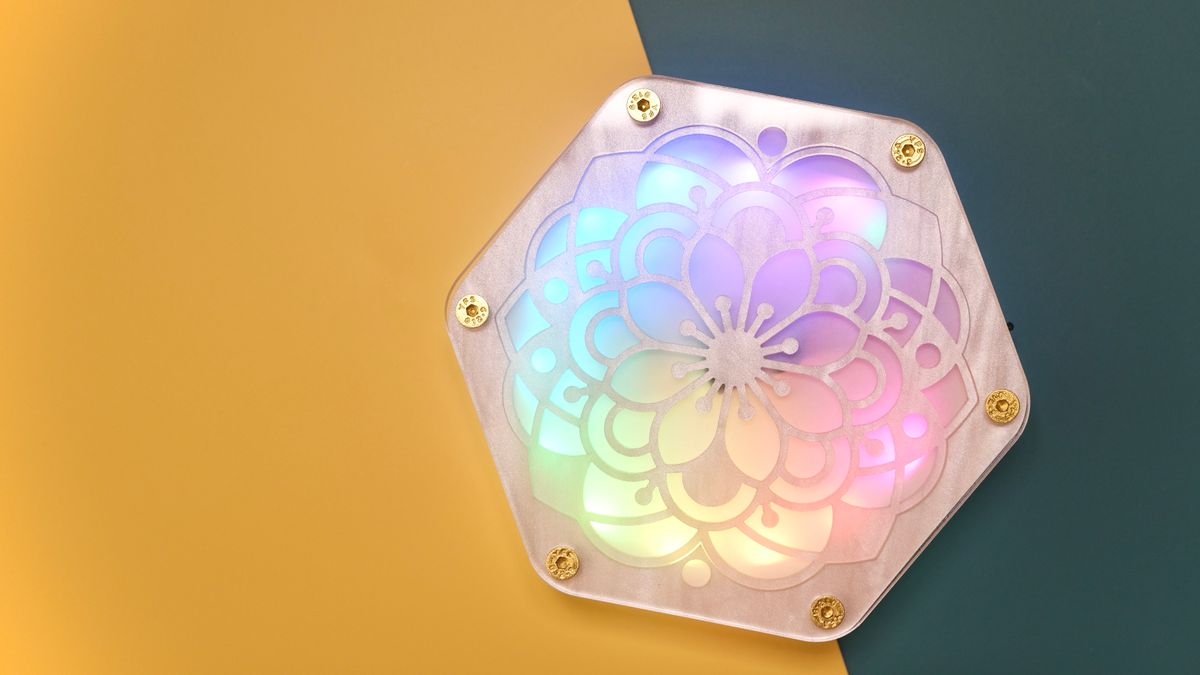

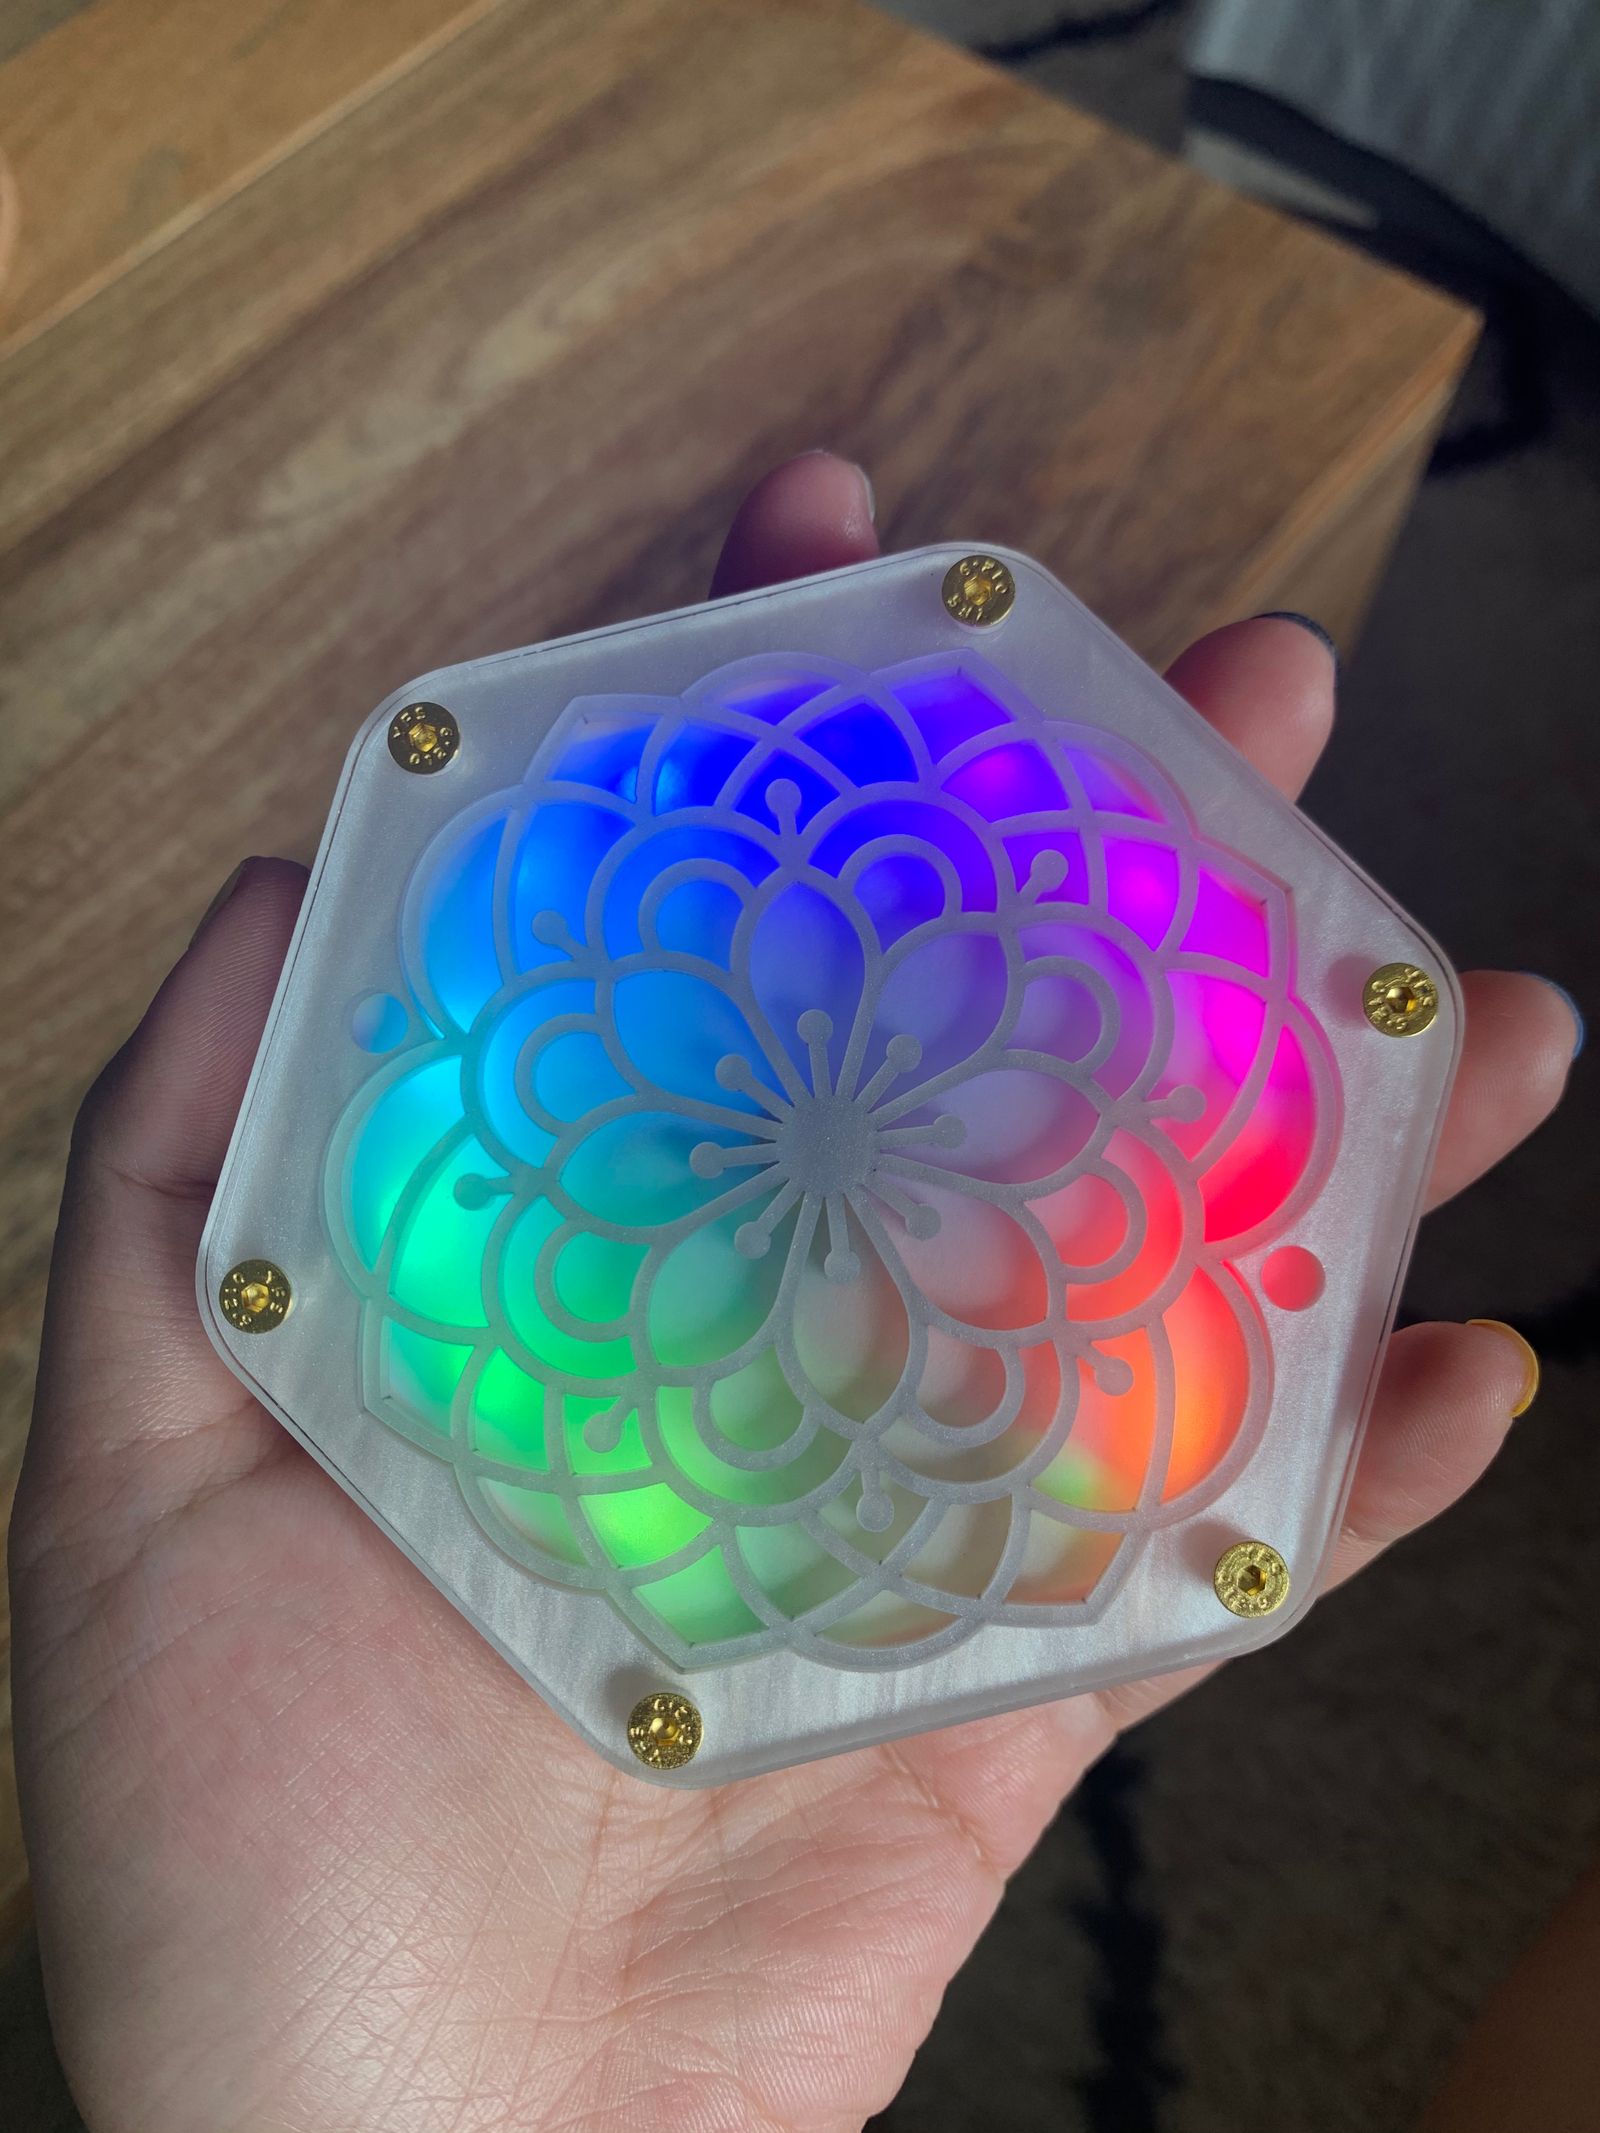
One of my good friends, Amit, owns a massive mug collection. And they're not just any mugs – these are beautiful, clever, and unique, just like he is! So, right before I met up with him for the first time in literal years, I made him this glowy coaster to compliment his collection.
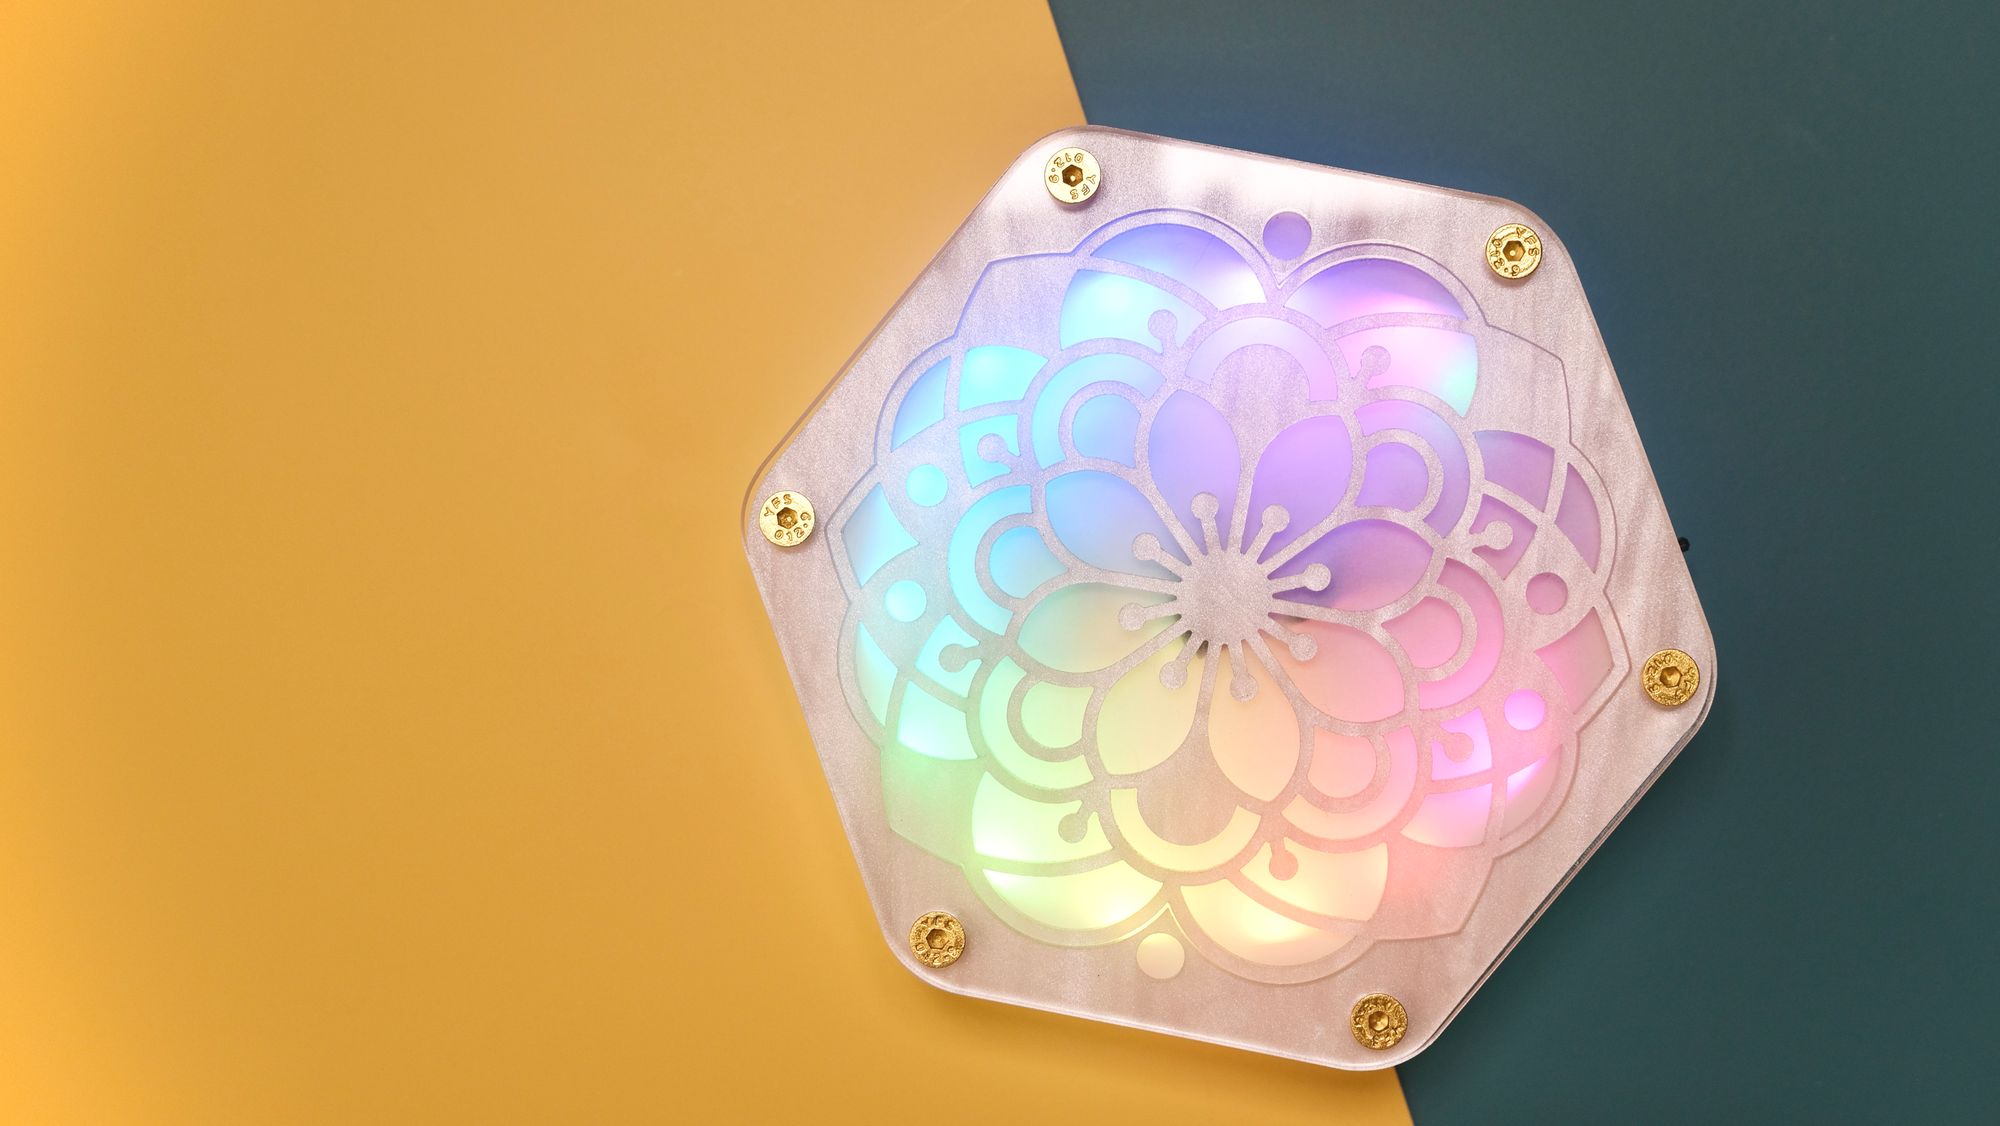
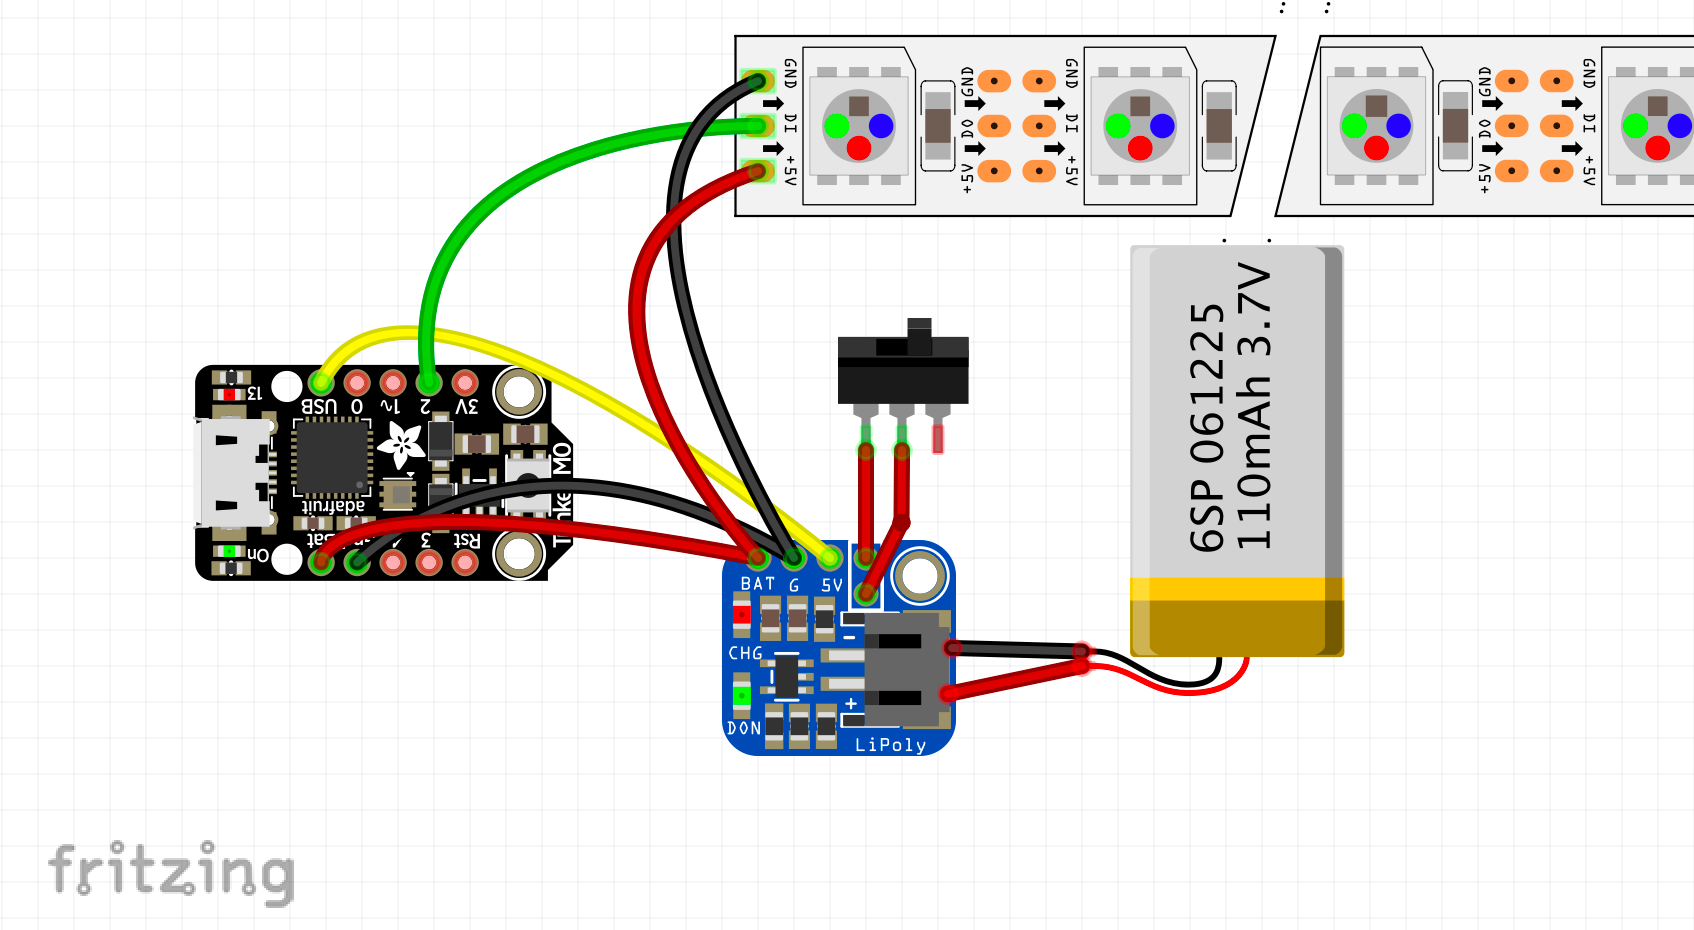
It's made up of laser cut layers with an Adafruit Trinket M0 powering a Neopixel LED strip, and held together with gold m3 machine screws and ✨love✨ (but mostly machine screws)
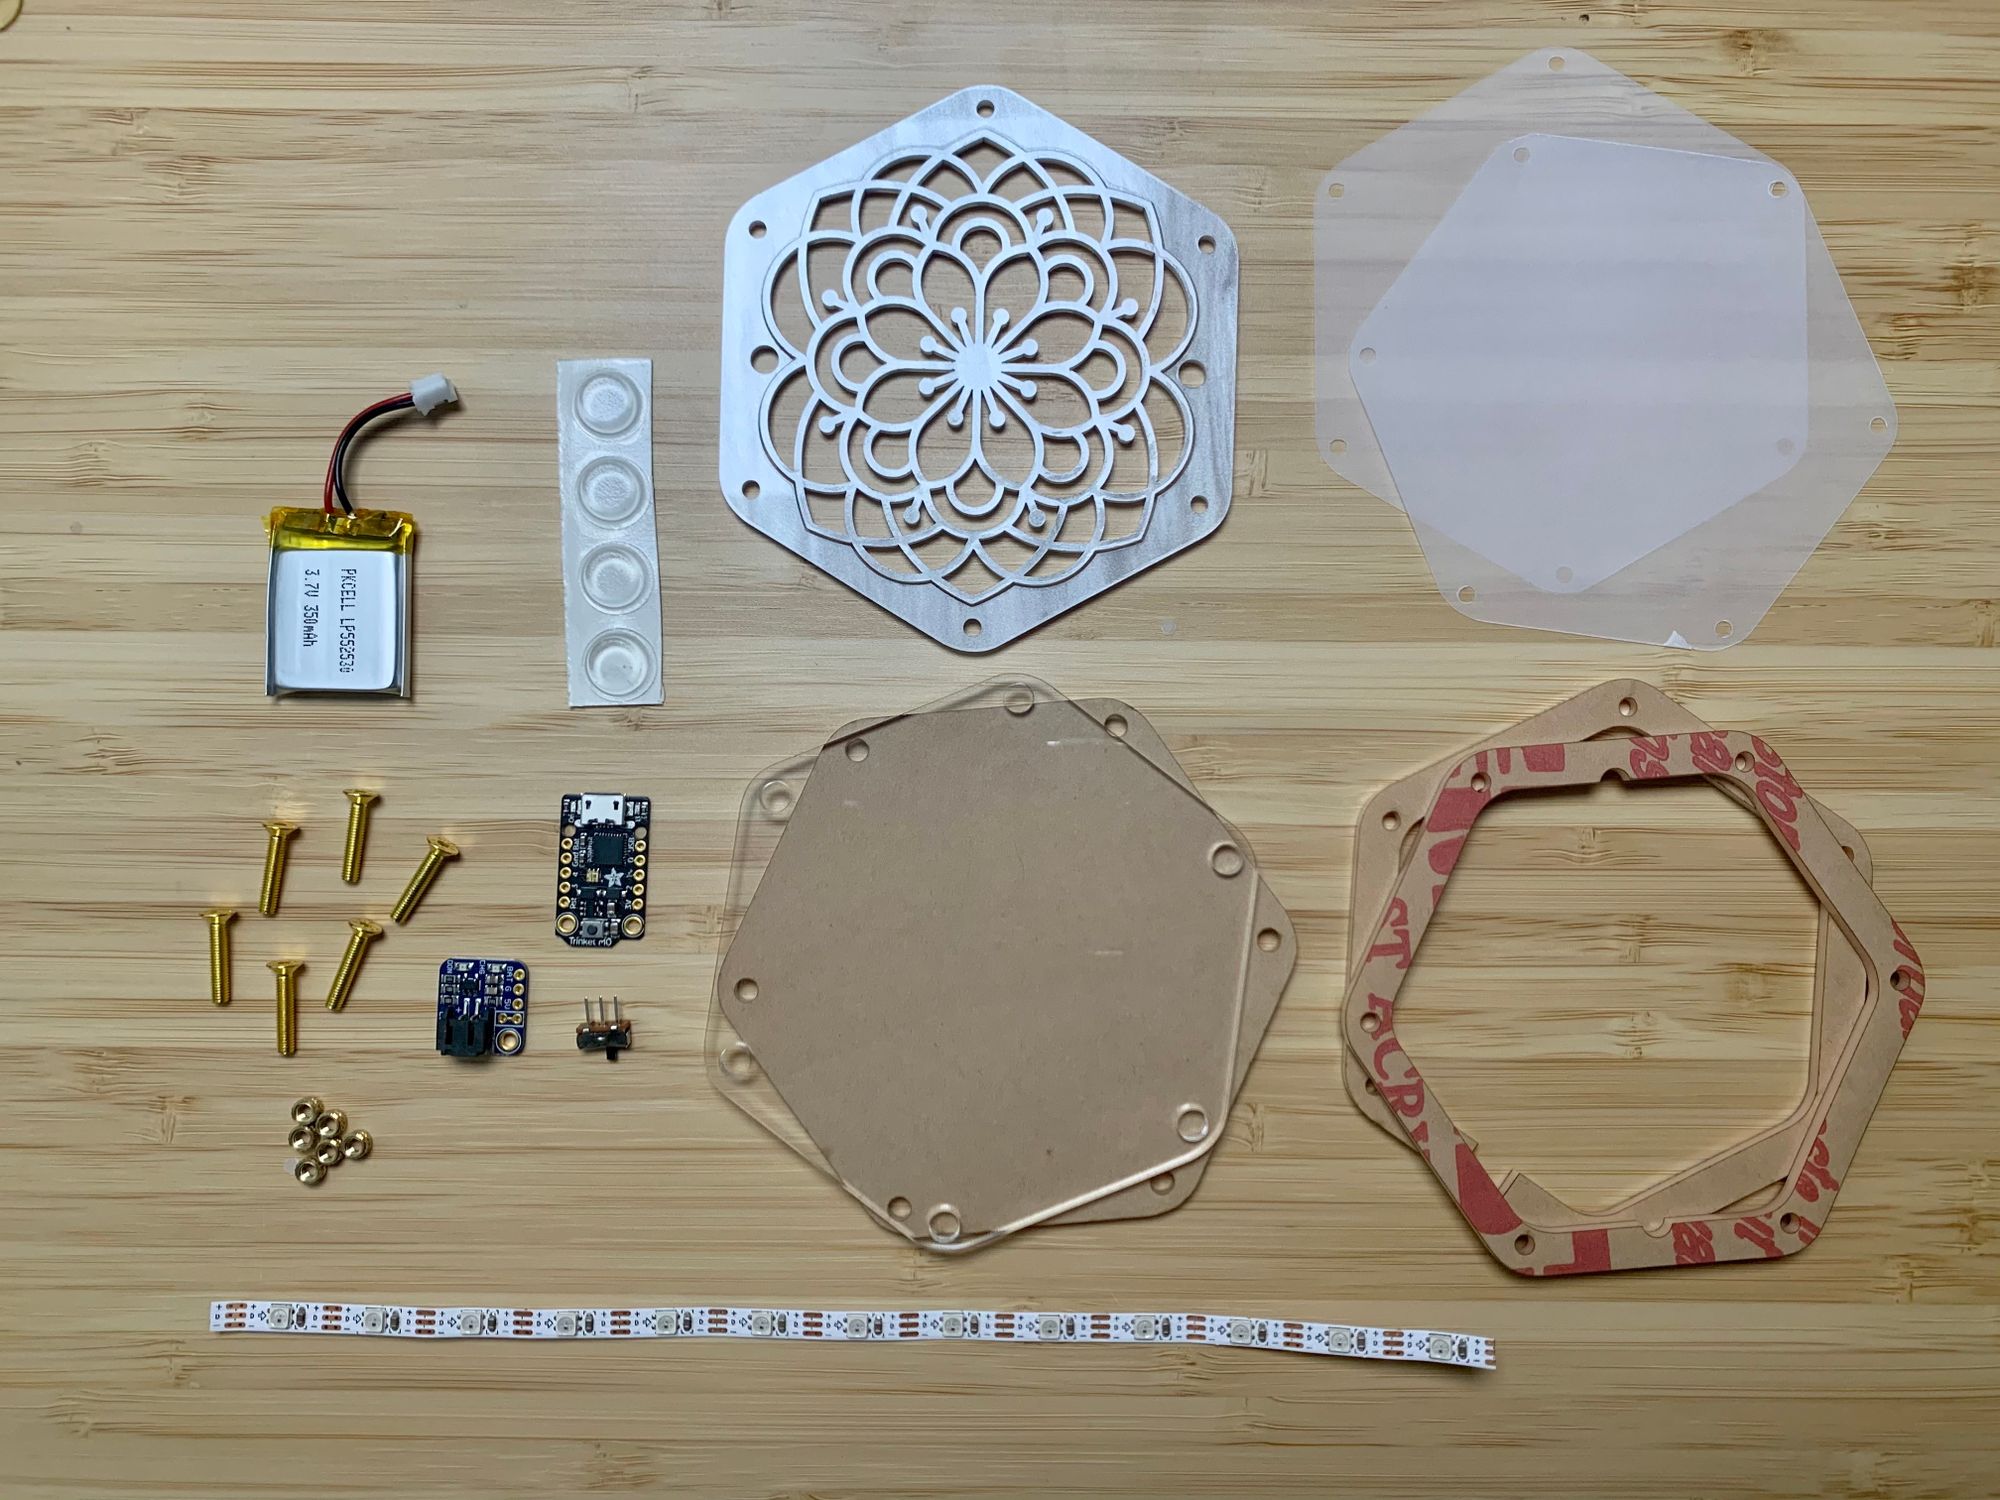
To diffuse the lights, I used a couple layers of transparent vellum paper (you can see it top right above), and for easier assembly I cut those pieces out with my Cricut Maker so that the screw holes would line up.
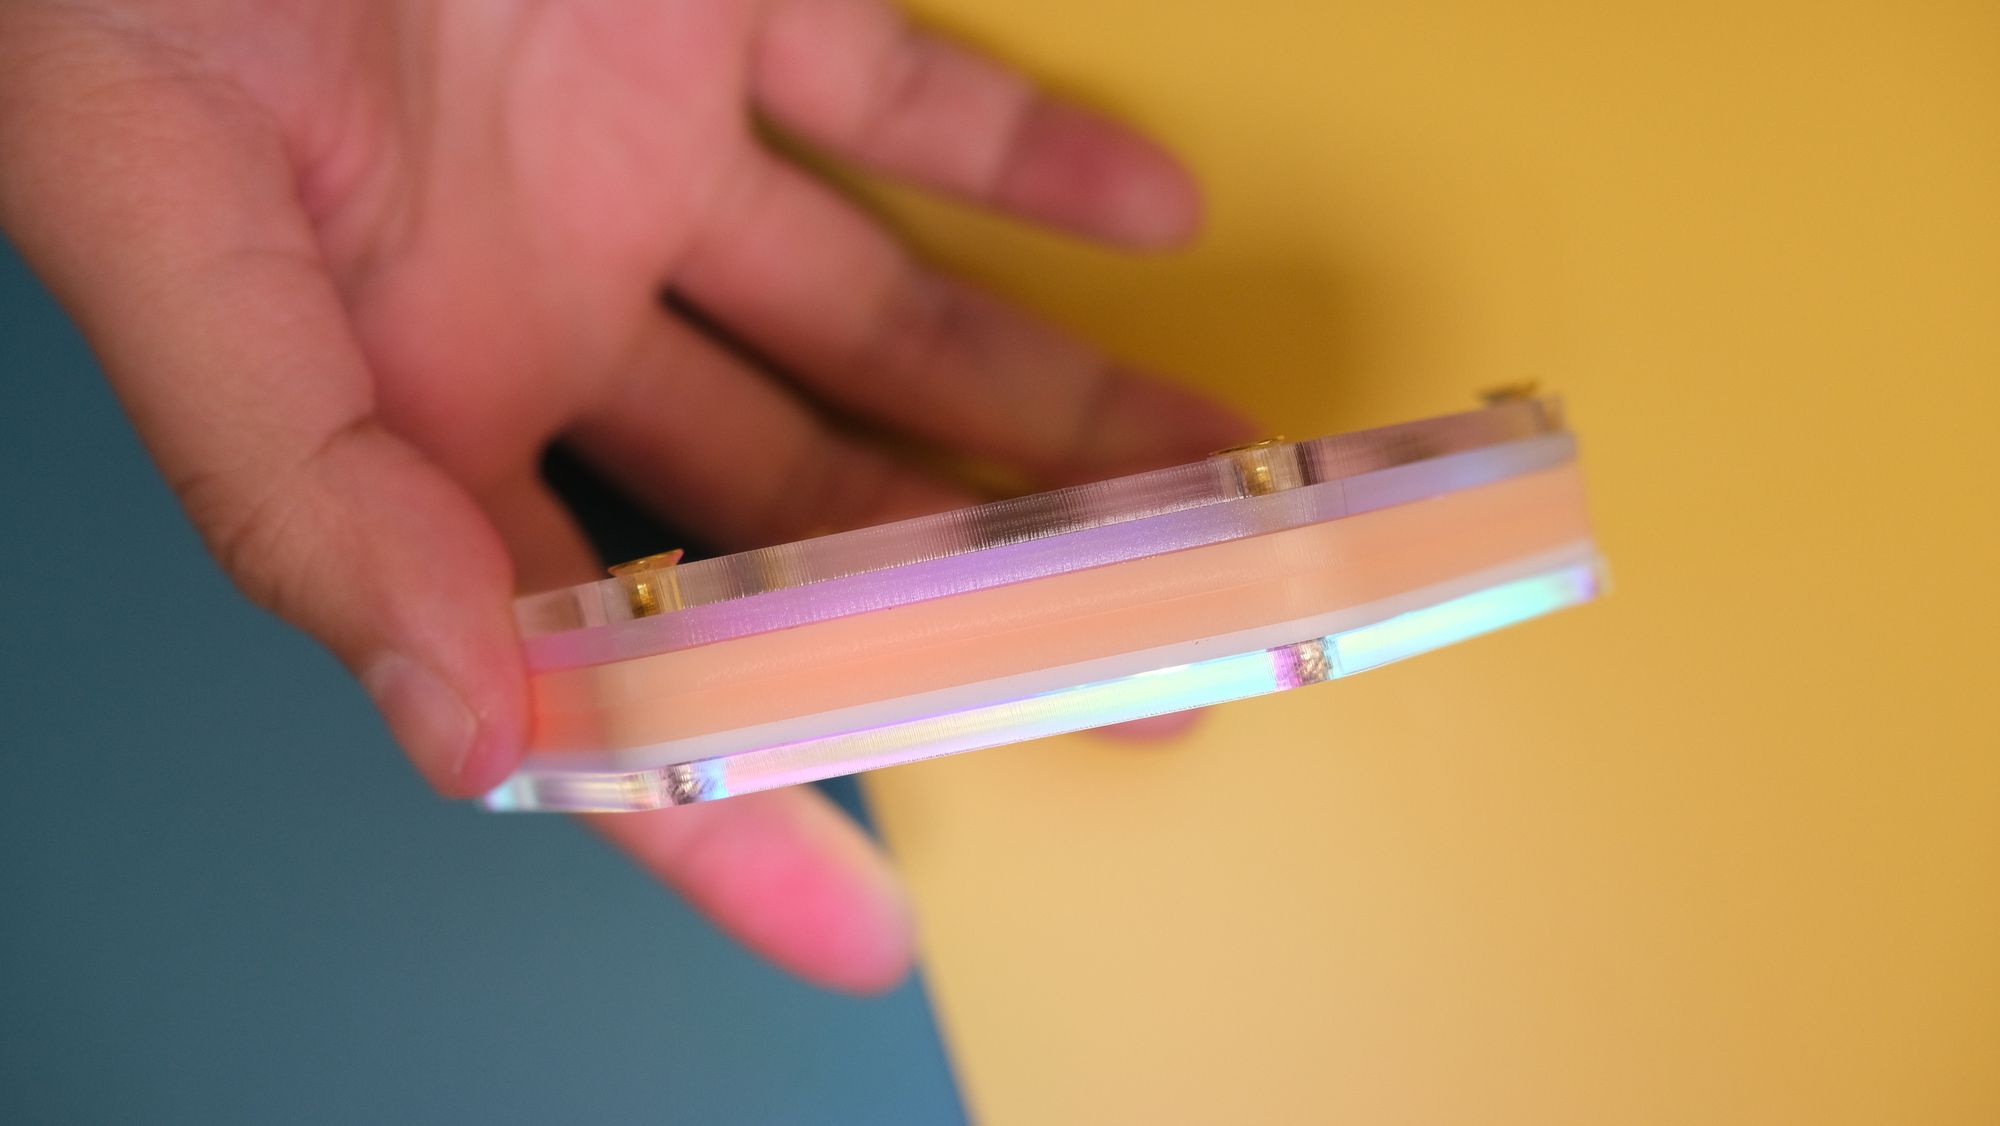
I actually had to iterate quite a bit on each layer, and had to use a combination of different acrylic thicknesses so that it was as thin as it could be while still being able to house all the electronics. Below is a picture of what I eventually ended up with:
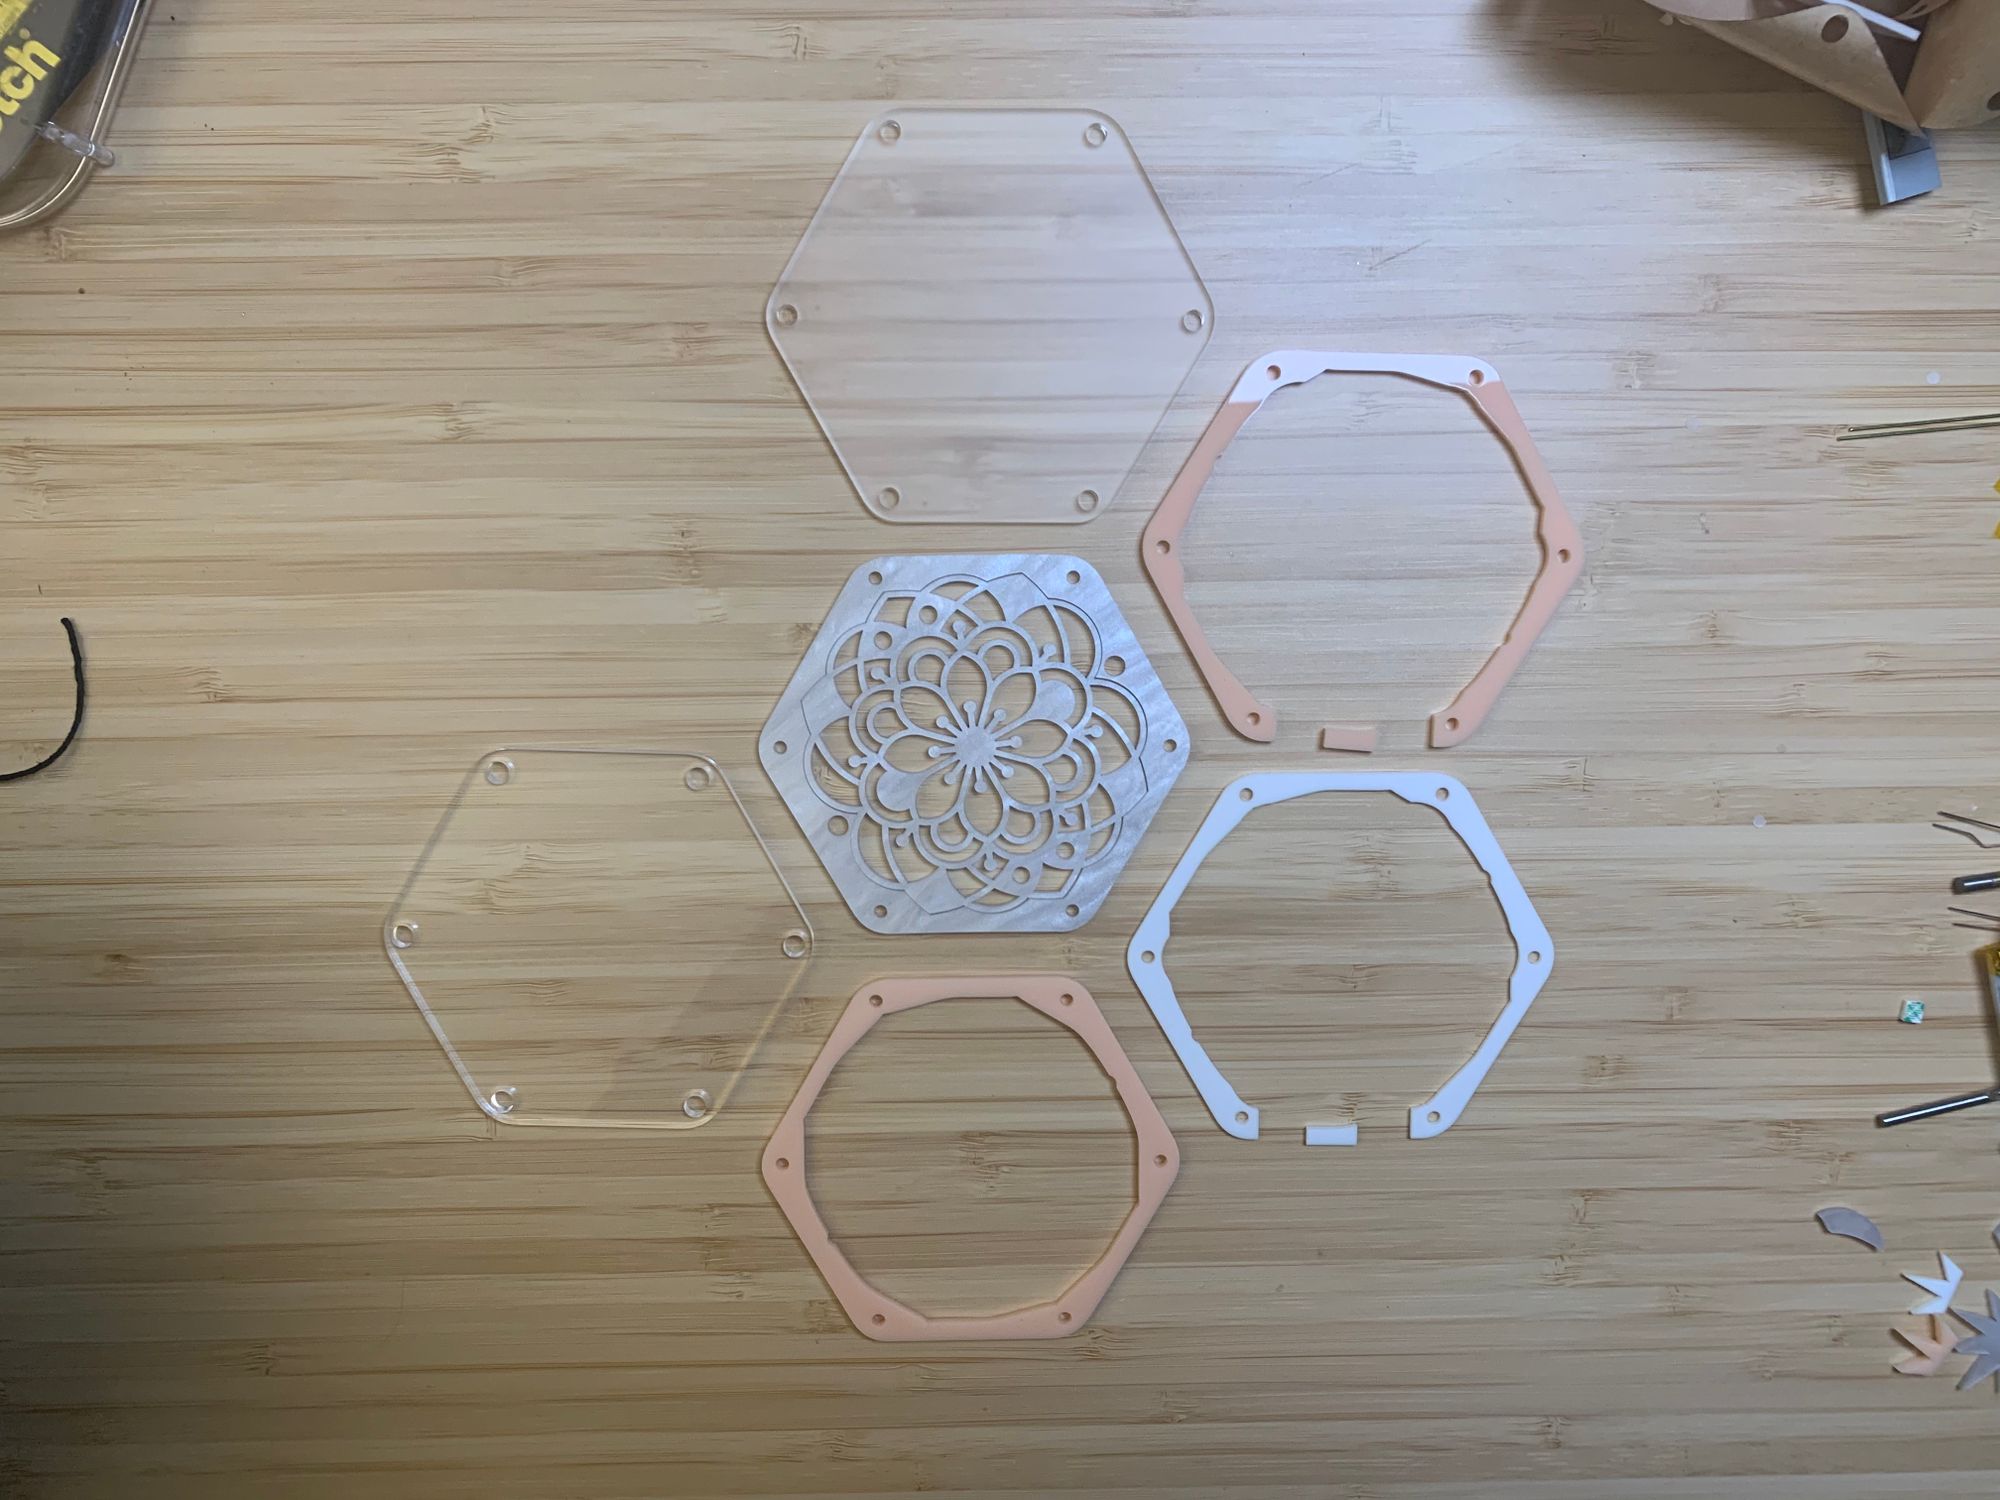
I am absolutely IN LOVE with this pearl acrylic, I think it really gives a subtle touch of elegance to this project, and I love how it pairs with the peach acrylic too.
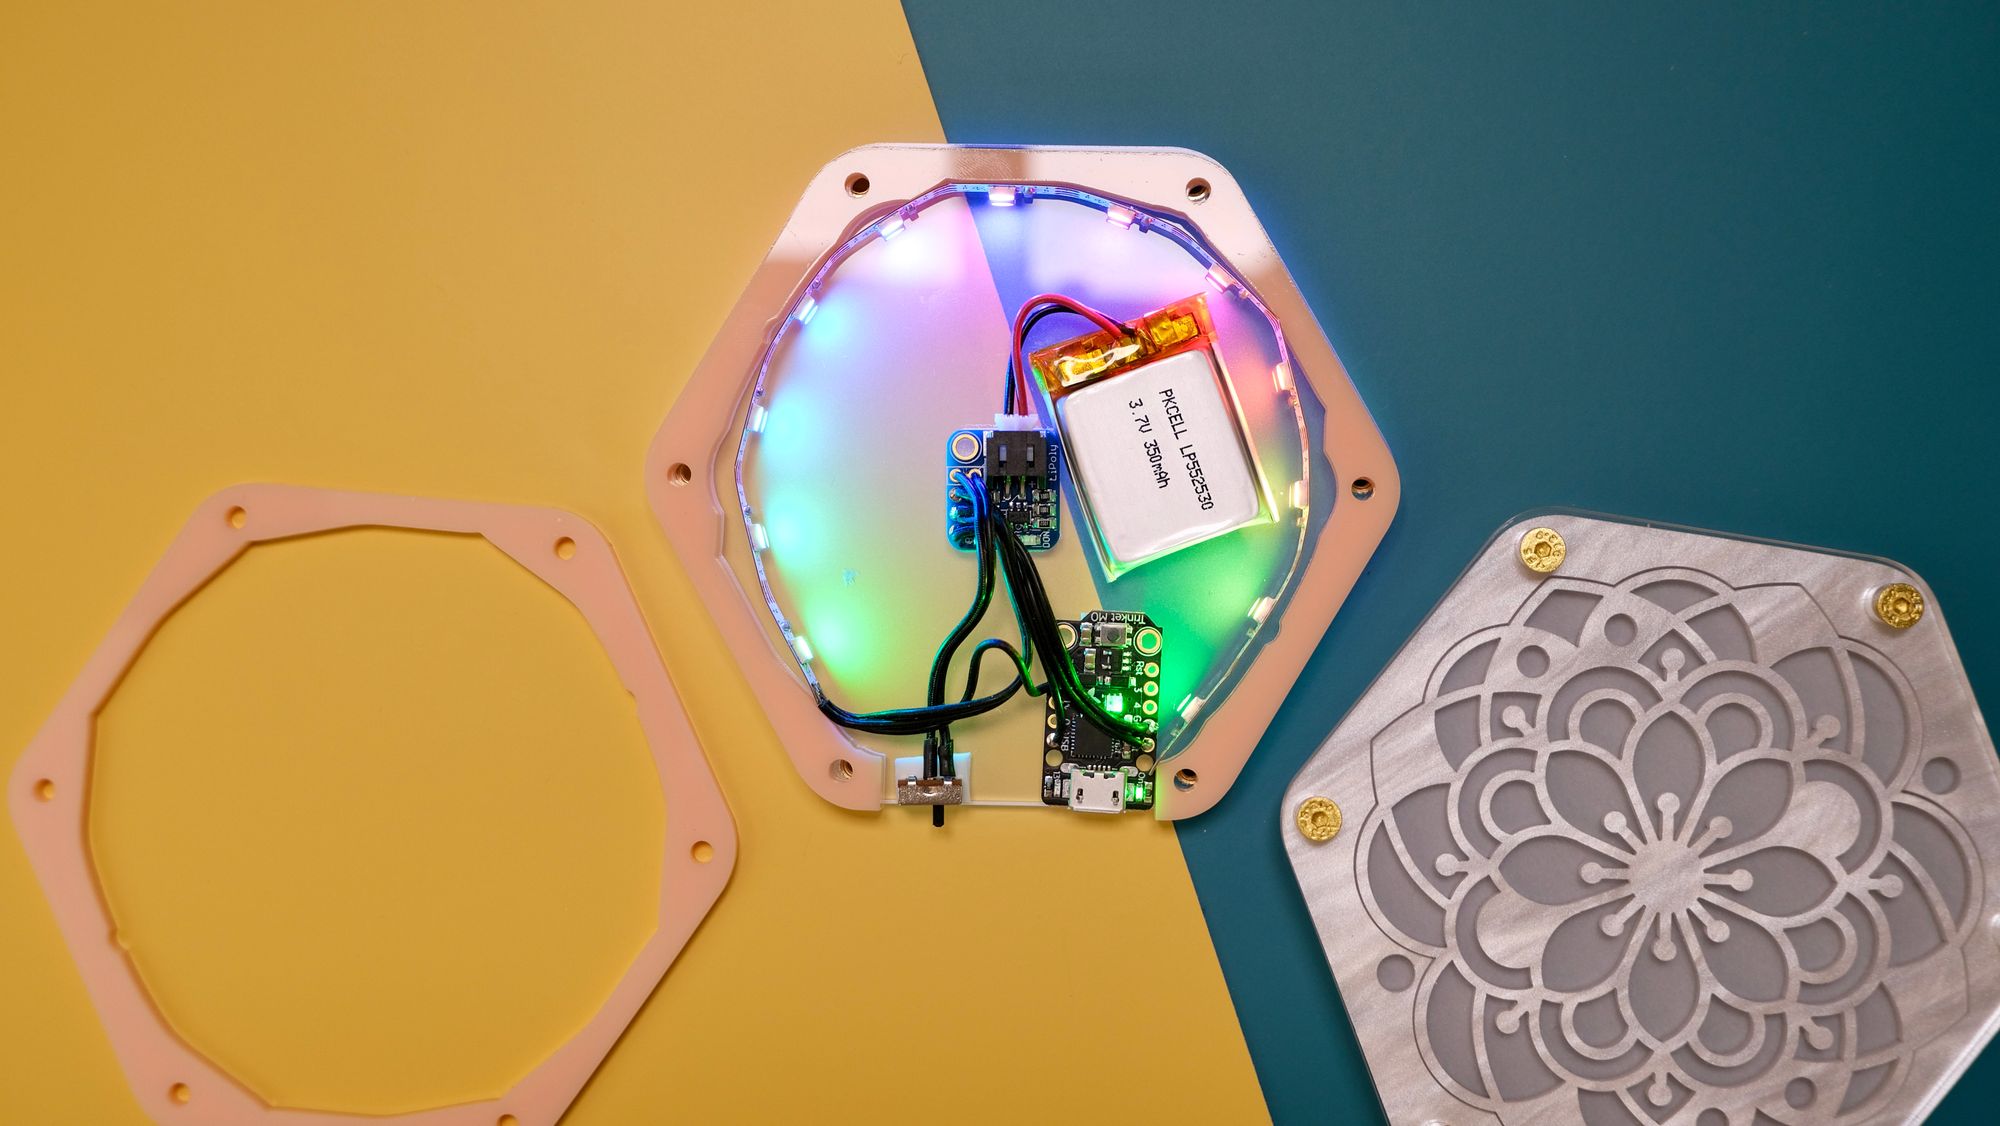
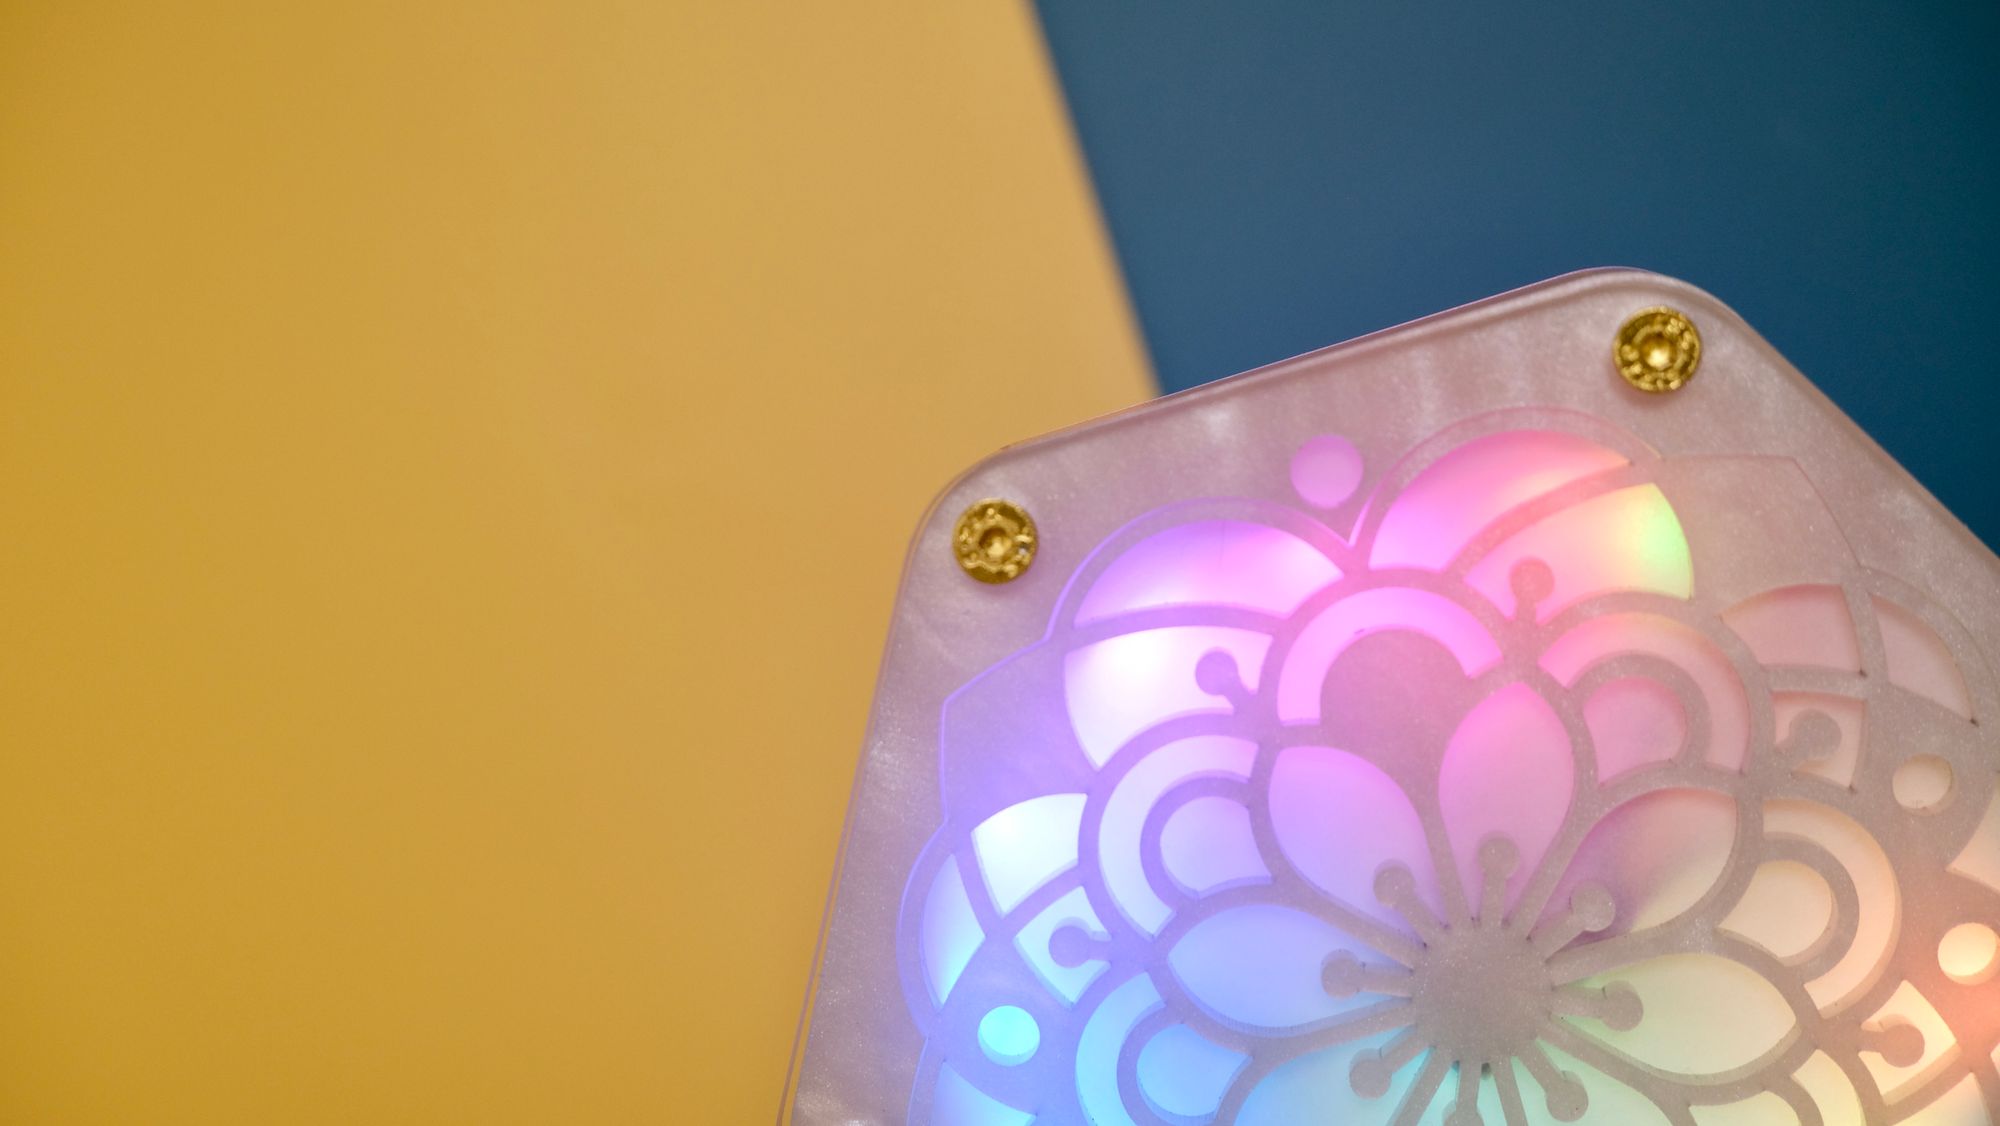
As you can see above, I arranged the Neopixel strip so that the LEDs were facing inward, and it turns out that having the battery right in the middle didn't take away from the diffused effect too much!
The coaster is rechargeable and can be turned off with a simple switch. Maybe one day I'll get fancier with some wireless charging and temperature sensing. 😍
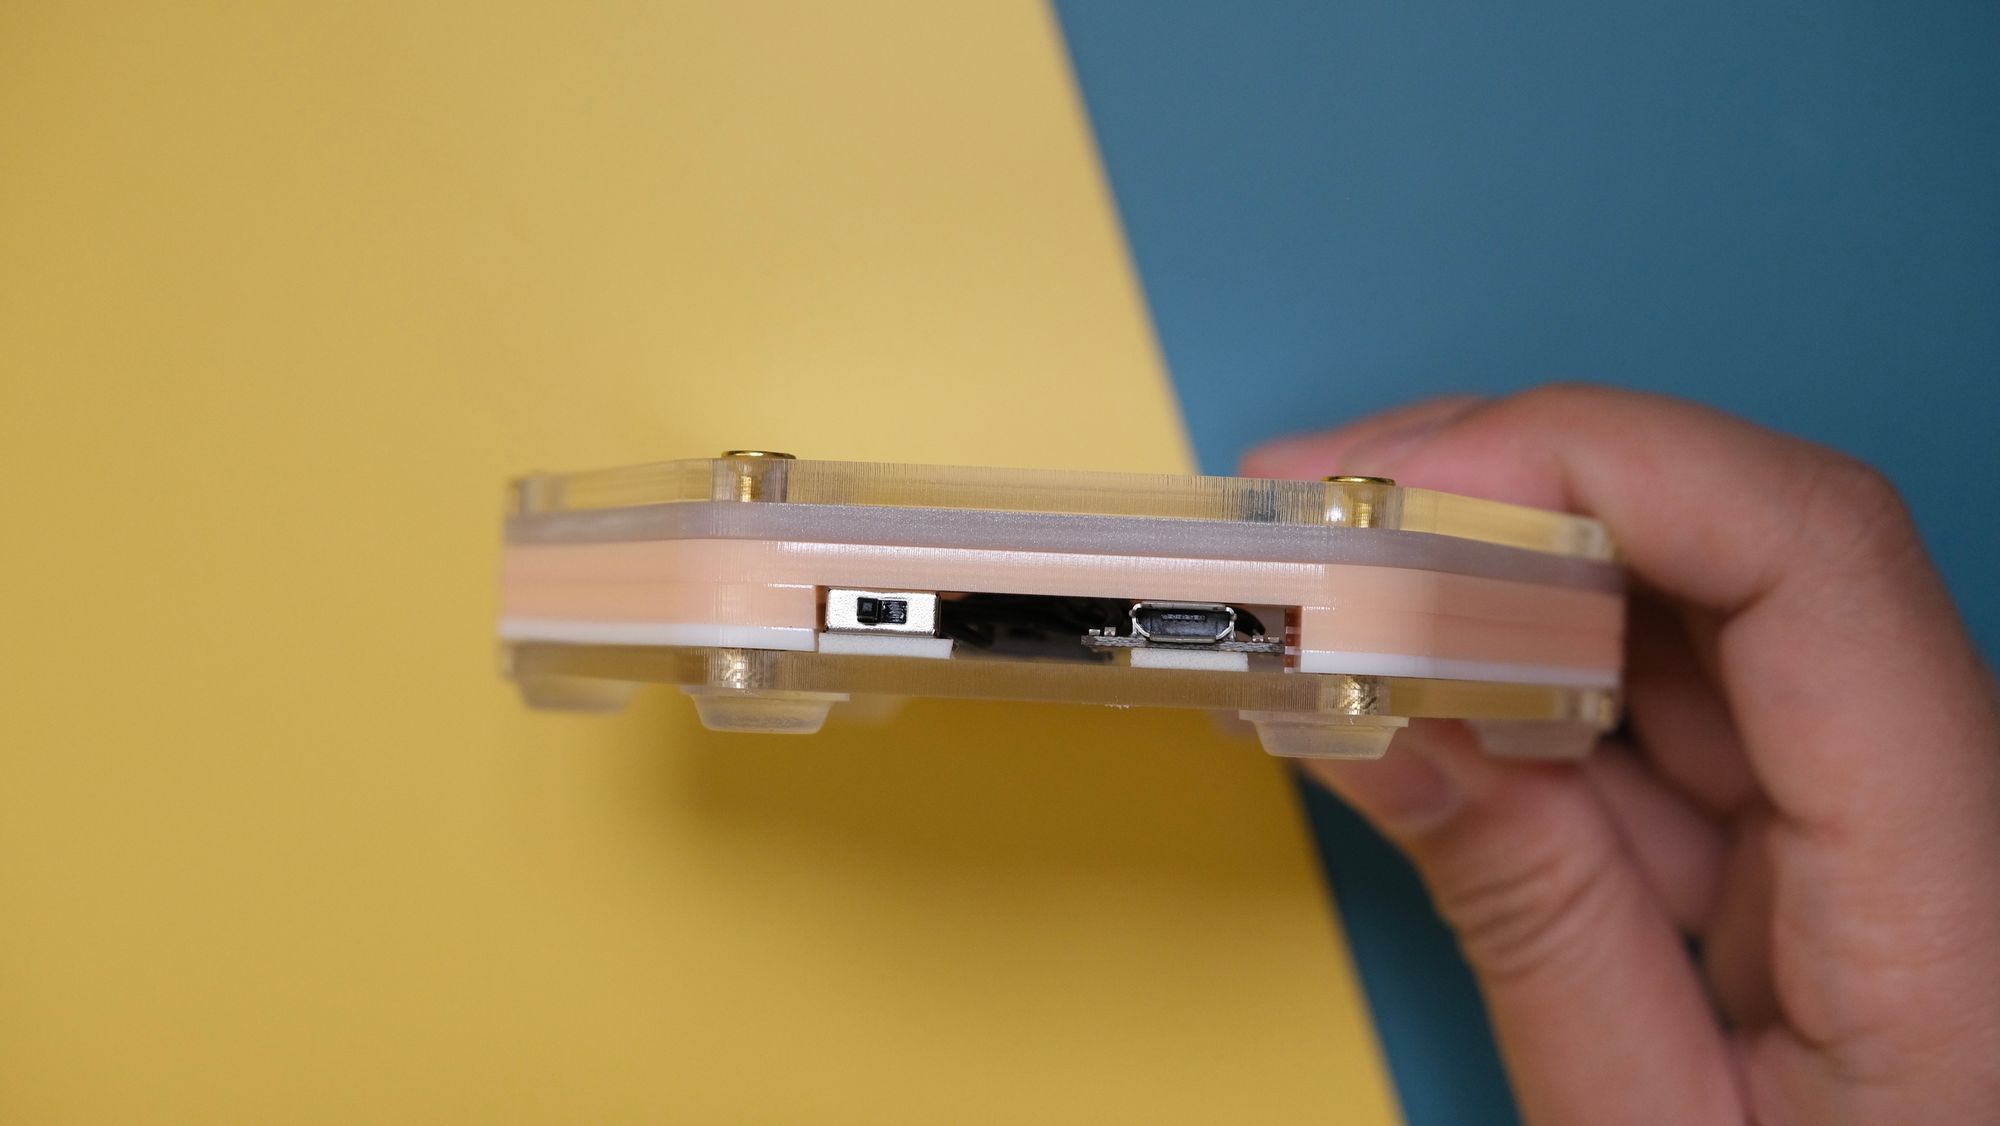
I wanted to use machine screws but also wanted to keep it as thin as I could, so I used these heat-set m3 inserts embedded in the bottom acrylic layer so that I didn't need to use nuts. In retrospect, it took a lot of iteration to get the holes sized just right, and I could have avoided this step since I eventually put rubber feet that were thicker than machine nuts anyway? BUT, you can't deny that it is sleek af ✨
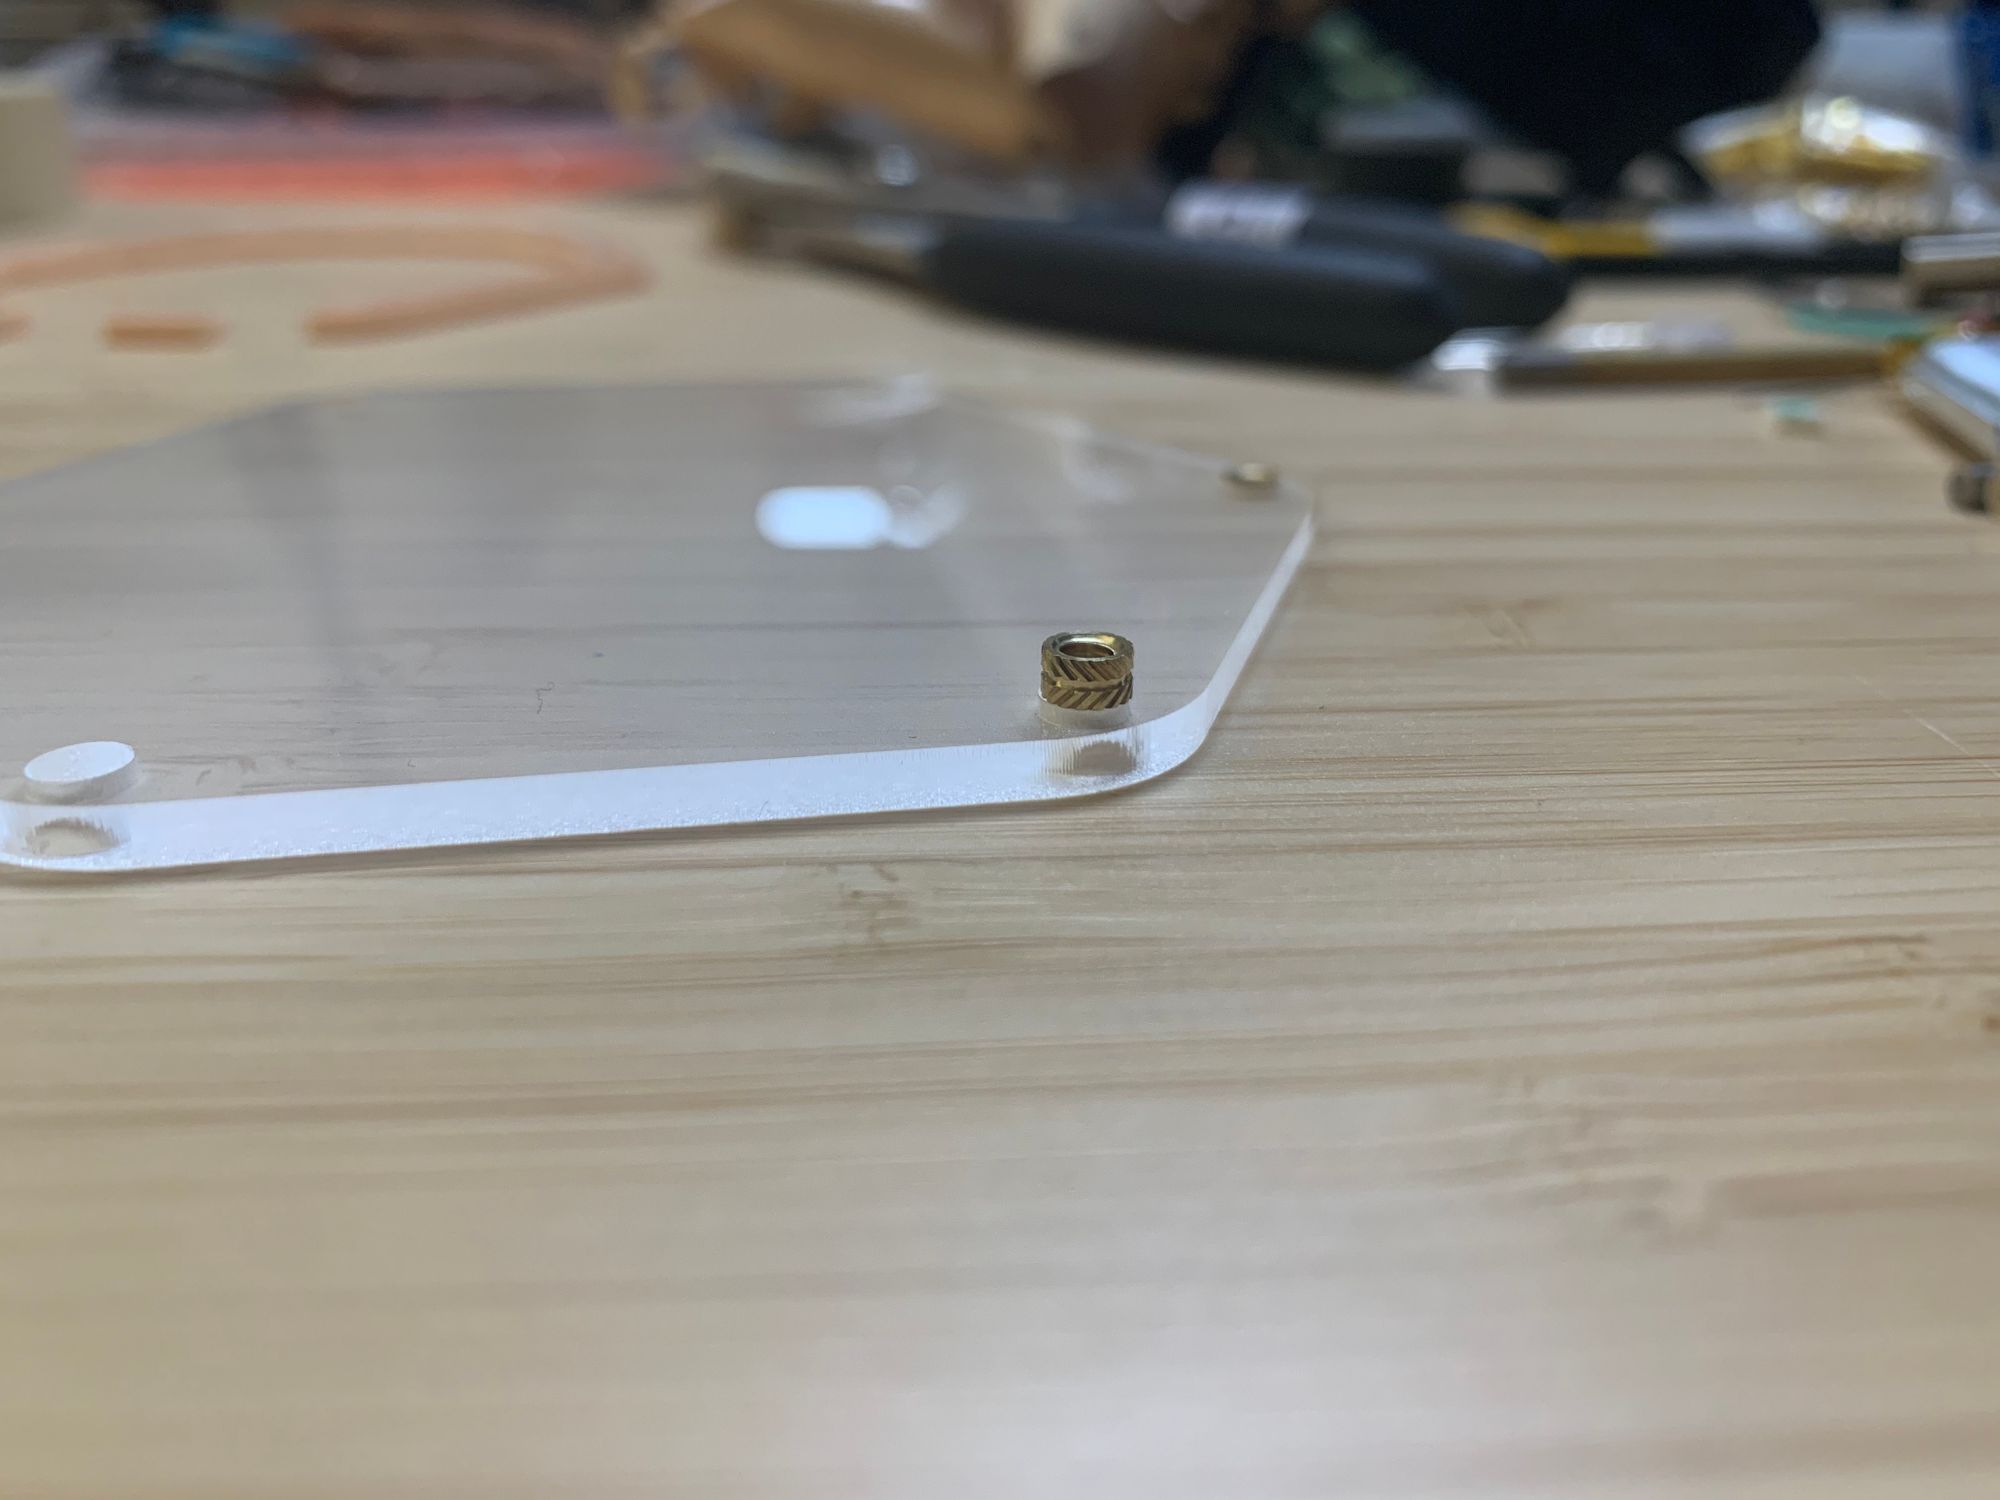
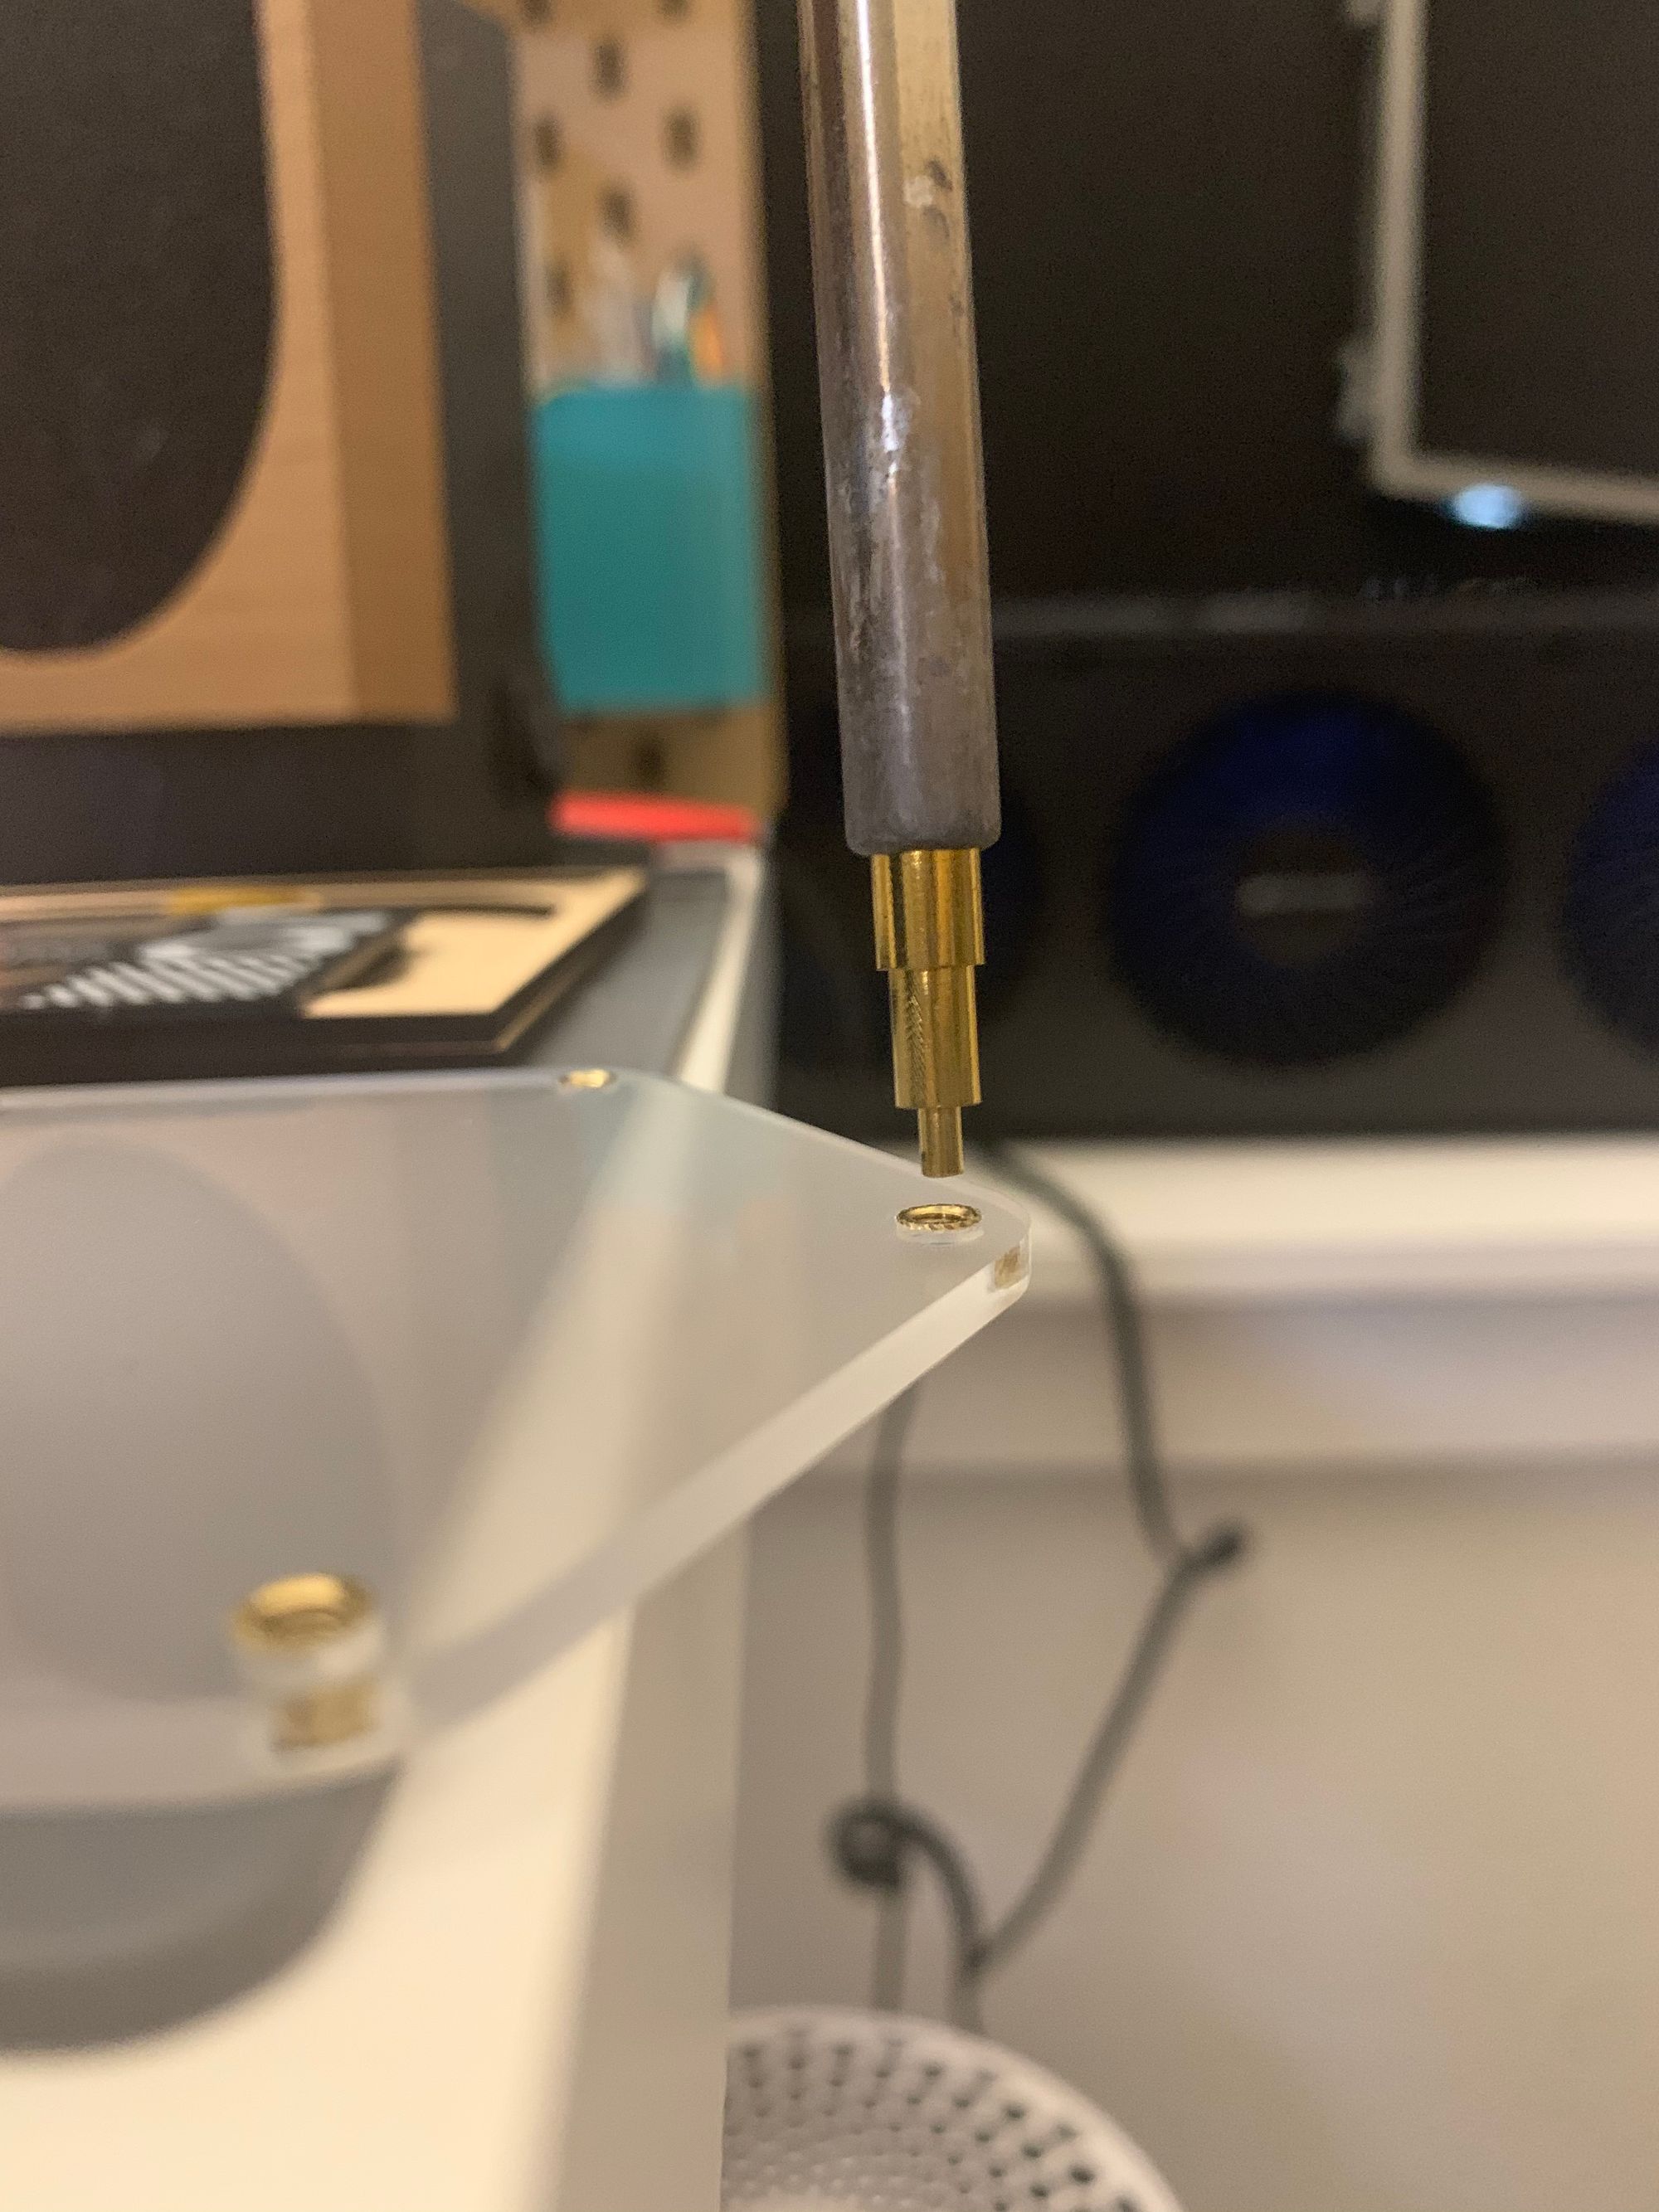
I also spent quite a bit of time trying to make sure that the flathead screws had a countersunk look to them. I wasn't entirely successful as you can see below, but it's pretty good results!
The rainbow animation is a classic from Adafruit's CircuitPython Neopixel Essentials, and I didn't feel like I had to create anything more elaborate than this. Check out the video below if you want to see the subtle animation in action (click here if the embed isn't working for ya):
Build details
If you wanted to make one yourself, you can follow this circuit diagram to connect the Trinket, M0 Neopixel strip and the LiPo "backpack" to make the battery rechargeable via the microUSB port of the Trinket M0
The code is written in CircuitPython, mostly taken from CircuitPython Neopixel Essentials. Short and sweet! Check it out here if the embedded code below doesn't show up (this happens on mobile sometimes). If you need more information on CircuitPython and how to use it (v easy i promise), start here!
You can download the vector files for laser cutting from this Thingiverse page!
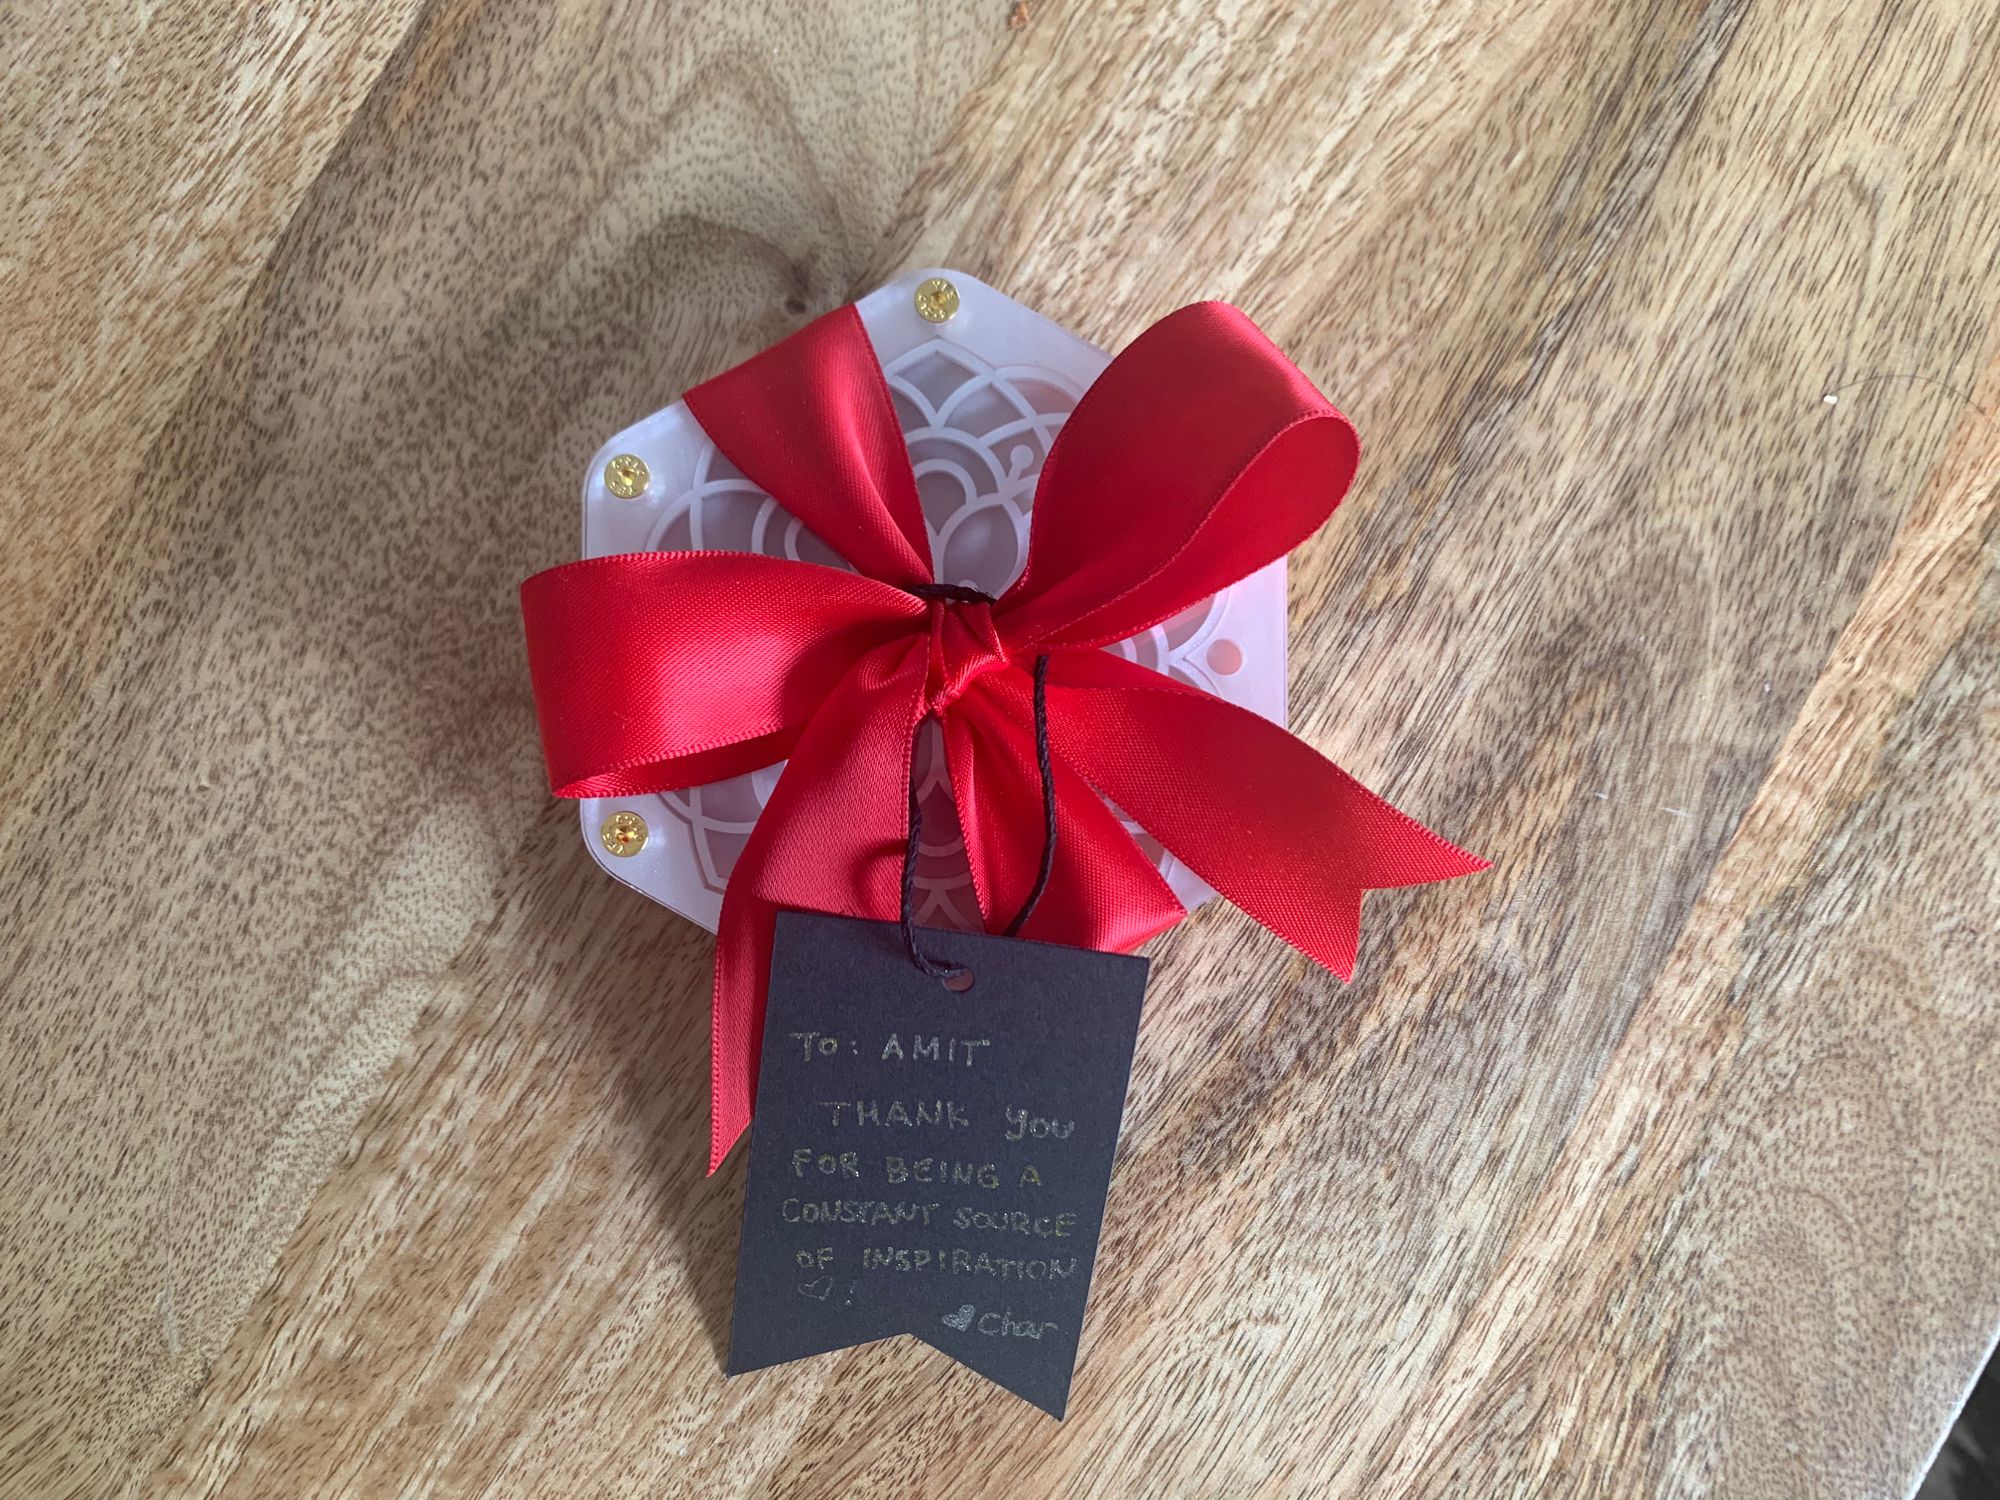
I had to do a lot of iteration for this project, but I felt like it was important that I celebrate seeing an old friend again. He's always been a source of inspiration for me, and I wanted to show that in some small way.
I put a big red bow on it, and met up with him in one of the outdoor food parks in SF. There was fun, laughter and some good reminsicing. Nothing like a (safe) non-zoom hang out to uplift spirits and deepen friendships!
Thanks for reading, I hope you enjoyed the journey. Maybe this will help someone (you?) create a special gift too! Share your creations with me on Twitter, I'm @chardane, and if you want to hear more about my gifting adventures, subscribe to this blog using the big Subscribe button below! 💖