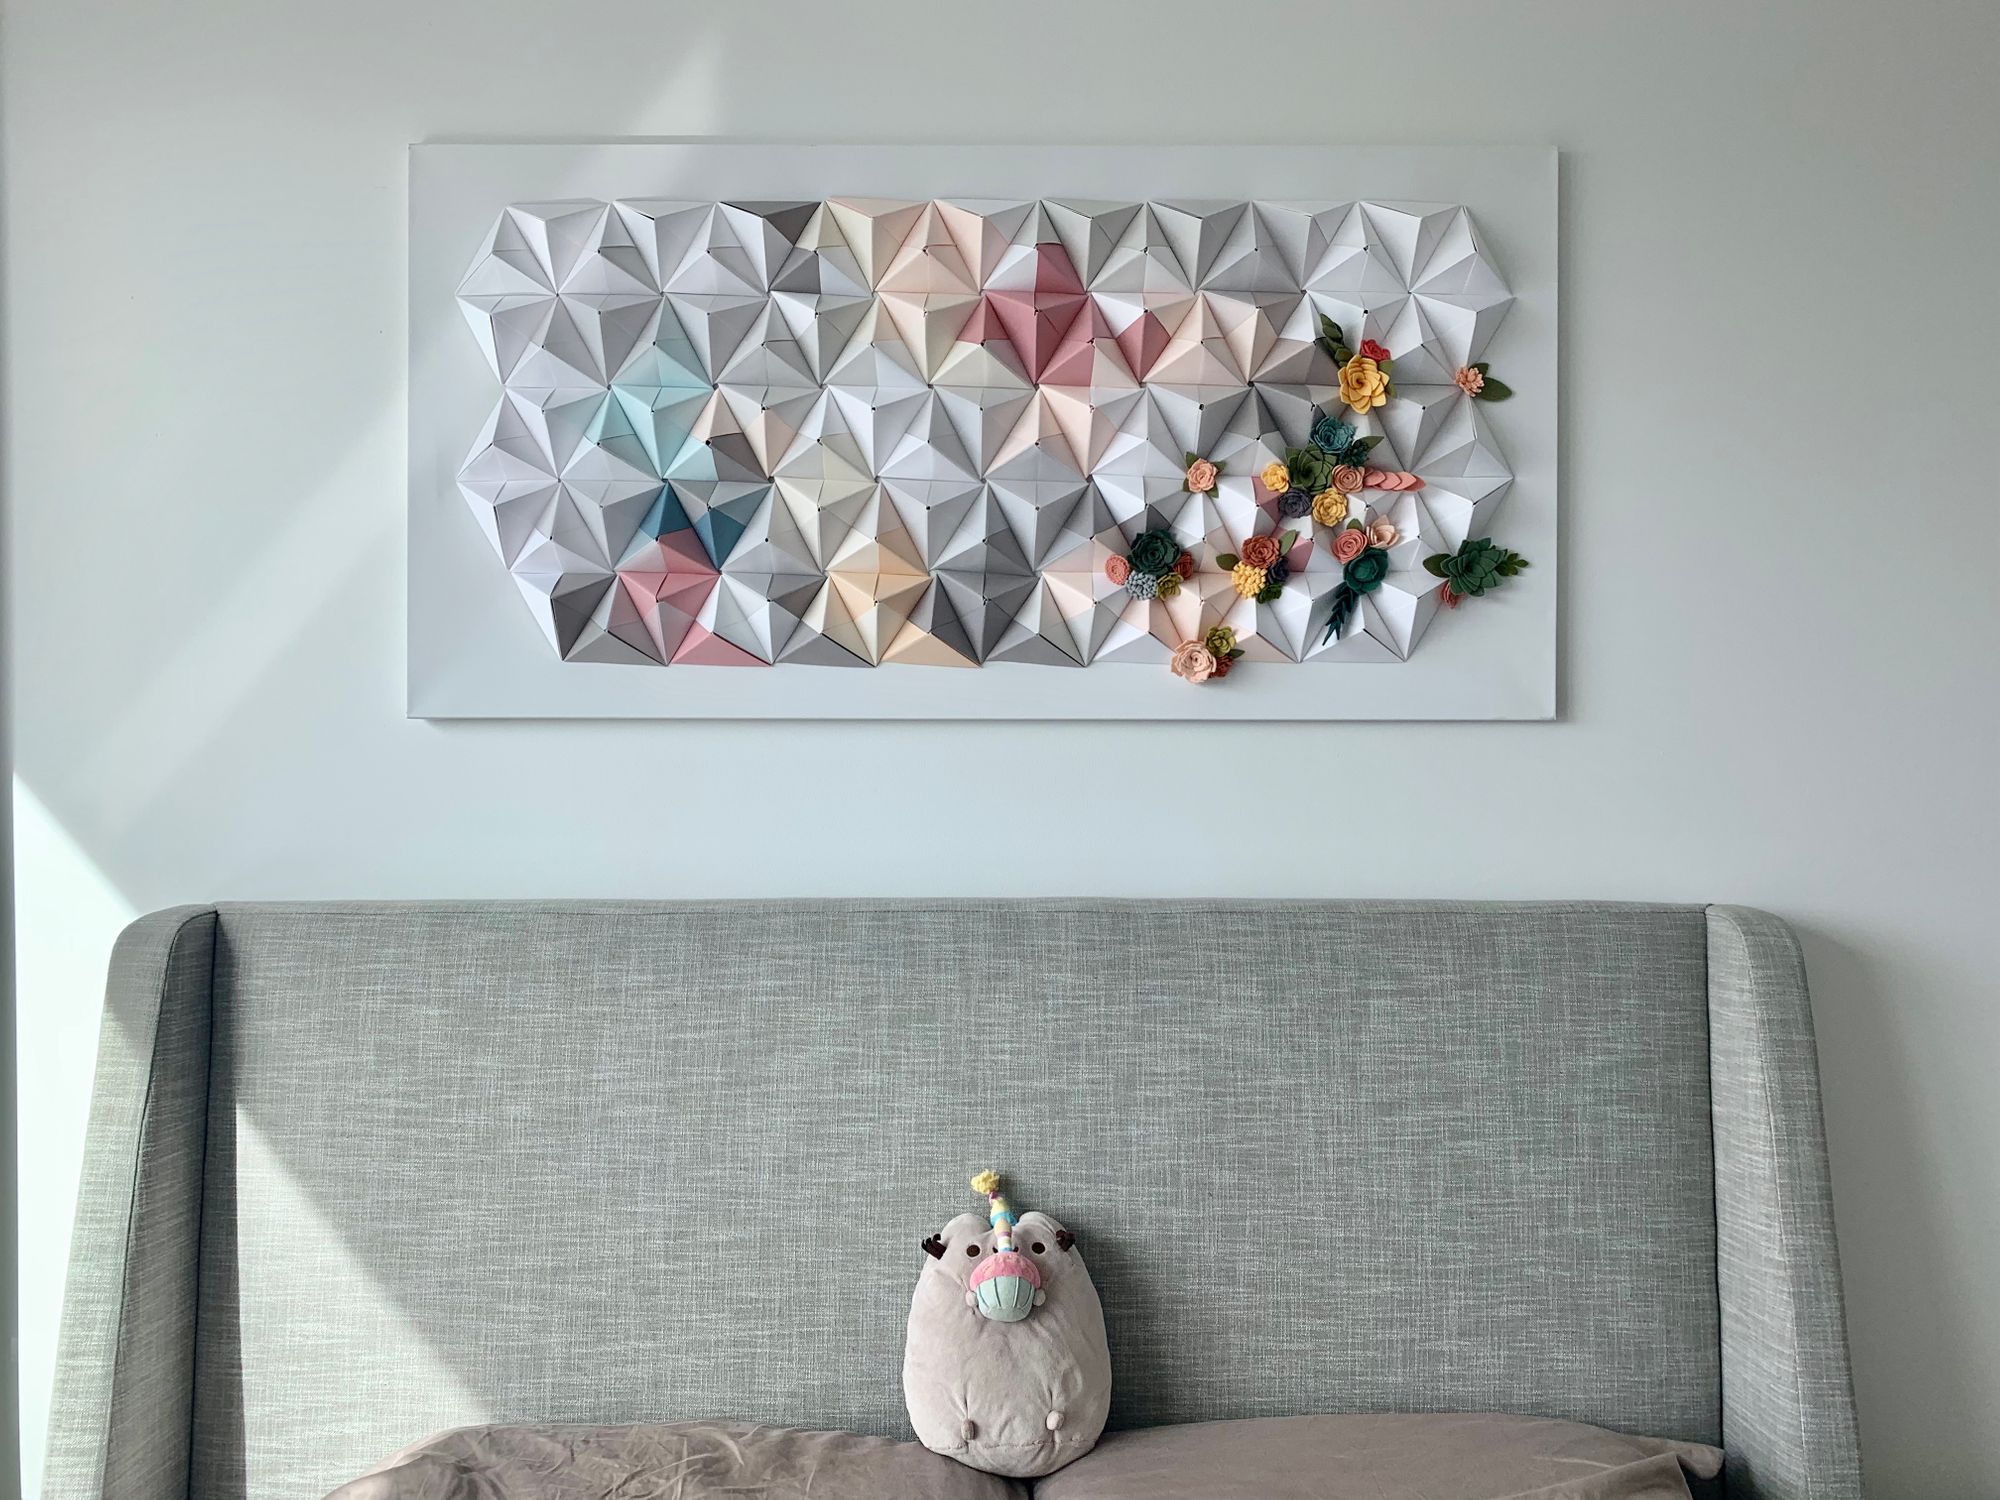
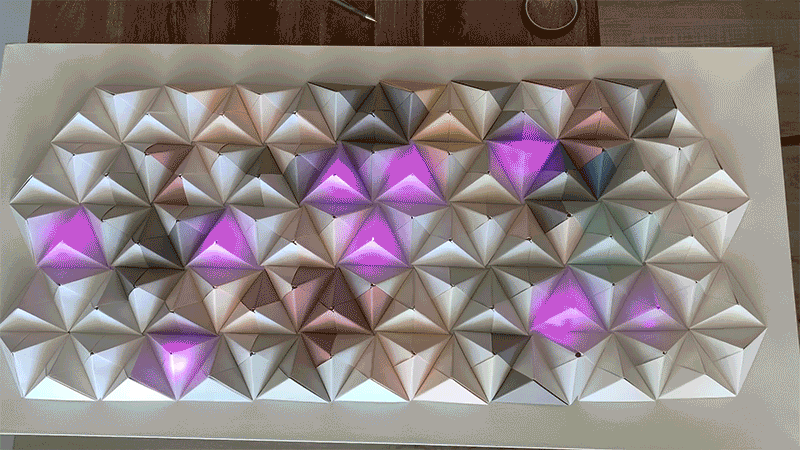
This post details my build process for this google-home-connected origami wall art, powered by Particle and inspired by GiantOrigami! I call this piece Serenity. Read on to find out how to make your own.
Background Story
I wanted to dress up the drab white walls in our bedroom, starting with the space above the headboard. I scoured Etsy and other art marketplaces, but I didn't find anything that I was really enamored with (plus a bunch of the choices were just a touch out of budget.)
So I decided to embark on a journey to make my own wall art for the bedroom. I came up with a set of requirements:
- Muted pastels, and possibly something that wasn't just a flat picture.
- Will have to be light enough so that if it fell on our heads in the middle of the night because of an earthquake, we'd be ok.
- Easy to move when we eventually move out.
For a few months, I searched and searched for inspiration, and finally came across this tutorial from a post on Design*Sponge, designed by Coco Sato of GiantOrigami.
Two thoughts immediately emerged:
- 😍😍😍!
- 🤔 can I put LEDs in this?
Turns out, I can. You can too. Let me show you how.
The build begins
First, I needed paper and something to attach the origami sculpture to. I went with a gallery canvas for the latter because of requirement #3 above, and spent quite a while strolling down aisles of art stores and grabbing bunches of papers to feel the texture and match colors. I also tried to find the most economical vellum (transluscent) paper. Here's the list of what I came up with:
- Canson Mi-Teintes papers in several colors – I liked these because of the weight and the color choices available
- 24 x 48 stretched canvas from Michaels
- Canson Vidalon Vellum
- A bone folder – I didn't know it existed until I saw it. Best discovery.
And for the electronics:
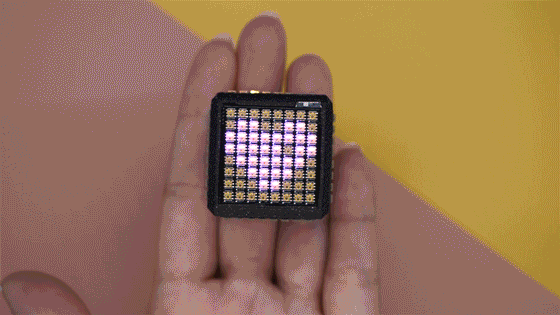
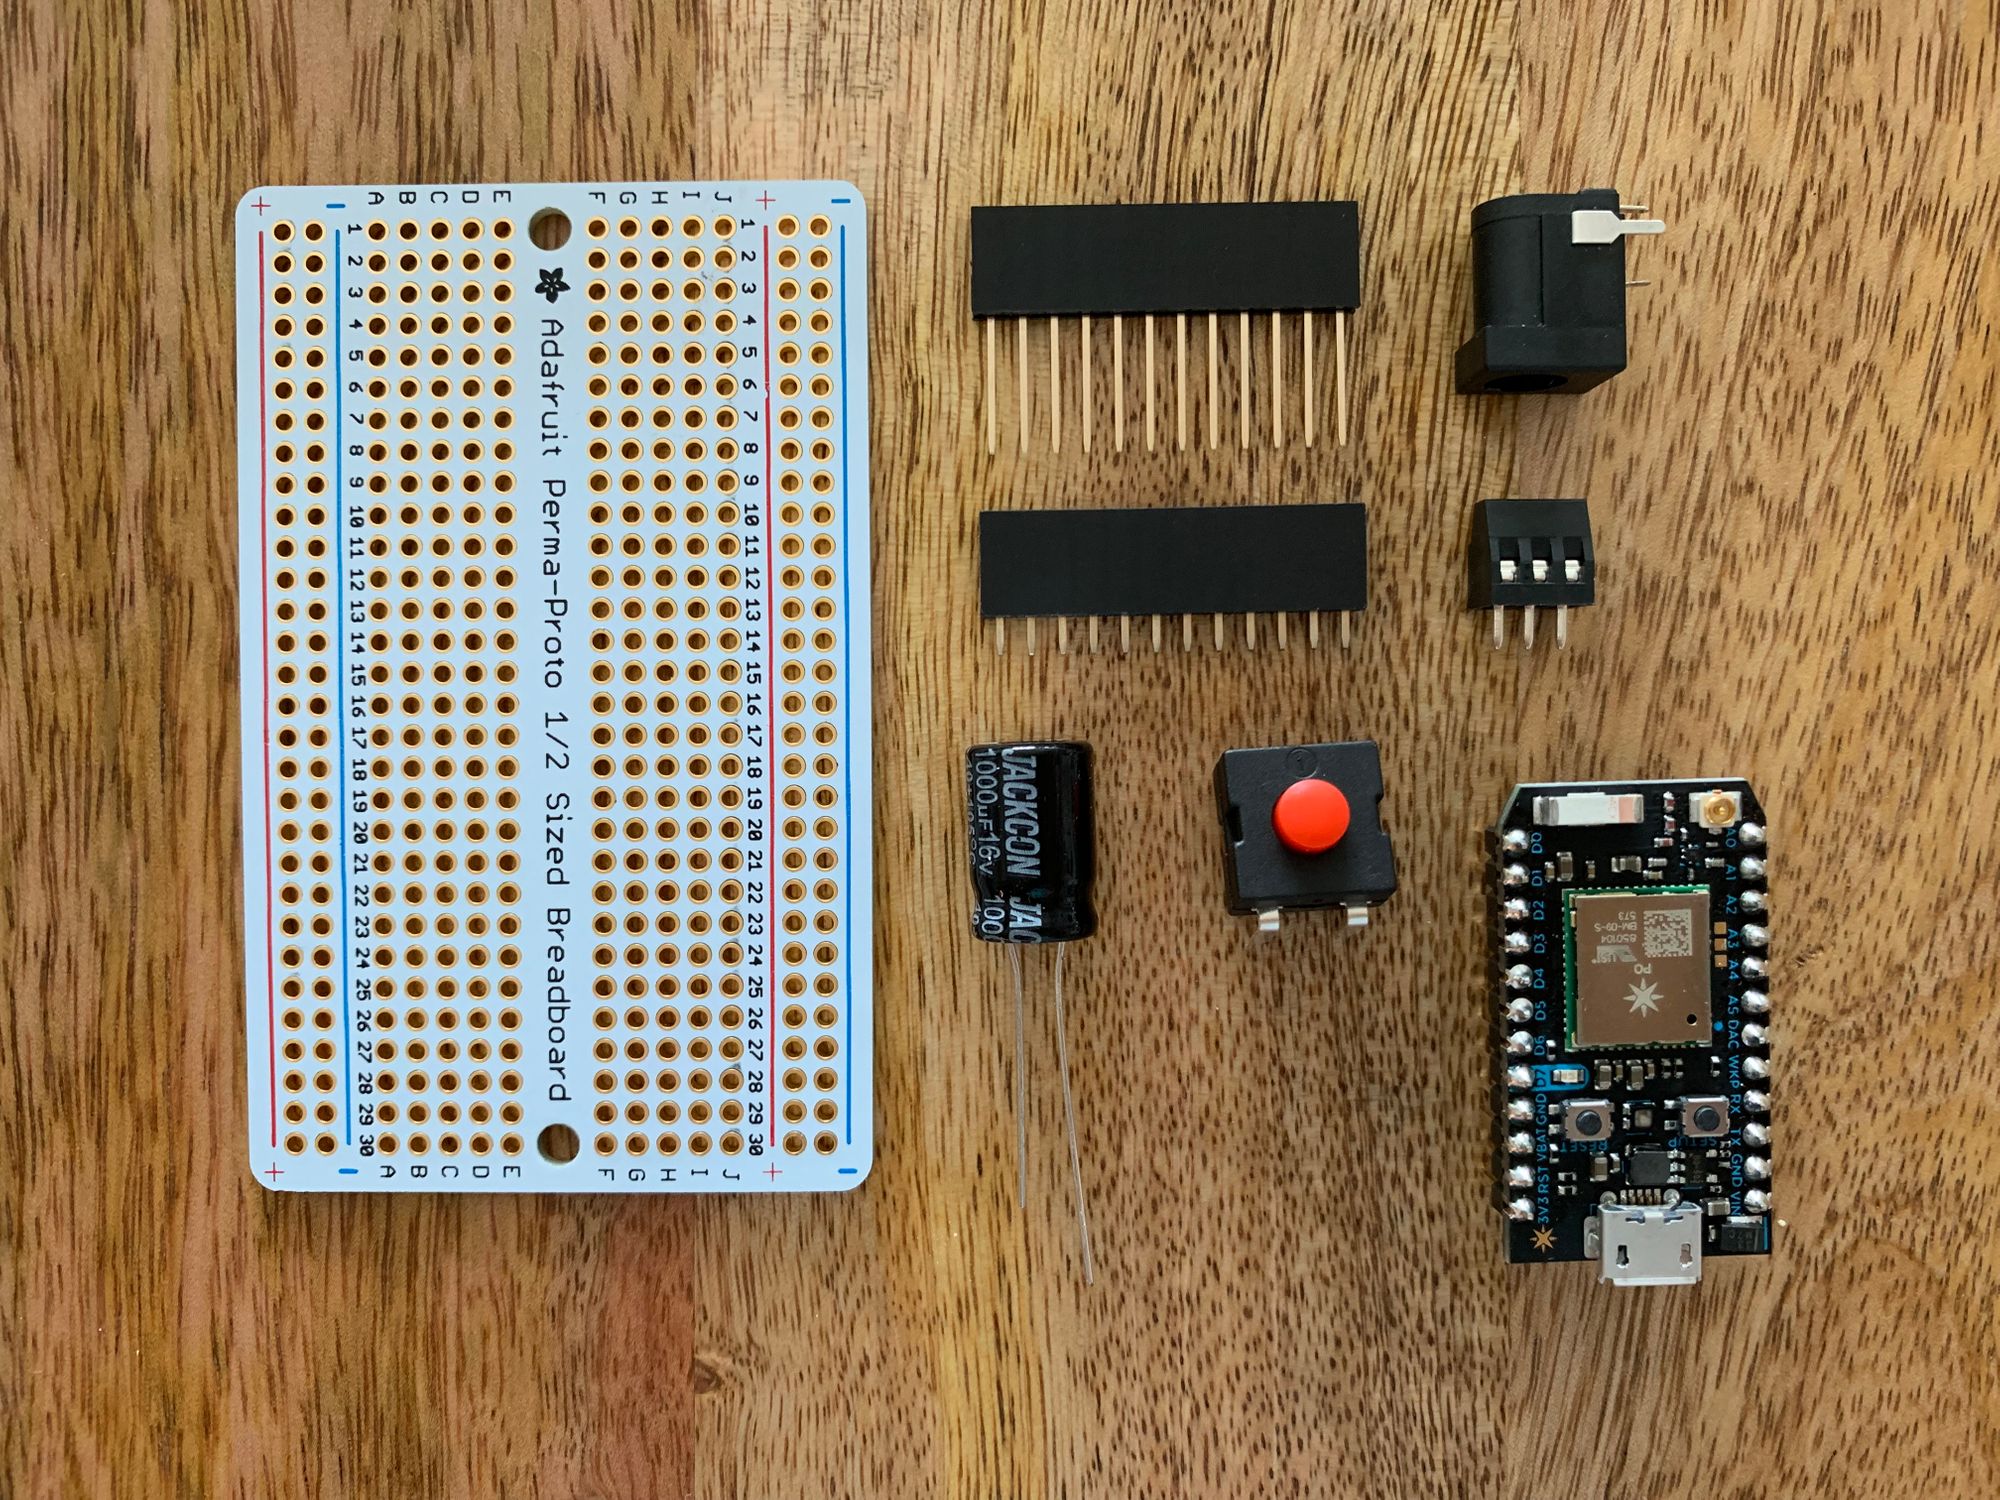
- 10pcs Neopixel Jewels
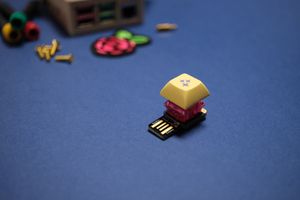
- Particle Photon board
- Adafruit perma-proto board
- Wires, headers, solder.
All the cuts and folds
Then I started cutting paper to size. I chose to cut squares of 8.5" x 8.5" because I figured I could mix the Mi-Teintes paper with some more common regular sized papers if I needed to.
This is the step I regret a little bit – I decided to get the 19" x 25" Mi-Teintes paper because I'd be saving a little bit compared to just buying twice to thrice the pieces of paper in the regular letter size. That meant I had to cut the 8.5" squares manually. 😅 It was actually kind of fun, it just made this project take a little longer.
After I felt like I had enough squares to work with (also after I got tired of cutting), I started folding Sonobe modules, following the instructions on that Design*Sponge blog post.
Head on over there to see the steps, and then please come back 😄
DIY Origami Wall Display
Sonobe modules are used in modular origami, these little pieces can be combined to transform into a lot of different origami objects.
Scroll through this insta post for some timelapsed goodness!
A note about colors
When I was choosing paper colors, I had a couple of guiding principles I made up:
- Subtle shade differences – in the article, Coco mentioned "I find that combining subtly different shades creates a magical effect," so I decided to find colors that are different shades of each other to attempt to find that magic.
- I had planned on a grey background, so I wanted a couple of shades of grays and whites. I eventually decided to just stick with the white background, but the grays still worked out.
- I picked two "main" colors, pink and blue, and picked a couple shades of each. I figured I'd want the asymmetry of warm and cool colors
- I also had a yellow in there because... I'm not sure? It looked nice when I put it next to the other colors 🤷🏻♀️
All that is to say that colors are hard to pick, and I just muddled through and mostly went with my gut, with the general principle of "shades of colors next to each other".
The build... stopped?
Honestly at some point in this project I procrastinated A LOT. I was overwhelmed by how much folding I had to do and the uncertainty of how everything was going to come together. I was finding it hard to visualize how the end result would look like because you have to really weave the Sonobe pieces together, see what it looks like, and disassemble + reassemble. I kind of fear uncertainty and I let that paralyze me for a bit. I finally was frustrated enough with myself and that blank stretch of wall above the bed that I just had to let go of all that and just continued. When in doubt, the best you can do is move forward. I kept folding.
The build continued (eventually)
I folded, failed, and folded some more. Once, I spent 3 hours folding, only to find out that I was folding it wrong! 😅🤦🏻♀️
Slowly but steadily, I kept making progress. I finally reached a point where I was pretty happy with the origami sculpture itself, and that was enough to propel me forward for the rest of the piece! Next up, had some fun with LEDs!
Lighting up with Particle and Neopixels
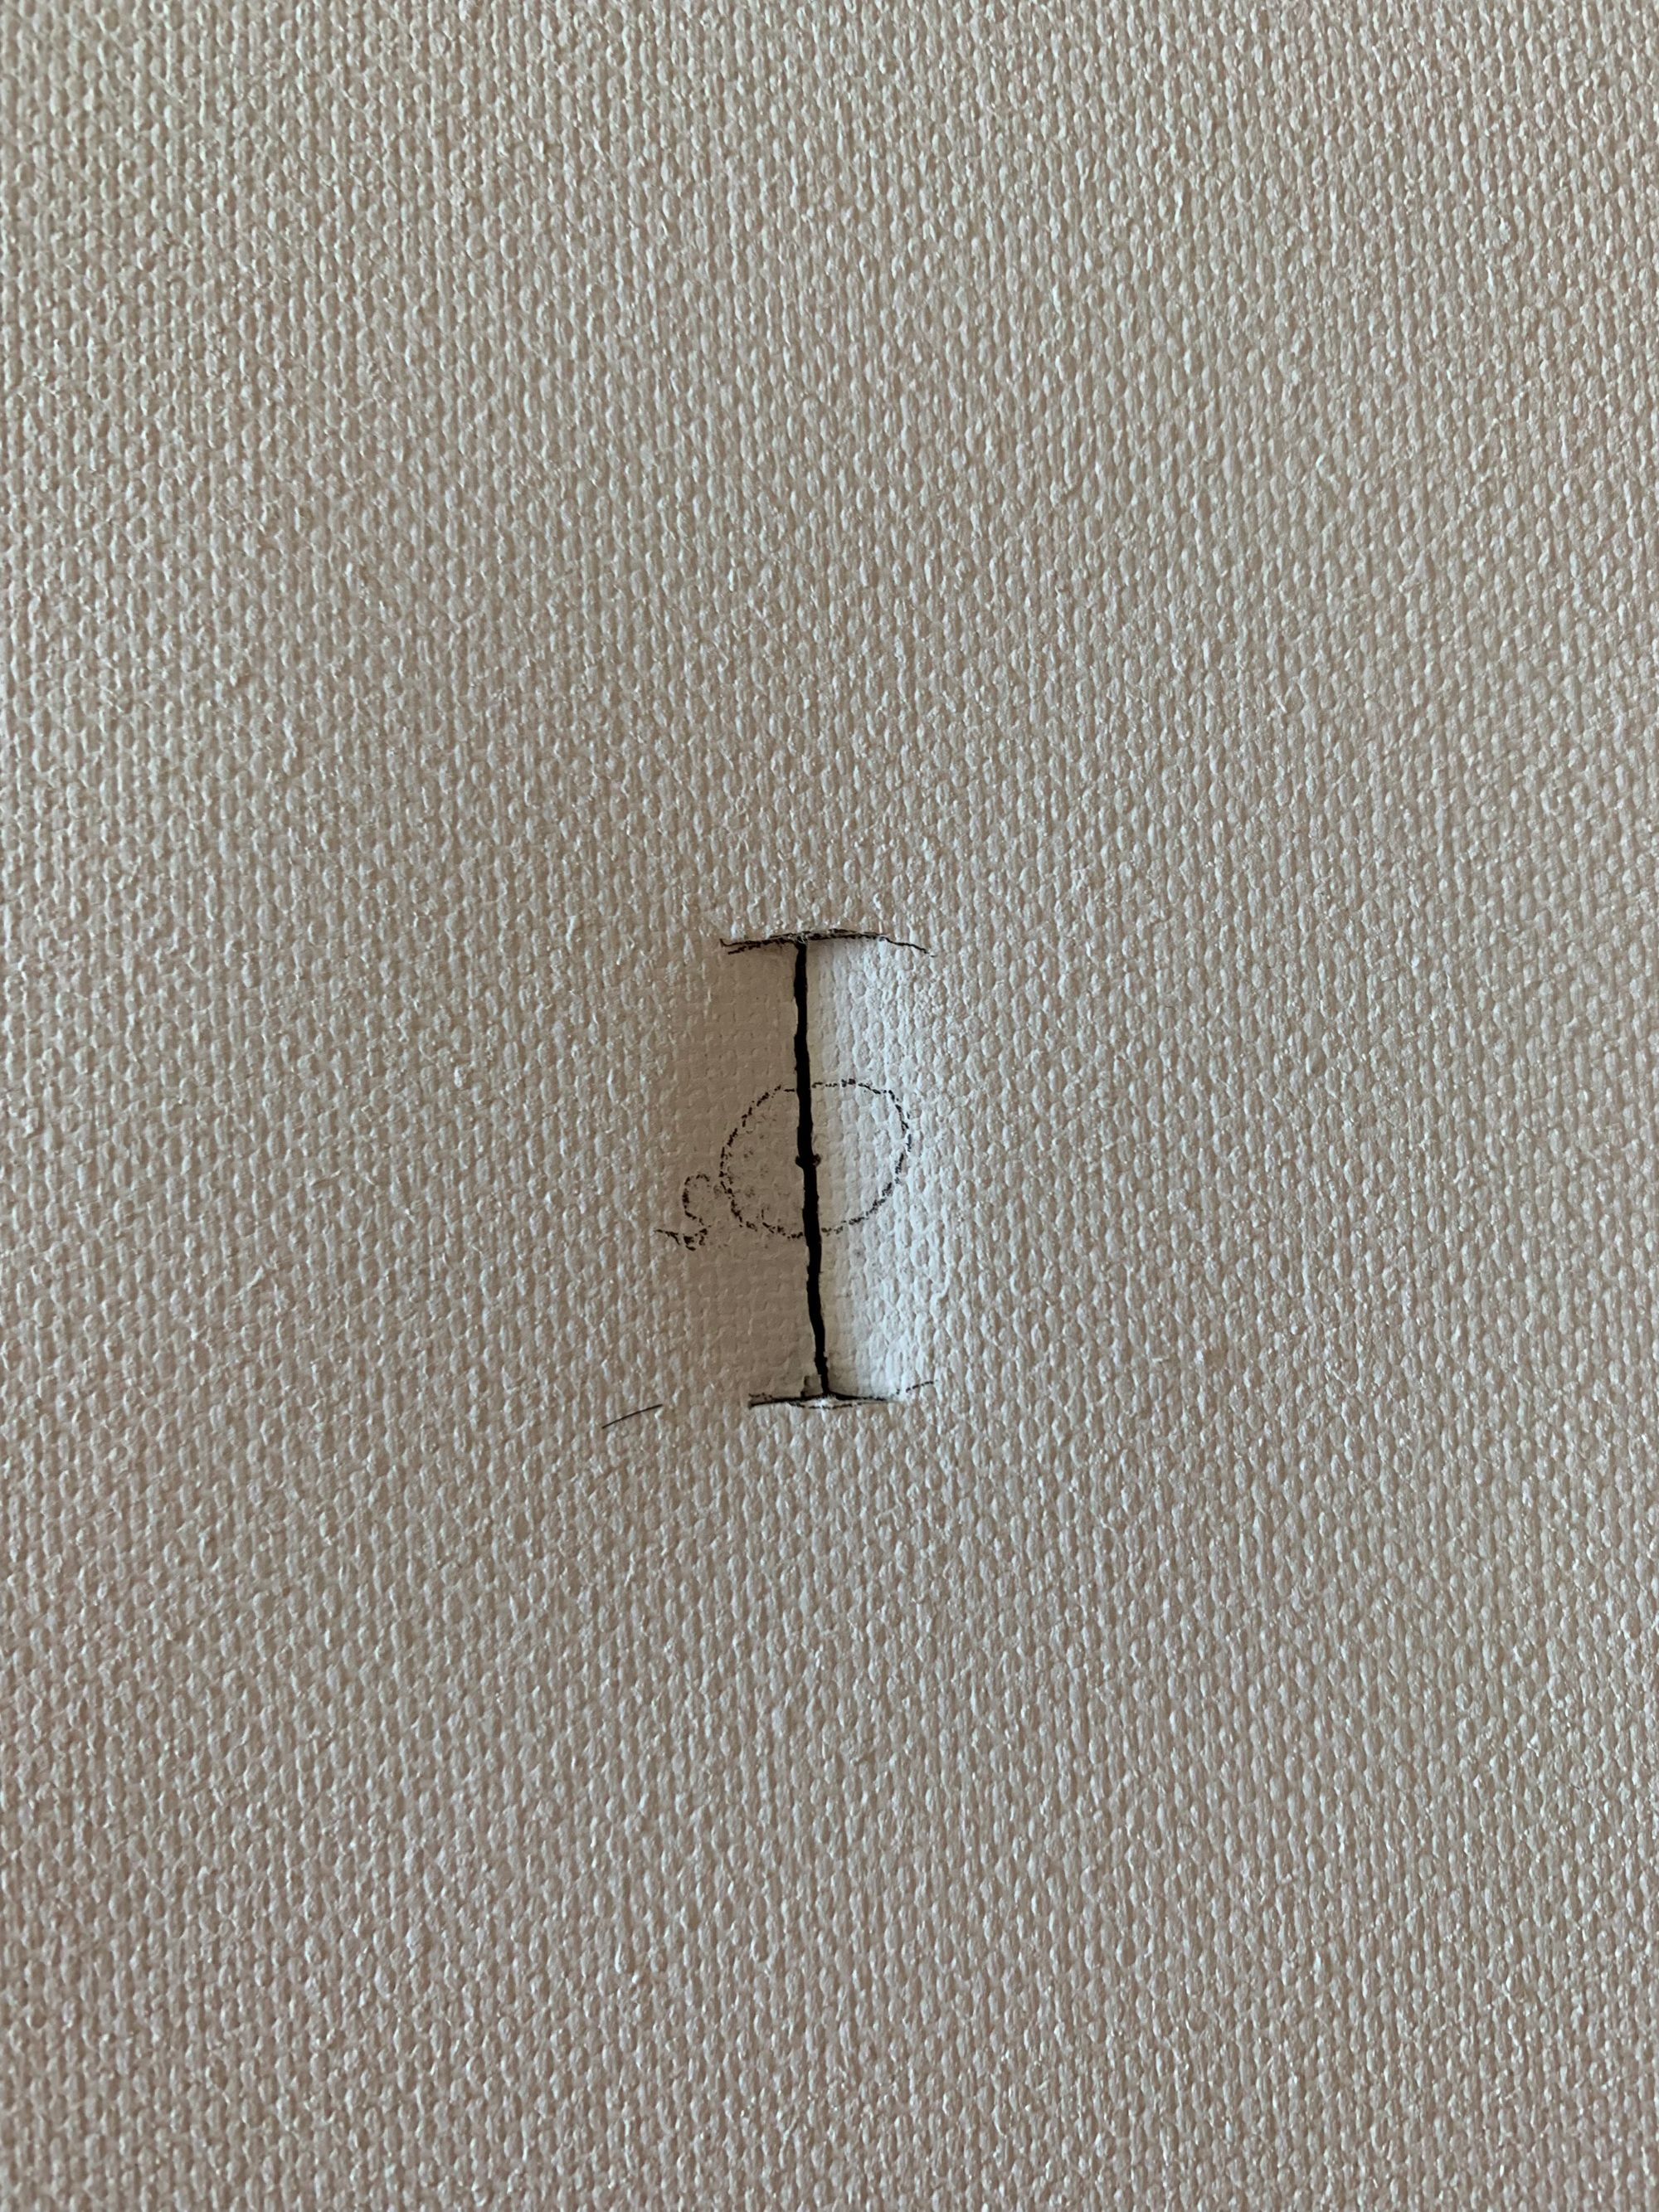
I always aim for builds that have a bit of wiggle room. Since each origami pyramid was quite large, I knew that I could tear a pretty big slit behind each transluscent pyramid and I'd still be able to hide it.
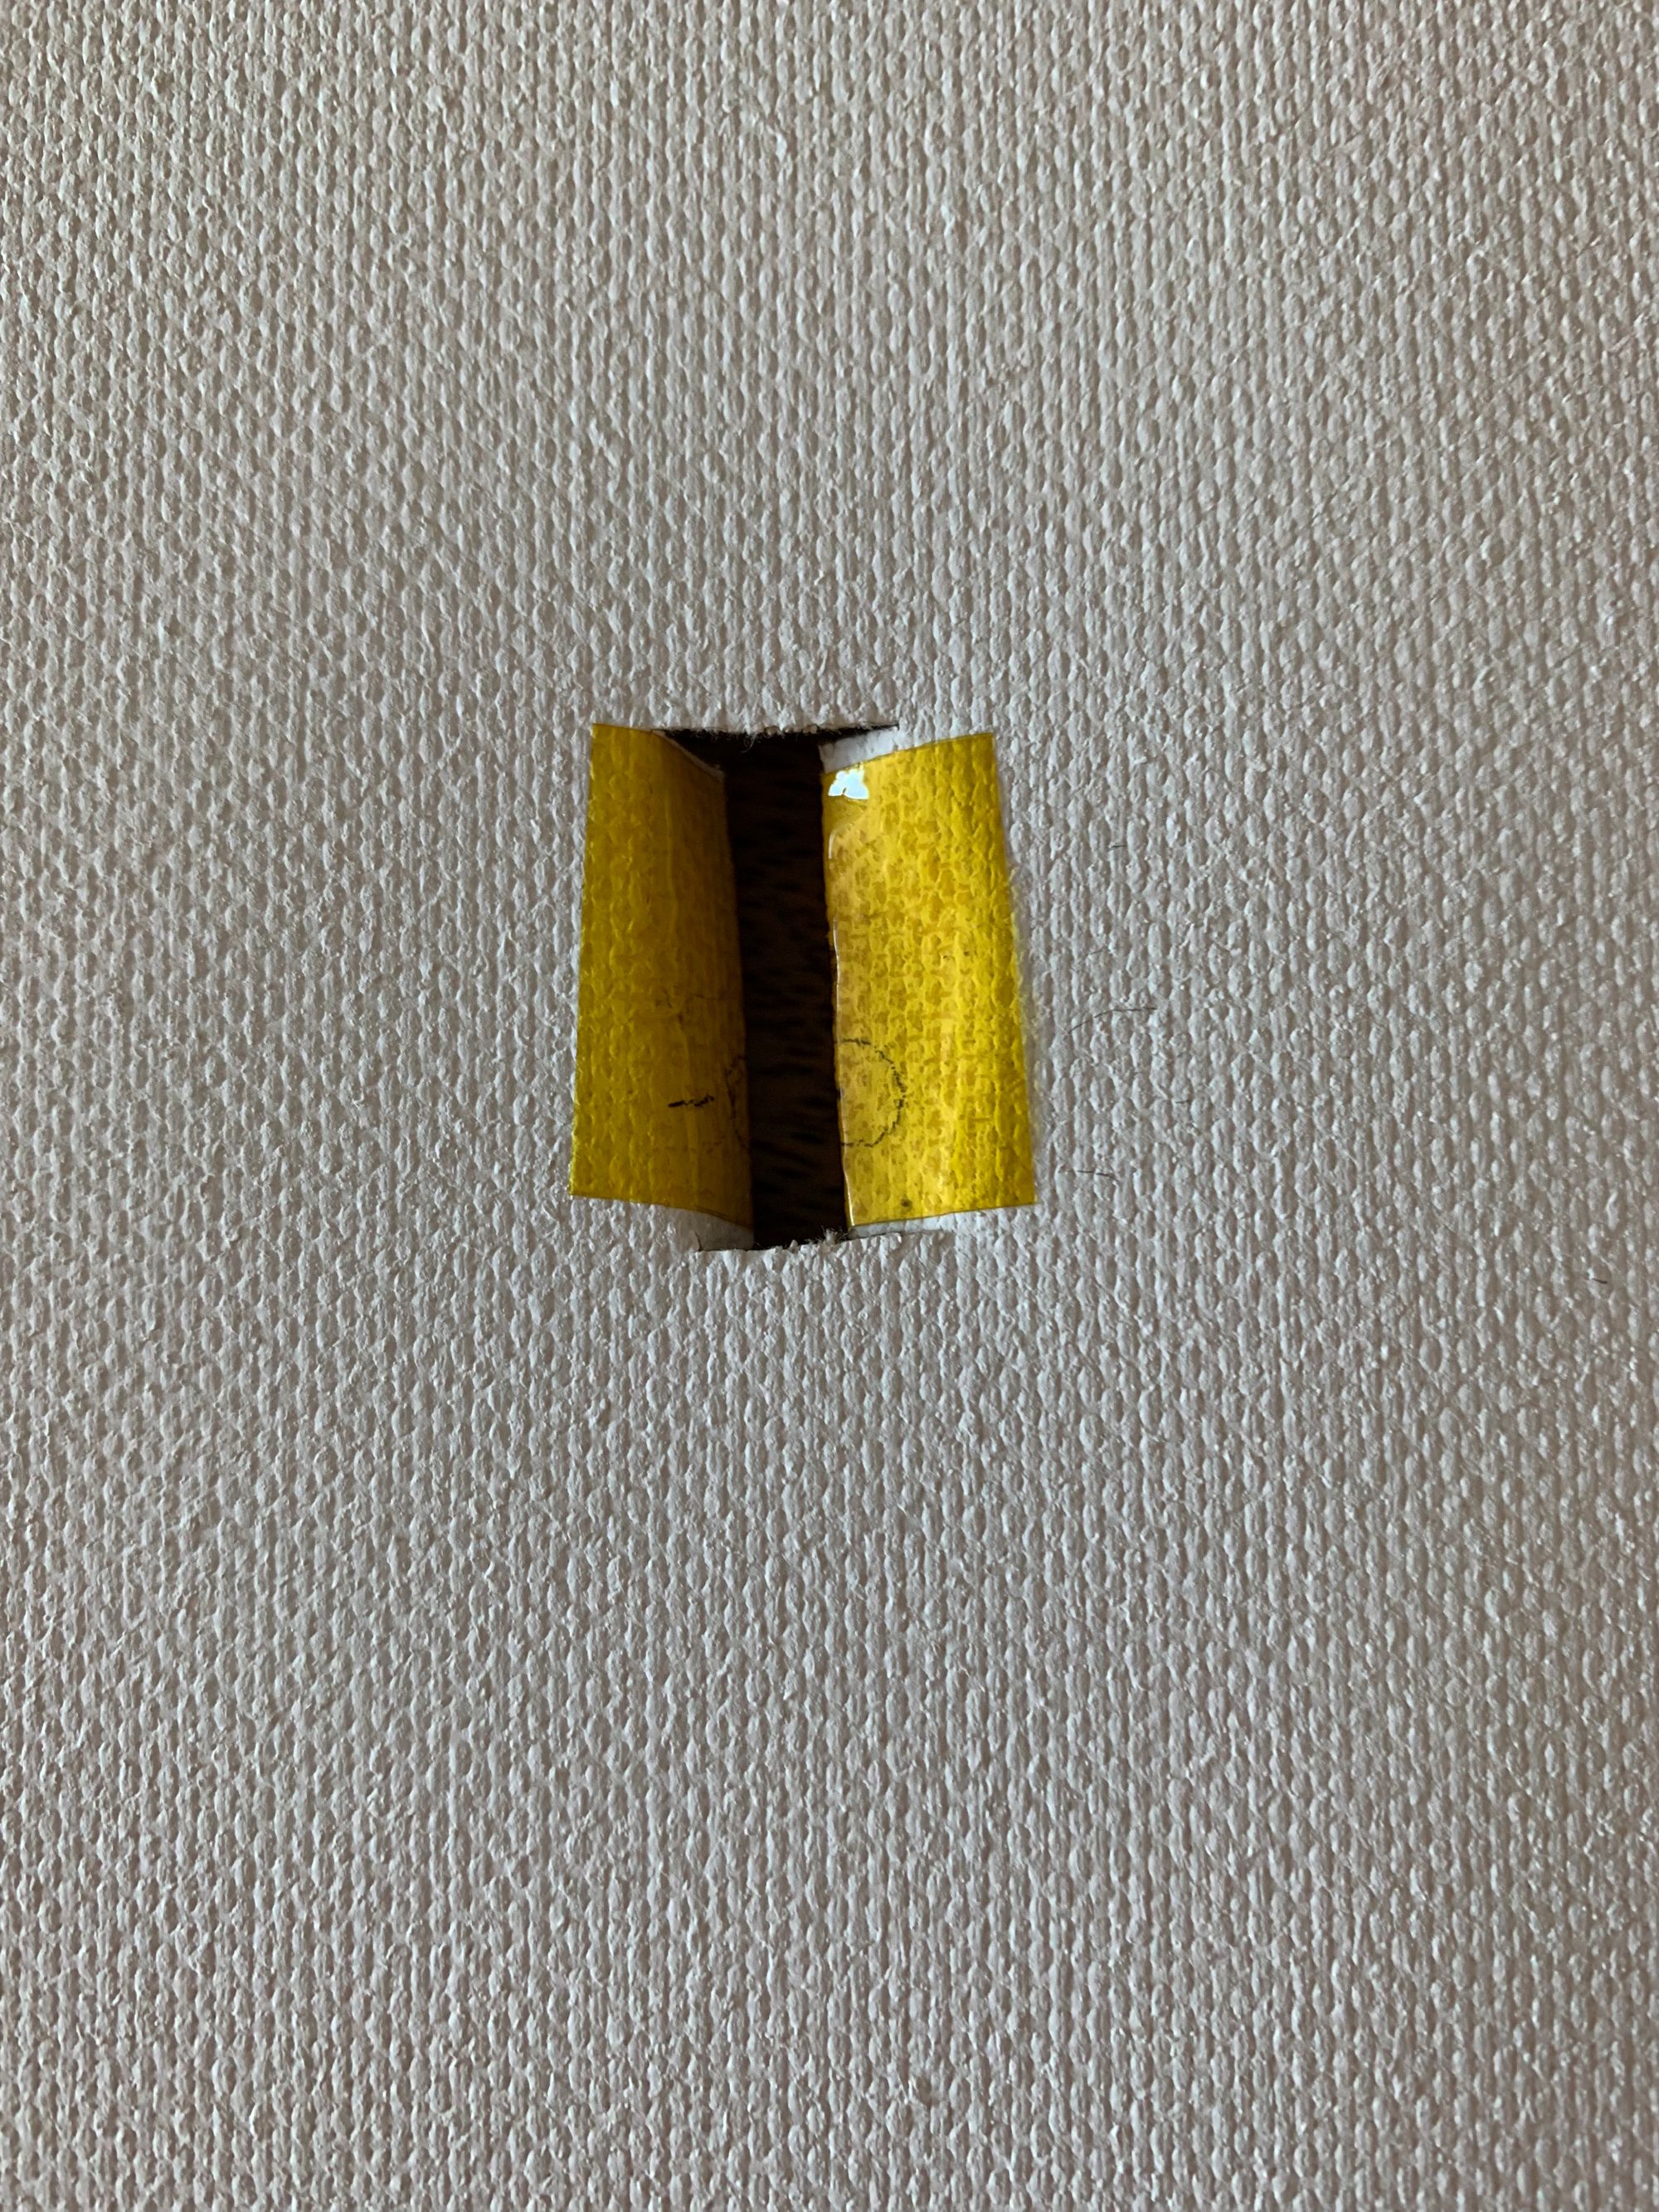
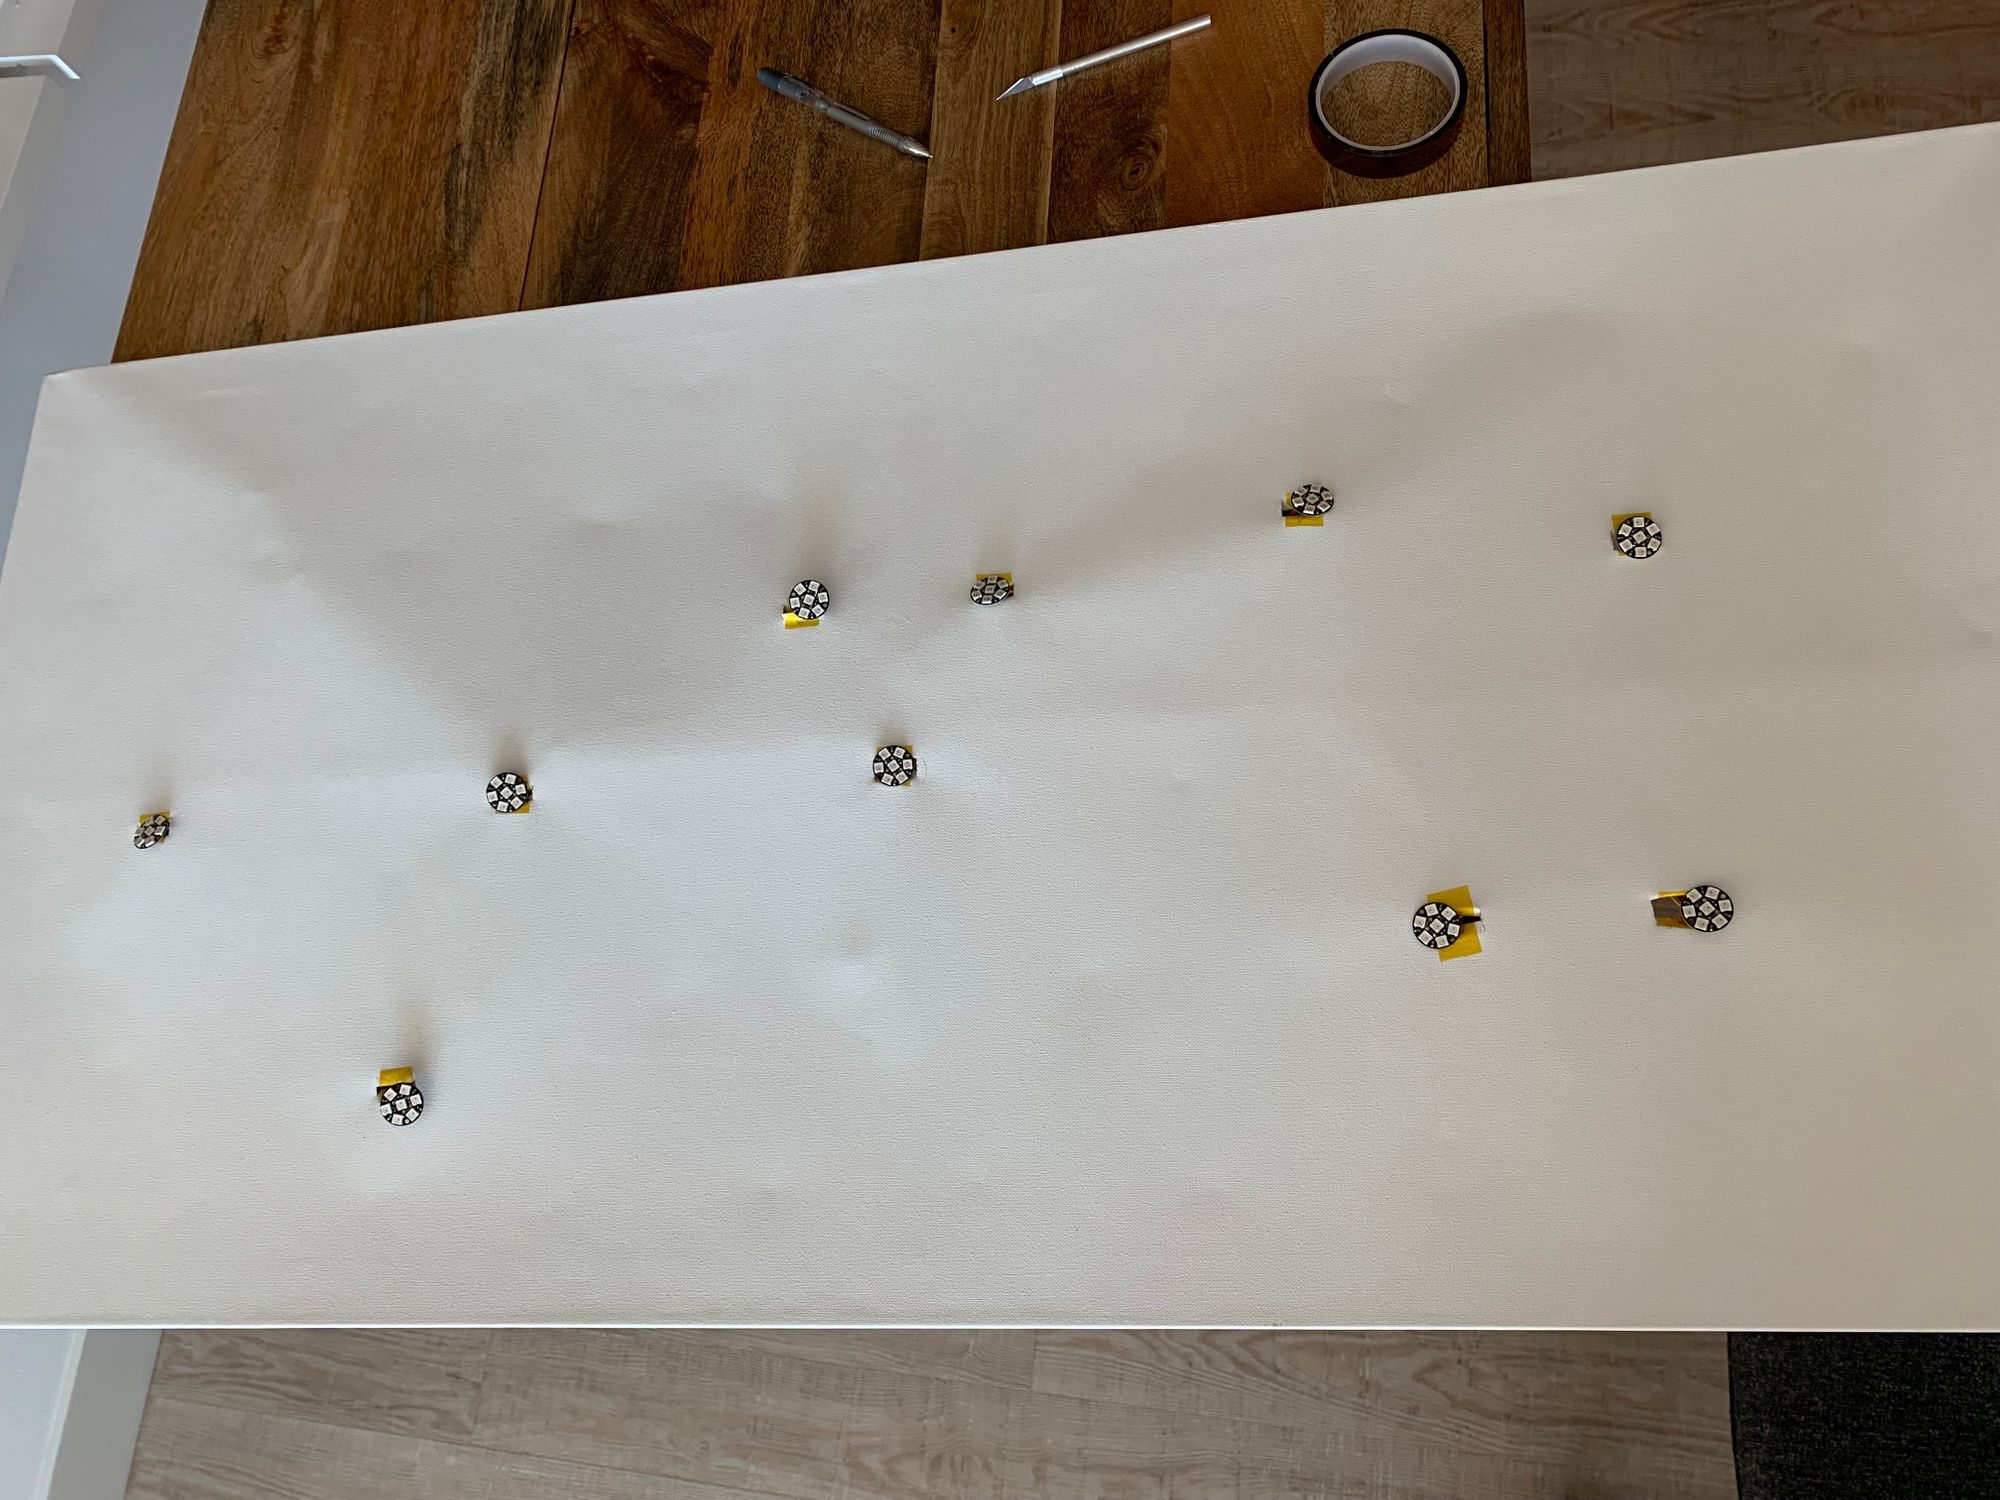
So to line up the lights, I laid down the woven origami sculpture, took some solid core wires and poked through the middle of each transluscent pyramid, making a hole through the canvas.


Then, I used these holes to make slits large enough for the Neopixel Jewels to slide through. I also covered the slits with kapton tape since they might end up in direct contact with exposed wires, but I'm unsure if this was really needed.
Then, I mapped the path that the wires would take and cut them to approximate lengths.
I soldered the jewels together, and made a quick test. At this point I was so excited to be done.
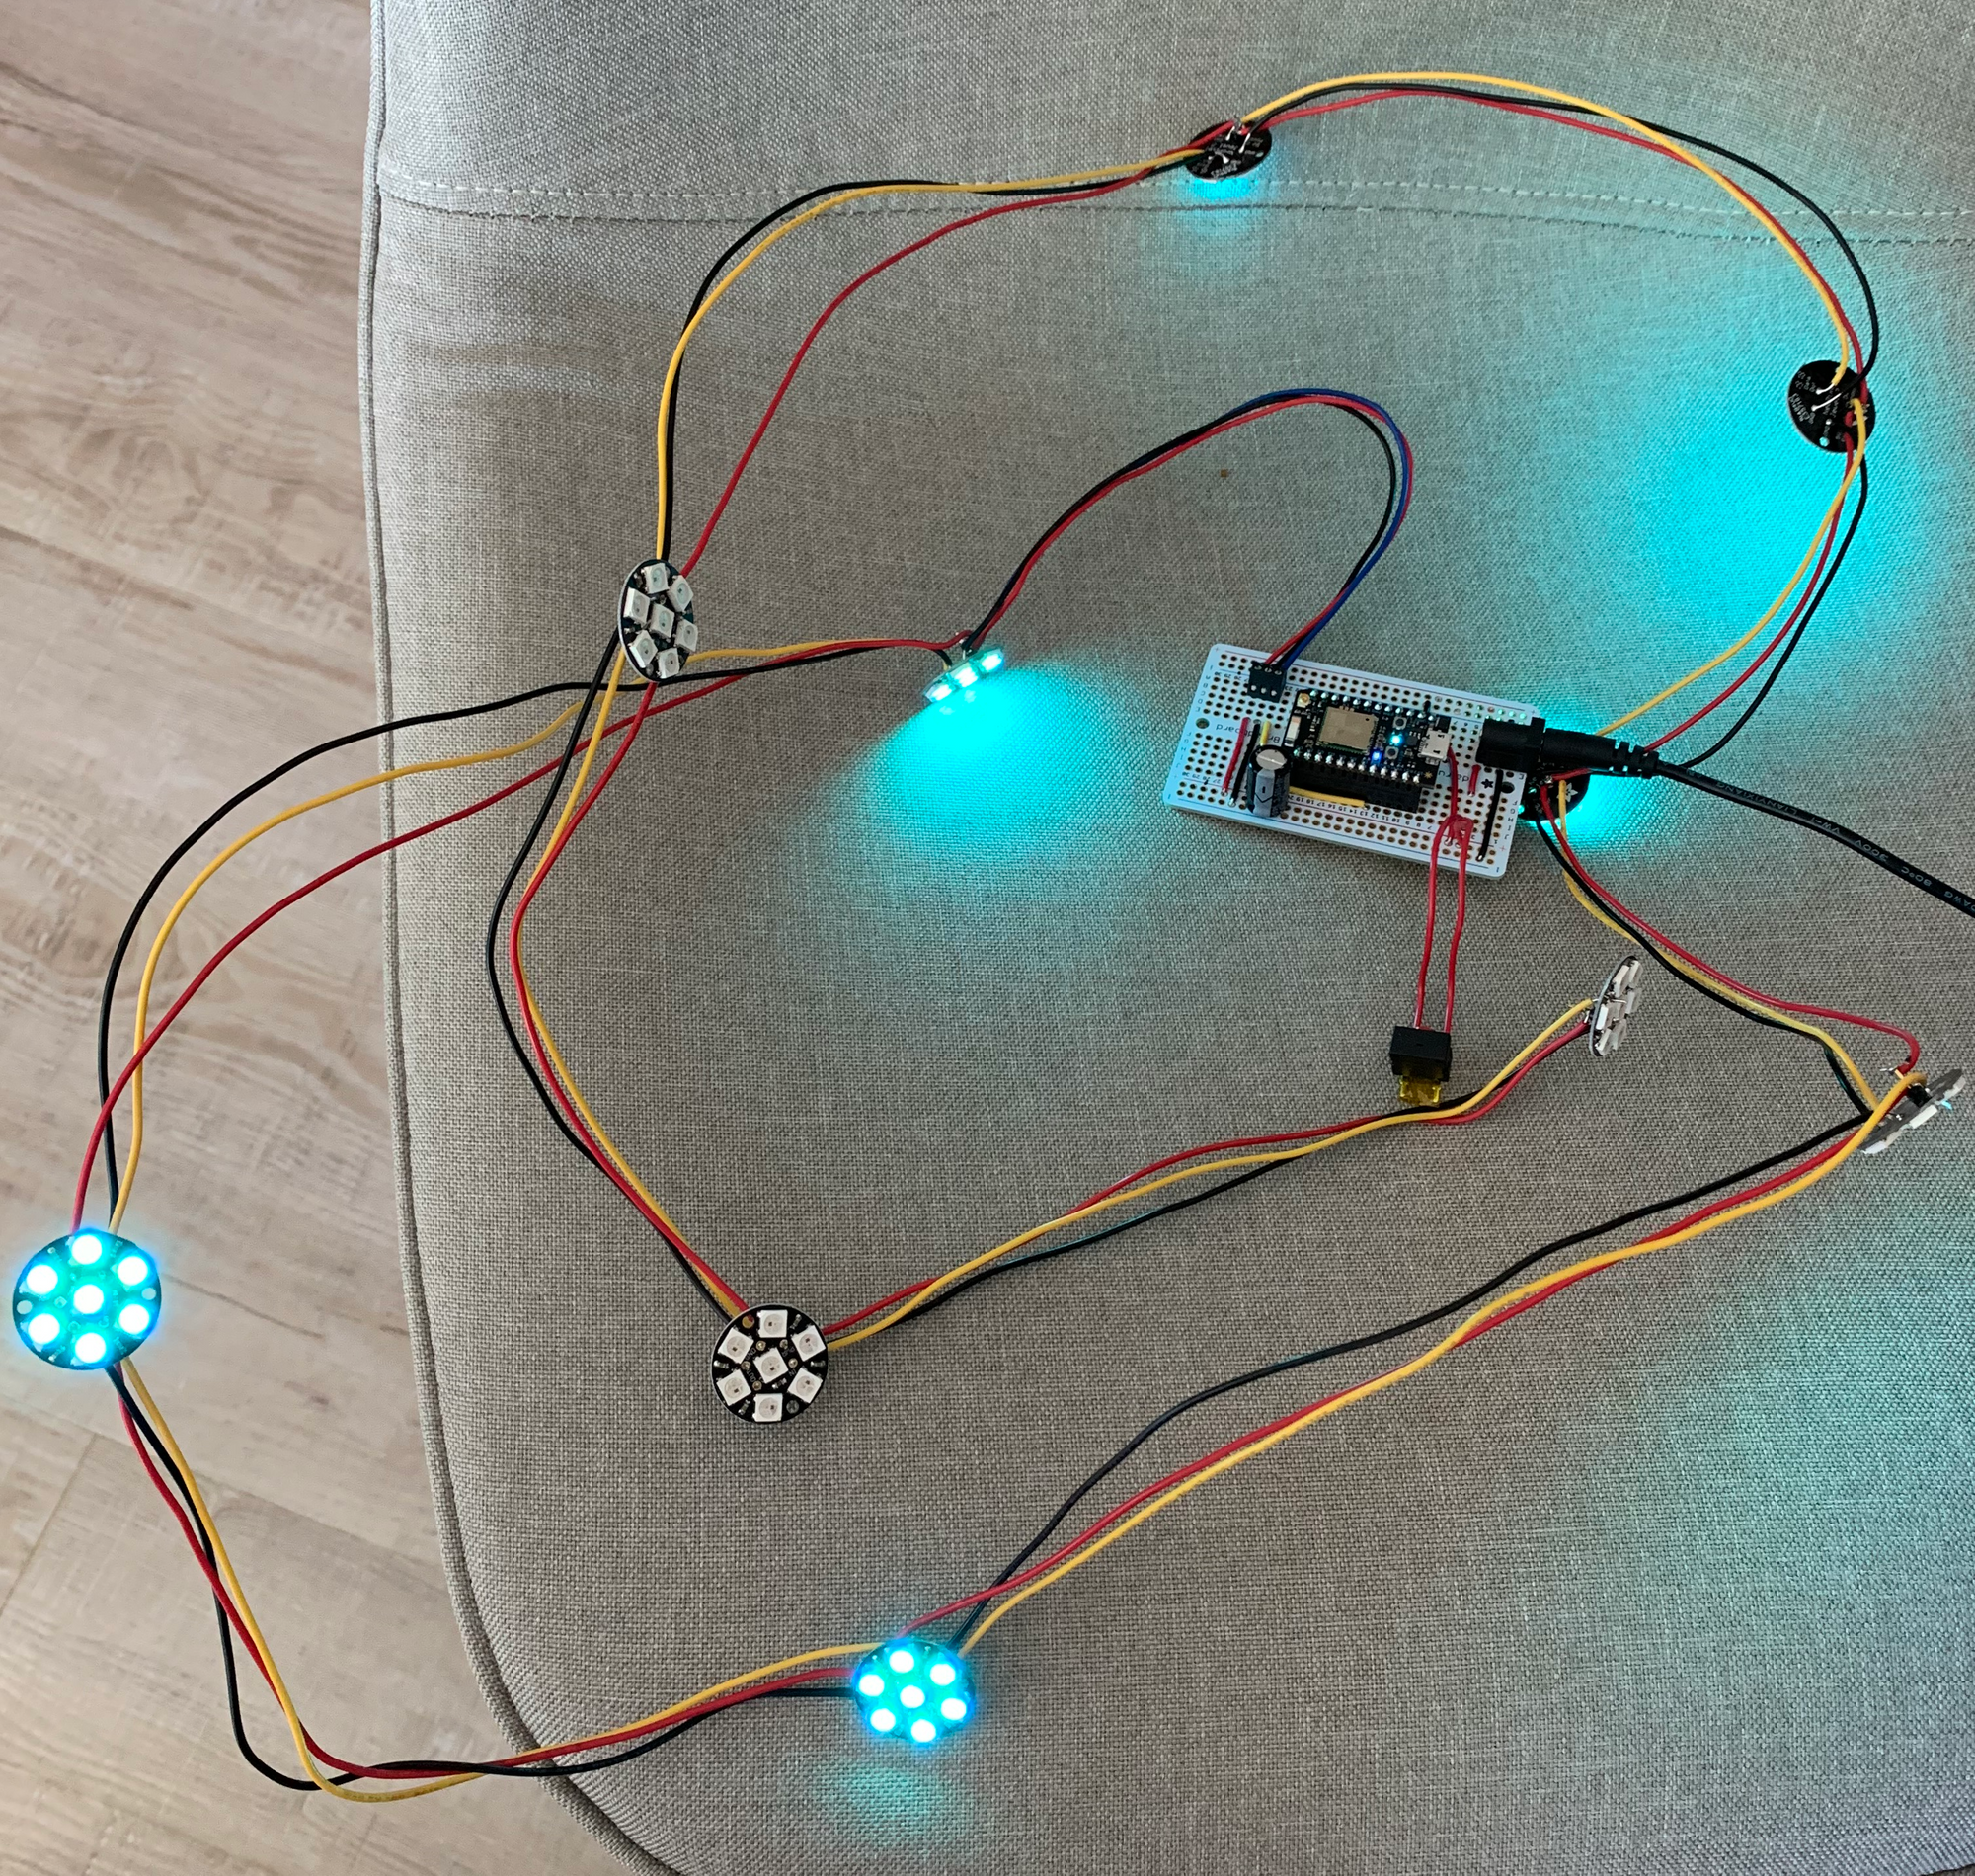
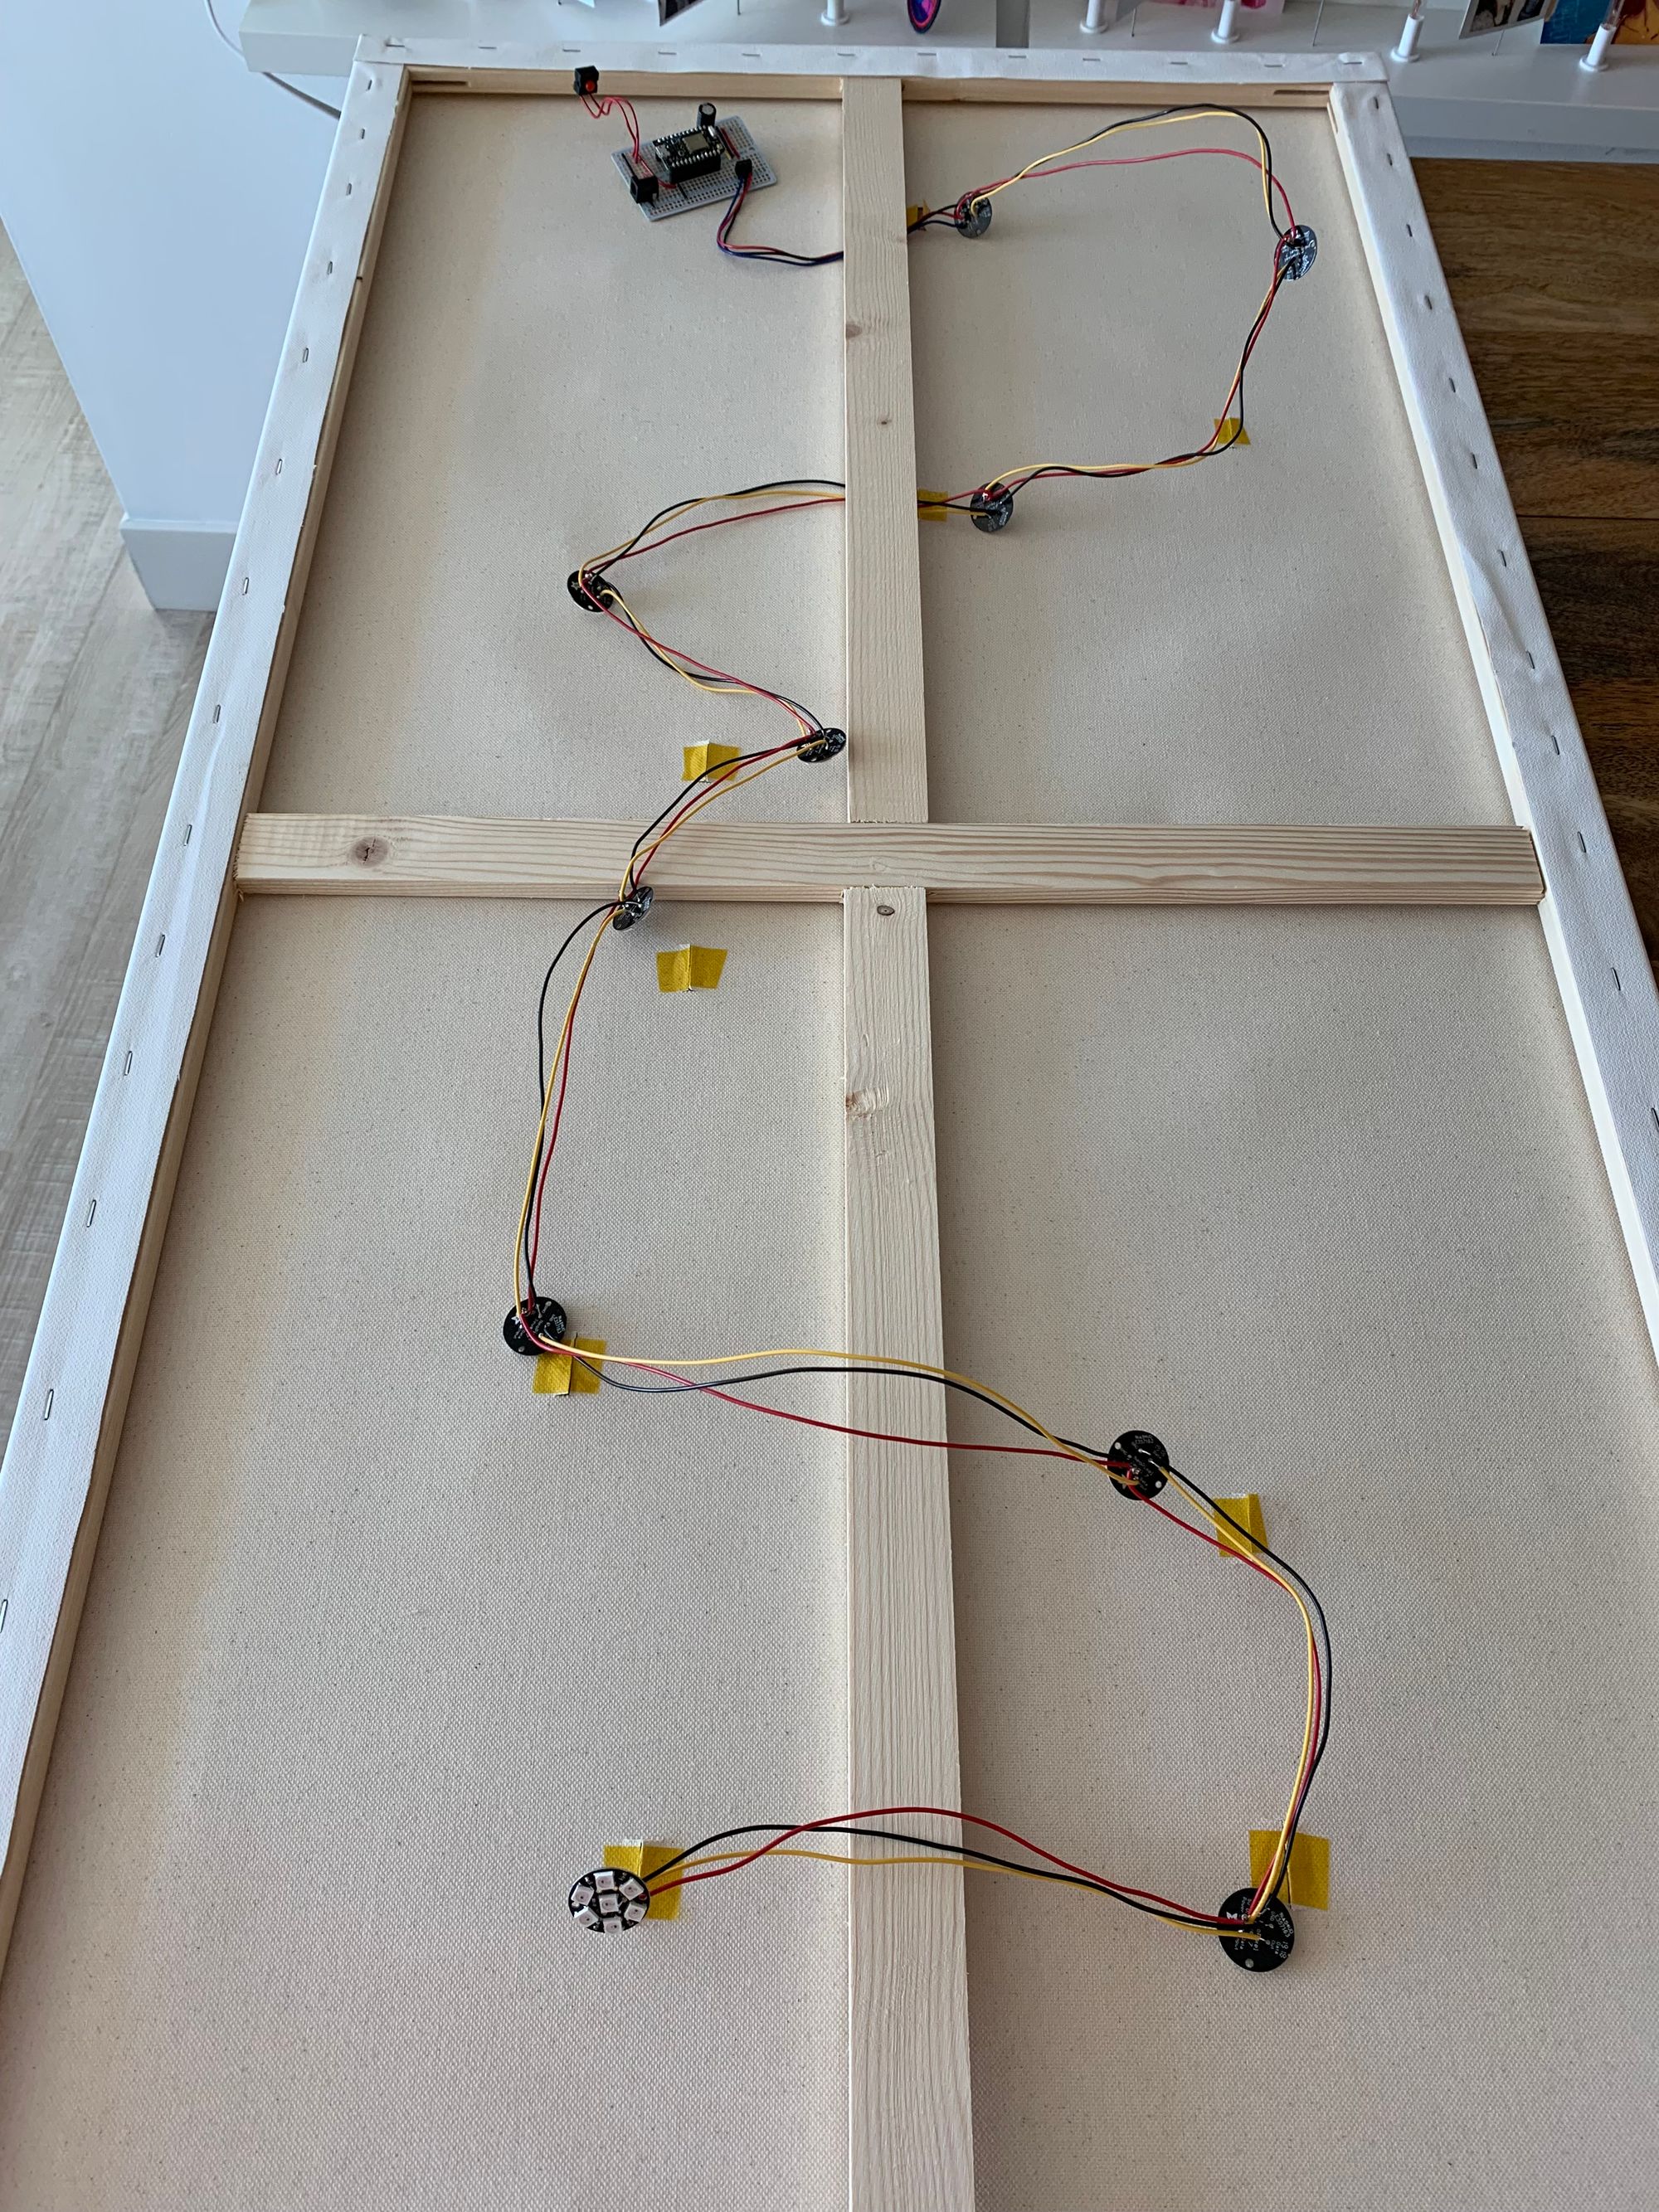
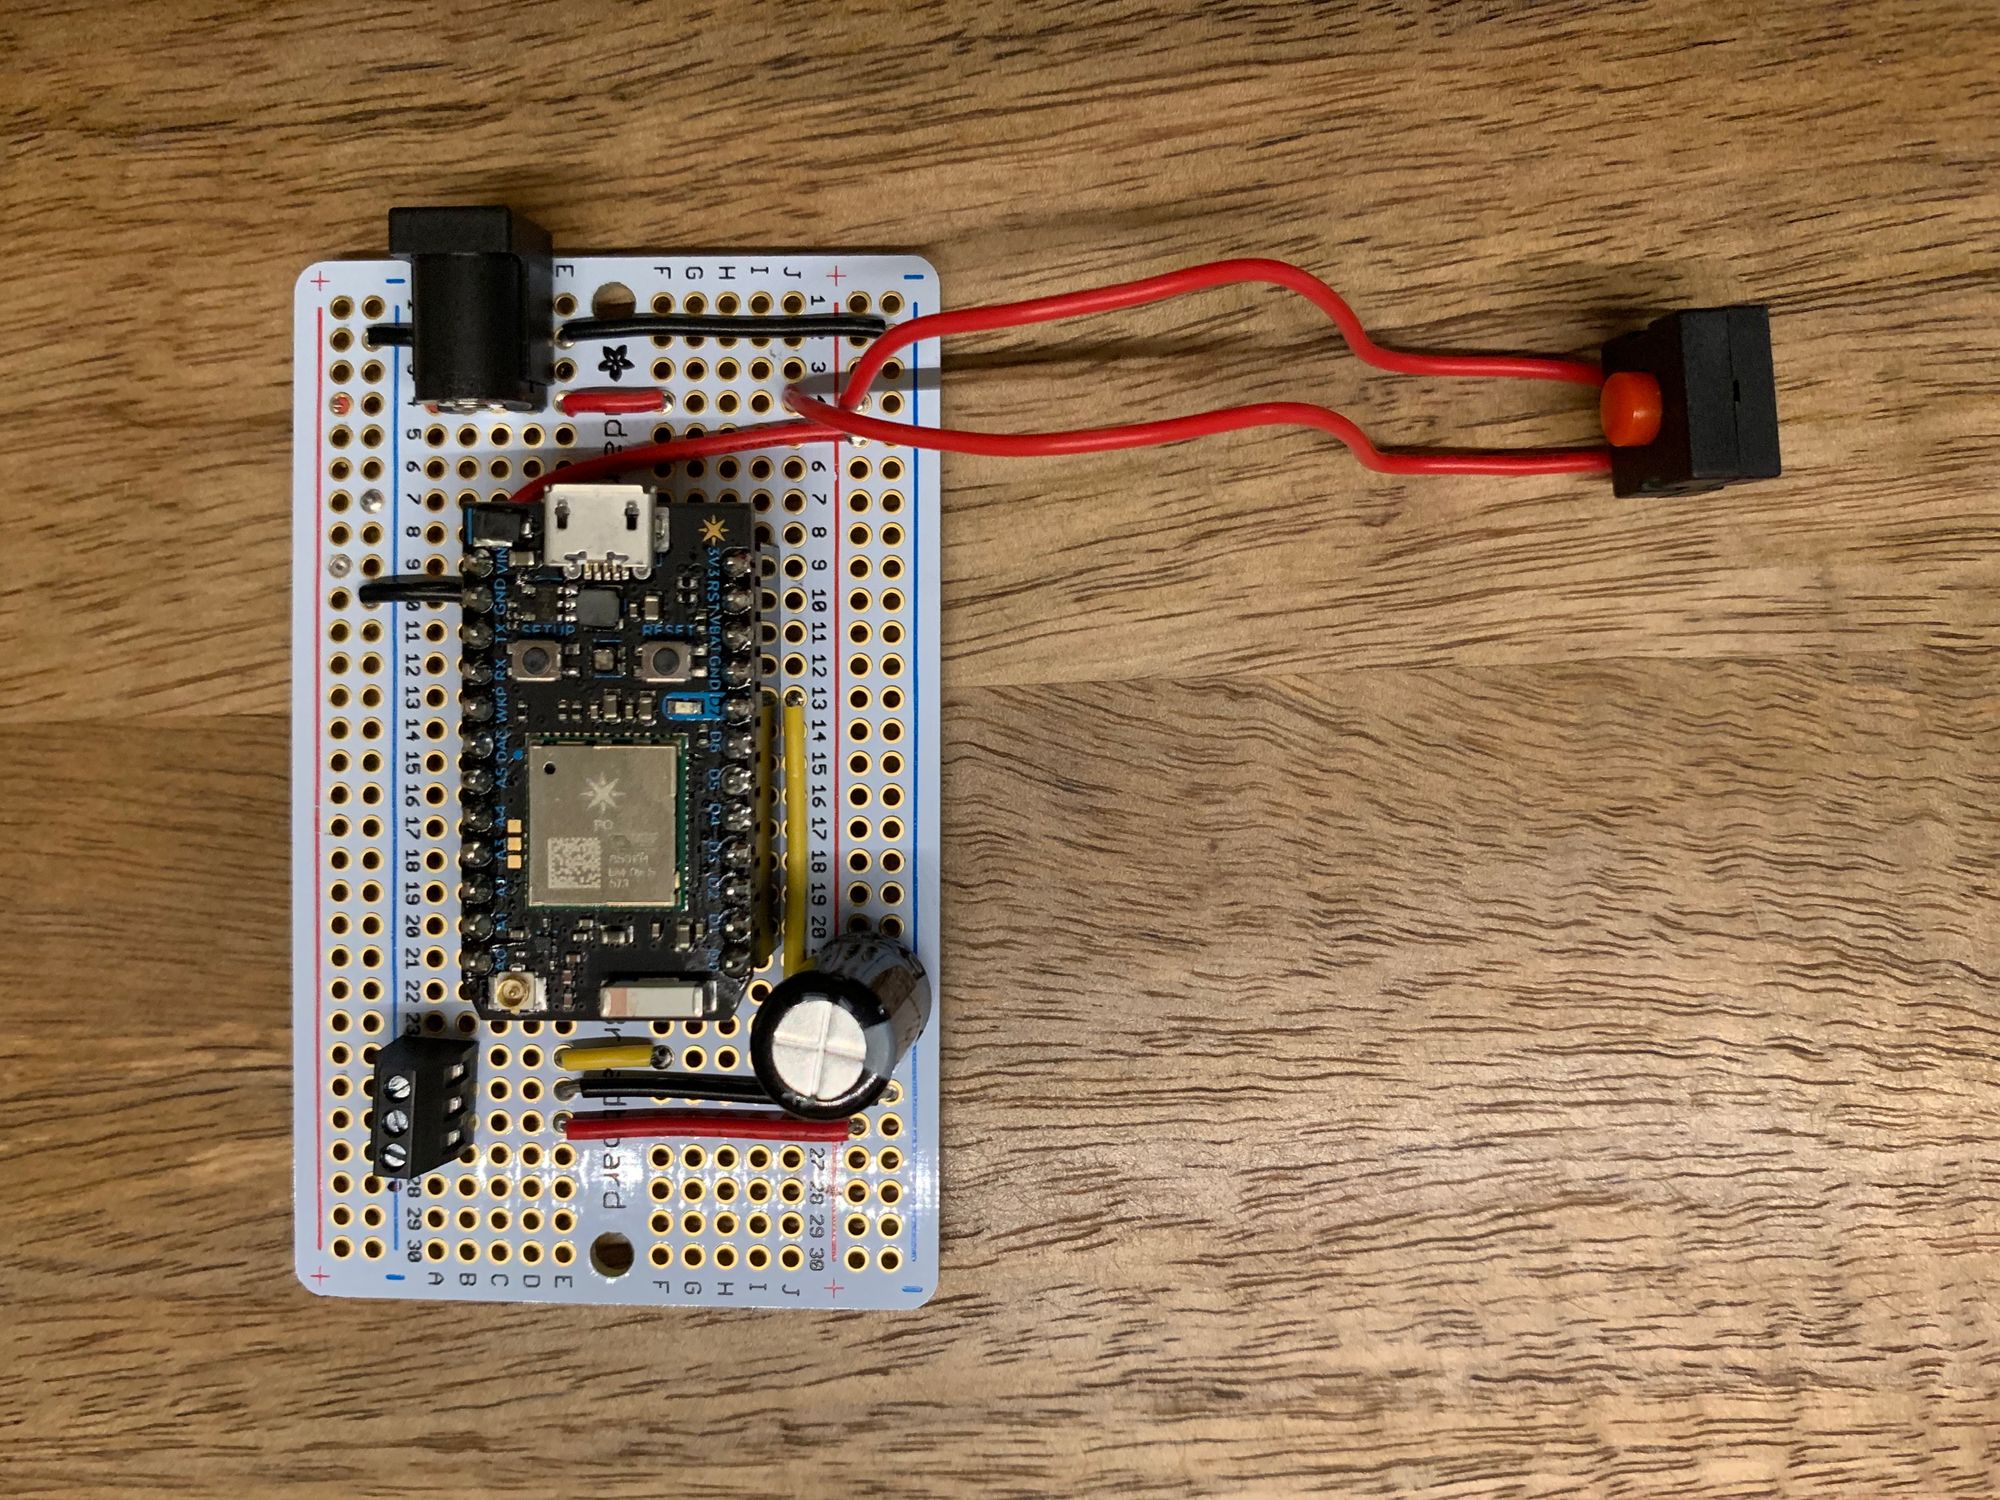
The circuit is powered by a Particle Photon, and I assembled it on a perma-proto board to connect the neopixels and power the assembly with a 5V wall adapter. I also added a power switch just in case I wanted to be low tech and mash a button to turn off the entire thing. 😂
I laid the woven origami down as a test fit before gluing, and was trying very hard (and failing) to contain my joy 😍
As a spontaneous finishing touch, I added some felt flowers. I love adding some chaos to this structured form.
Optional: Hide the wire
Since this was going to need to be plugged into a wall outlet, I needed a way to hide the wire. I designed a super simple tube that could contain the wire and let it blend into the wall. It was 3D printed on a Prusa i3 MK3 in white PLA using vase mode. Download and 3D print it from Thingiverse.
Firmware
At this point, I could turn on the Particle board and walk away from the piece since I could modify the firmware magically over wifi. This allowed me to dial in the light animations while it was propped against a wall. Here's the code I ended up using (not the cleanest, but it works!):
Connect to Google Home
And finally, to turn it on and off easily, I discovered that IFTTT already has Particle triggers and actions! Head on over to https://ifttt.com/create, choose "Google Assistant" for This and Particle for That. Keep in mind that you'll have to have accounts in IFTTT, Google and Particle for this to work.
It's magical, I love it. The journey was longer than expected, but I learned a lot about origami, and myself.
Done!
That's it! Please let me know if you make your own interpretation of this, I'd love to see it! I was so happy to find that Coco Sato also liked it:
Brilliant! 💖💖✨⚡️
— Coco Sato (@giantorigami) April 30, 2019
And bonus, here's what it looks like at night:
Thanks for reading this far, I really hope you enjoyed it, and I can't wait to see what you build too! Feel free to reach out to me on Twitter if you have any questions!